6-6
Network Settings
Network Settings
Compro TN2200 - User’s Manual
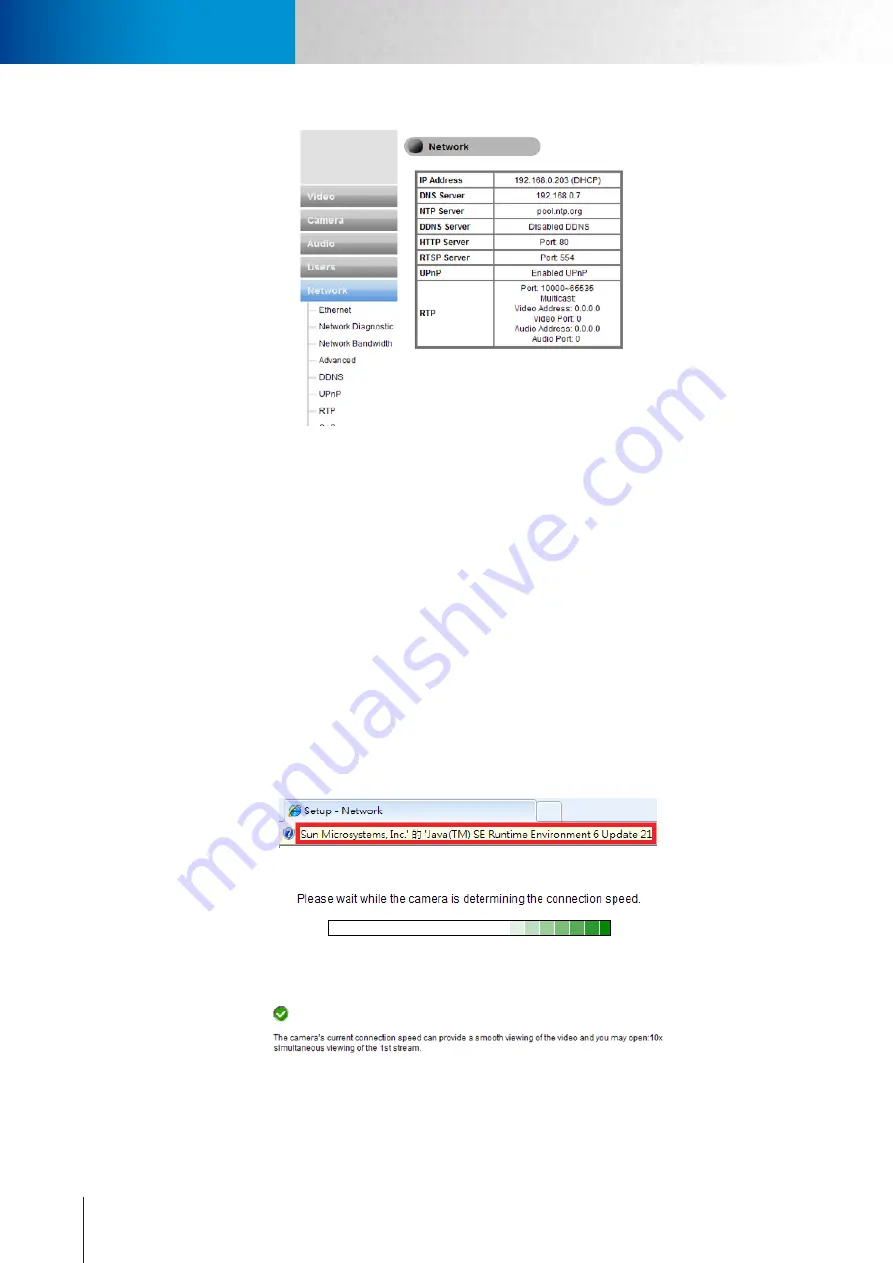
Figure 6-8. Network settings
Ethernet
Choose the IP address configuration. The camera can obtain IP address via DHCP (recommended), use the
manually inputted static IP address, or obtain IP address via PPPoE for which you need to provide valid user
name and password.
Network Diagnostic
Here you can run the diagnostic tool for your current network settings and it will show error messages if any
anomaly is detected. For further information on error messages, please refer to the FAQ section at www.com-
prosecurity.com for more information.
Network Bandwidth
This automatic network connection speed test is to help users better define appropriate video bit rate for
their applications. To perform network bandwidth test:
1. Go to [Setup] > [Network], and click on [Network Bandwidth] located on the left menu to start.
2. Wait for Internet Explorer to prompt for the installation of Java plug-in. Then click on the text to accept.
3. Camera begins testing connection speed.
4. Once speed diagnostics is done, camera will advise on current network connection speed. See below
example:
The message indicates that currently connected network has the network capacity to support up to 10 net-
work cameras of identical bit rate settings (either on Stream 1 or Stream 2). If the message shows a less favor-
able result, go to [Setup] > [Video] to select a lower current video bit rate setting
Summary of Contents for TN2200
Page 1: ...V2 110118 Network Camera TN2200 Model No V1 130906...
Page 6: ...Compro TN2200 User s Manual...
Page 12: ...2 4 Camera Layout Compro TN2200 User s Manual...
Page 26: ...3 14 Compro TN2200 User s Manual...
Page 36: ...4 10 Accessing via 3GPP Mobile Phone ComproTN2200 Network Camera...
Page 40: ...5 4 Icons on Live View Page Compro TN2200 User s Manual...


