3-7
Install Camera from C4Home App
Install Camera from C4Home App
Chapter 3: Installtion
Using a Non-PoE Switch
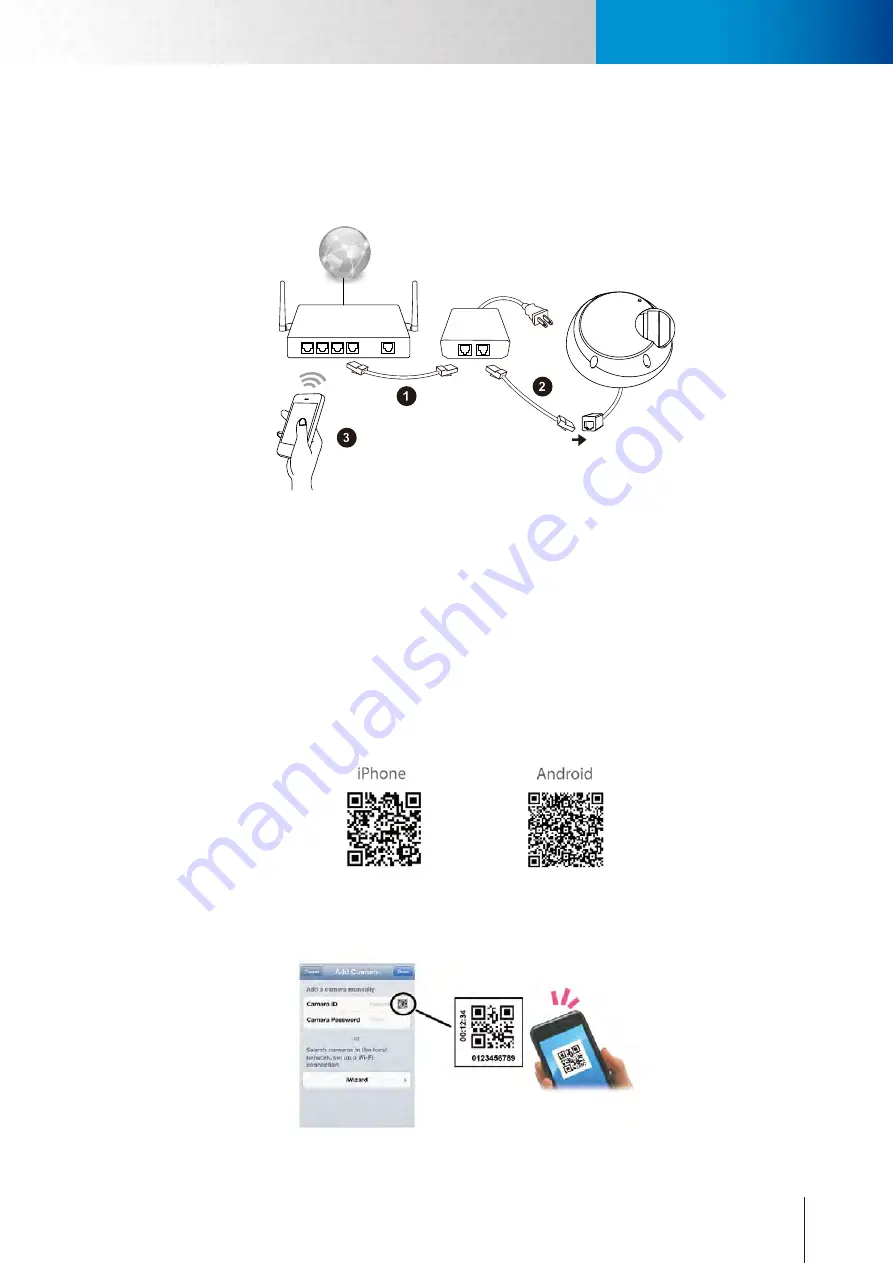
If you are using the camera with a non PoE capable network switch/router, please prepare a PoE injector (mid-
span, optional) first in order to power the camera. Then connect your camera in the following way:
Midspan
(PoE Injector)
PoE Switch
(802.3af class3)
Wireless
Router/Hub
Wireless
Router/Hub
Internet
Internet
1. Ethernet port on PoE injector: Use a RJ-45 Ethernet cable (not supplied in the package) to connect the
RJ-45 connector on PoE injector marked “IN”. Then connect the wireless router/hub.
2. Ethernet port on camera: Attach a RJ-45 Ethernet cable (not supplied in the package) from the “OUT” RJ-
45 connector on PoE injector to the Ethernet port of the network camera.
3. Make sure your smartphone is able to go to internet via your wireless router.
Install C4Home App and Add Camera
Make sure your smartphone is able to go to internet via your wireless router. Then download the C4Home
app from Apple store or Google Play and install to your smartphone. Start C4Home app and register your per-
sonal C4Home account.
(You can scan the QR-code below on your smartphone to add C4home app.)
Login to the C4Home account and click “+” to add new camera, we provide 3 ways to add your camera:
•
Scan the QR code on the Ethernet connect of camera (or the first page of this installation guide), it will auto-
matically add your camera to the list.
Summary of Contents for TN2200
Page 1: ...V2 110118 Network Camera TN2200 Model No V1 130906...
Page 6: ...Compro TN2200 User s Manual...
Page 12: ...2 4 Camera Layout Compro TN2200 User s Manual...
Page 26: ...3 14 Compro TN2200 User s Manual...
Page 36: ...4 10 Accessing via 3GPP Mobile Phone ComproTN2200 Network Camera...
Page 40: ...5 4 Icons on Live View Page Compro TN2200 User s Manual...


