OPERATION
Roadie 25K User’s Manual
3-25
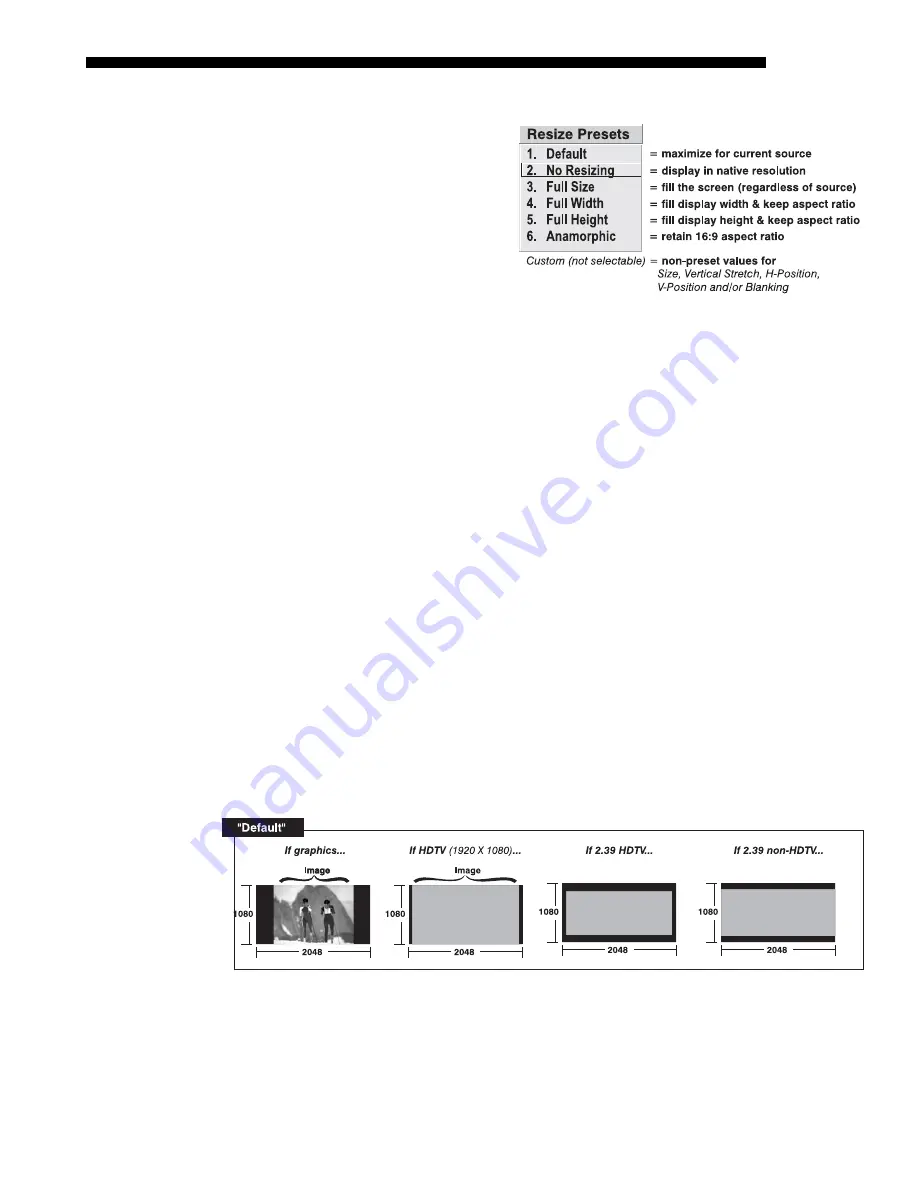
Resize Presets
Select a Resize Presets option
to quickly display an image in
its native resolution or to
automatically resize an image
to closely fill the projector’s
native resolution of 2048 x
1080, or to optimize the width
or height of your display. Size,
Position and Blanking
parameters will automatically
adjust accordingly. Or, if Blanking is set first, which defines an Active Input Area,
Resize Preset scaling will occur in this region of interest only. Resizing options are
explained in detail below.
WHAT IS THE RESIZING DEFAULT?
By default when displaying a new source, your
image will utilize as much of the projector’s display area (2048 x 1080) as possible
for the type of incoming source data, but with minimal changes to aspect ratio. For
example, incoming signals having a more “square” aspect ratio than that of the
projector will be maximized to approximately 1080 pixels from top-to-bottom, with
the image centered between black side bars. See Select “Default” below.
WHEN “CUSTOM” APPEARS:
The “Custom” re-size descriptor automatically appears
in the Size and Position menu when any of the values for Size, Vertical Stretch, H-
Position, V-Position or Blanking do not correspond to those for a preset. This option
is not a choice in the Resize Presets pull-down list.
•
Select
“DEFAULT”
for most sources (factory default). The image will be centered
and displayed as large as possible depending on the type of source, as described
below:
A graphic image will enlarge to fill the screen height, and be centered
between black side bars.
A video image will enlarge to fill the screen height, and be centered
between black side bars.
An anamorphic (16:9) image will fill the height and slightly stretch
horizontally to fill the small amount of display area remaining on both
sides.
•
Select
“NO RESIZING”
to display the image in its native resolution, which is
probably smaller than the projector’s 2048 x 1080 resolution. For example, for a
source with a native resolution of 800 x 600, “No Resizing” will center a small
image within a black border—the black border areas are unused areas. See below.
Summary of Contents for Roadie 25K
Page 6: ......
Page 56: ......
Page 153: ...SPECIFICATIONS Roadie 25K User s Manual 6 7 ...
Page 164: ......
Page 165: ...Appendix B Remote Keypad Roadie 25K User s Manual B 1 Figure B 1 Standard Remote Keypad ...
Page 166: ......
Page 168: ...SERIAL COMMUNICATION CABLES C 2 Roadie 25K User s Manual ...
Page 169: ...SERIAL COMMUNICATION CABLES Roadie 25K User s Manual C 3 ...
Page 170: ......
Page 186: ......


