


65
-
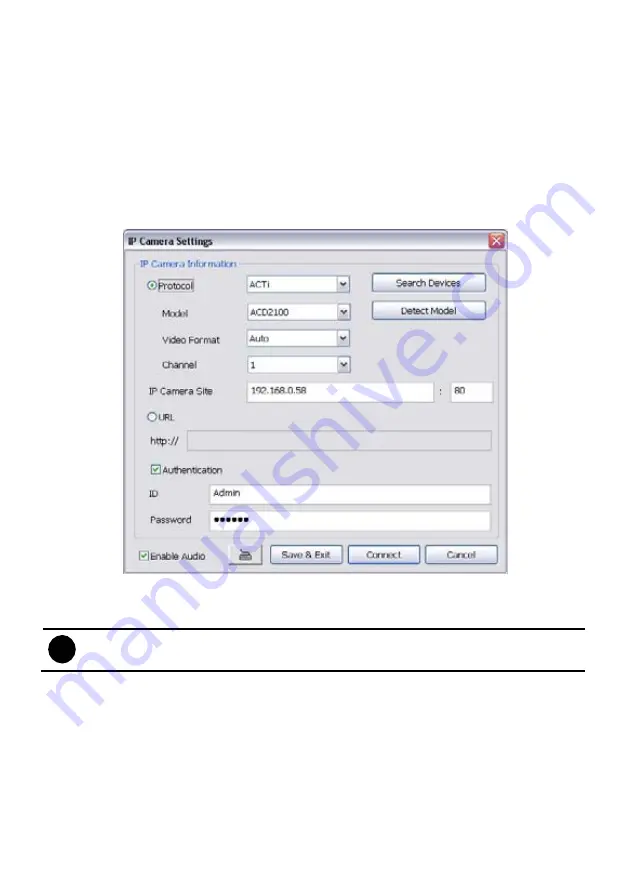
Model:
After selected the protocol of camera, the available model will be list in drag down list. If
user is not sure the camera is which model, click
Detect Model
to find the correct model of
camera. Choosing the wrong model, user is not able to continue the camera setup.
-
Video Format:
select format of IP camera video, if not sure, select
Auto
.
-
Channel:
assign a channel for this IP camera.
-
IP Camera Site:
Enter the IP address and connecting port of the camera. Through the IP
address and connecting port, the DVR system can reach and monitor the camera.
-
URL:
Besides the IP address, user can enter the URL of the camera, too.
-
Authentication:
Mark check box and enter the
ID
and
password
for authorizing to connect the
camera. Only if the camera has assign the ID and password for authentication.
-
Enable Audio:
Enable/disable camera audio recording.
To configure
Video
,
Senor
,
Relay
, and
Direct Link by IE
of the IP camera, click
Detail.
Click
OK
to
save the configuration and exit the setup windows. To reset the configuration back to factory value,
click
Default
.
i
The Video, Direct Link by IE, and Advanced Setting setup contents may be varied that
depends on the brand of IP camera supported.
Summary of Contents for NX 8000 series
Page 1: ...AVerMedia NX8000 NXU8000 series User Manual April 2009...
Page 24: ......
Page 34: ...26 9 User can select the Date Camera and Cycle to view the report of object counts In Out...
Page 58: ...50 i The UPS application must meet Windows XP or Windows Vista system requirements...
Page 78: ...70 Region 1 Object size frame Region 2 Object counting information display...
Page 81: ...73...
Page 96: ...88 13 To view the all I O devices information click I O Map...
Page 199: ...191 4 Mark the UPnP Framework check box and click OK...


