


63
Advanced Setting
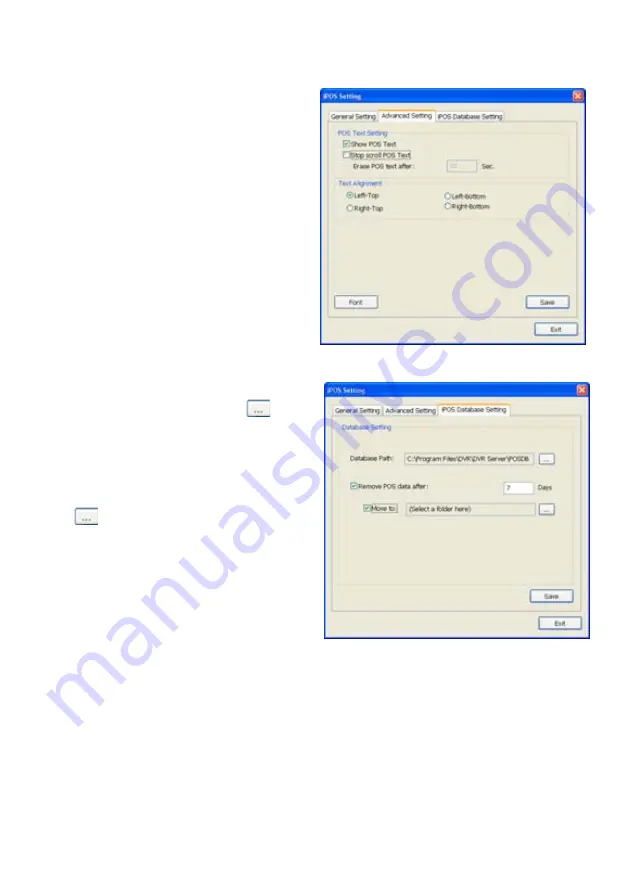
To setup POS text display position, text font and color.
1. In the System Setting dialog box, POS
section, click
Setting
>>
Advanced Setting
2. Mark
Show POS Text
to allow POS data to
be display on surveillance screen.
3. If user doesn’t want POS data to be scroll up,
mark
Stop scroll POS Text
and enter the
time to delete POS text at
Erase POS text
after
column.
4. Select the POS data display position on
surveillance screen – Left-Top, Left-Bottom,
Right-Top, or Right-Bottom.
5. To change the POS data font and color, click
Font
.
6. When it is done, click
Save
to complete the
configuration.
POS Database Setting
User can export the POS database to another
save location or storage device. Click
to
change the save path. Mark
Remove POS data
after
the POS data will be delete from DVR hard
disk on the day that user has setup. Also,
mark
Move to:
user can save the POS data to another
folder on DVR when the POS data is removing.
Click
to set a storage path.
Summary of Contents for NX 8000 series
Page 1: ...AVerMedia NX8000 NXU8000 series User Manual April 2009...
Page 24: ......
Page 34: ...26 9 User can select the Date Camera and Cycle to view the report of object counts In Out...
Page 58: ...50 i The UPS application must meet Windows XP or Windows Vista system requirements...
Page 78: ...70 Region 1 Object size frame Region 2 Object counting information display...
Page 81: ...73...
Page 96: ...88 13 To view the all I O devices information click I O Map...
Page 199: ...191 4 Mark the UPnP Framework check box and click OK...


