


119
-
Display
Enable/disable to show the video. Even if the video of the selected camera is hidden you can
still record the video and preview it in playback mode.
-
Name
Change the camera name.
-
Description
Add a short comment.
(4) Enable Deinterlace
To enhance the video quality. Set the deinterlace
mode to #1, if you are capturing motionless picture
and #2, if it captures lots of movement.
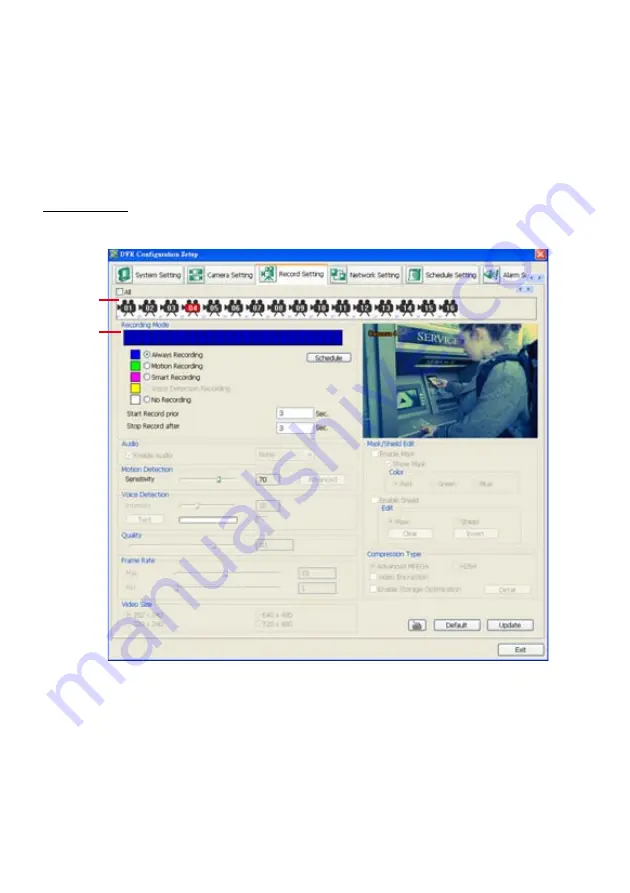
Record Setting
In the Recording setup windows, click
OK
to accept the new settings, click
Exit
to exit without saving,
and click
Default
to revert back to original factory setting.
(1)
(2)
(1) Camera Icons
Select the camera number you want to set the recording setting. To select all the cameras, enable the
ALL
check box. To select more than one camera,
Right click
on the camera icon. To select one
camera only,
Left click
on the camera icon. The camera icon turns red when it is selected.
(2) Recording Mode
The blocks from 00 to 23 represent the time in 24-hour clock. To record in full 24 hours, select the
recording mode and click the
~
button. If you want to only record at a particular time, click
Schedule
and select the colored block, and then, click on the time blocks.
Summary of Contents for NX 8000 series
Page 1: ...AVerMedia NX8000 NXU8000 series User Manual April 2009...
Page 24: ......
Page 34: ...26 9 User can select the Date Camera and Cycle to view the report of object counts In Out...
Page 58: ...50 i The UPS application must meet Windows XP or Windows Vista system requirements...
Page 78: ...70 Region 1 Object size frame Region 2 Object counting information display...
Page 81: ...73...
Page 96: ...88 13 To view the all I O devices information click I O Map...
Page 199: ...191 4 Mark the UPnP Framework check box and click OK...


