


3. Installation
12
D-307083 PowerMaster-360R Installer's Guide
3.5 GSM connection and configuration
The GSM modem auto detection feature enables automatic enrollment of the GSM modem into the control panel memory.
GSM modem auto detection is activated after reset that is after power-up or after exiting the Installer Mode menu. This
action causes the PowerMaster-360R to automatically scan the GSM COM ports for the presence of a GSM modem.
In the event that the GSM modem auto detection fails and the modem was previously enrolled in the control panel, the
message
Cel Remvd Cnfrm
is displayed on the Configurator’s Virtual or Touch Keypad. This message disappears from
the display after you press
OK
. The modem is then considered as not enrolled and no GSM trouble messages are
displayed.
Notes:
1) A message is displayed only when the alarm system is disarmed
.
2)
The GSM Alarm Transmission System is designed to comply with EN 50131-1 DP4.
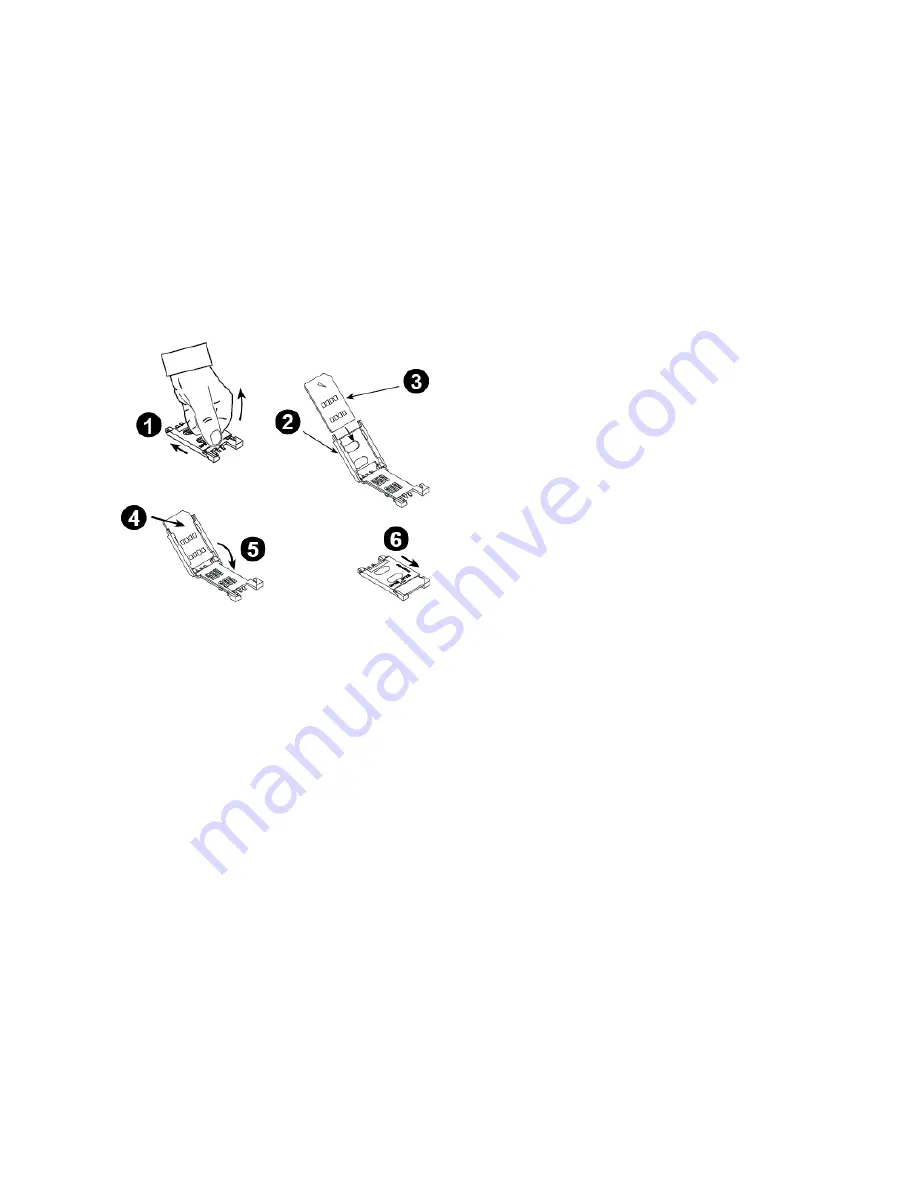
3.6 SIM card insertion
The following procedure outlines how to insert SIM
card into the GSM module, see Figure 3.1 (P):
1.
Slide the top cover.
2.
Open the cover.
3.
Align the SIM card in the cover (note cover
orientation).
4.
Slide the SIM card into the cover.
5.
Rotate the cover to close.
6.
Lock the cover to close.
CAUTION!
Do not insert or remove the SIM card when
the control panel is powered by AC power or battery.
To configure the GSM modem, see section 4.6.2.
3.7 PowerMaster-360R Prerequisites
Connection to the PowerManage server requires the following ports to be open on the router to access the internet:
TCP ports : 8080, 5001
UDP port: 5001
FTP port: 21
Note:
In a typical setup these ports on the router are open.
The Configurator supports Windows 7 PC Operating System.
3.8
Enrolling and deleting a Z-Wave device
Enrolling a Z-Wave device
To enroll a device, complete the following steps:
1.
Press and hold the (+) button (
U
in Figure 3.1) for 2 seconds. The red LED (
T
in Figure 3.1) blinks slowly.
2.
Press the
Enroll
button on the device.
3.
If Enroll is successful, the green LED blinks quickly, a success beep is heard, and the LED turns off.
Notes:
To cancel the enrollment, press and hold the (+) or (-) buttons for 2 seconds. The LED stops blinking.
If enroll is not successful, the red LED lights constantly for 3 seconds and a failure beep is emitted.
Long press on the
(+)
button, returns the panel to normal operation.


