Action
VP 300 Description and Response
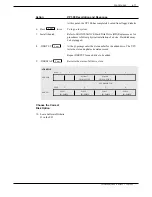
11. @DISKO
The following menu is presented:
12. Choose option 1 —
The VP 300 displays the following screen. (There may be a delay
ADD DISK.
before the screen appears.)
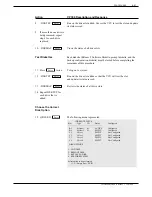
13. Remove Software
Diskette #1 from the
FD.
Reload the System
14. Make sure the
configuration backup
diskette is write-enabled.
15. Insert the configuration
backup diskette into the
FD.
16. Press the lower button
To reload the system.
on the CPU.
17. Press
twice.
To display the boot process.
18. Log on to the system
using the old
maintenance password.
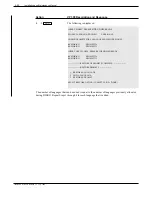
Enter
Selected drive in slot C1 has been added
CURRENT STATUS
Slot
Type
ID
Status
Configured
- - - - - - - - - - - - - - - - - - - - - - - - - - - - -
B4
System1
S1
ACTIVE
Configured
B3
System2
– –
ACTIVE
Configured
C1
Voice1
– –
UNKNOWN
Not Configured
C2
Voice2
– –
EMPTY
Not Configured
C3
Voice3
– –
EMPTY
Not Configured
C4
Voice4
– –
EMPTY
Not Configured
DISK OPTIONS
1. ADD DISK
2. REMOVE DISK
3. REPLACE A DISK
4. RESTORE SYSTEM
5. UPGRADE LANGUAGES
Select option to be performed
(1–5, – Empty line = EXIT)
:
Enter
Toshiba VP Systems Release 7.1
July, 1994
6-78
Installation and Maintenance Manual
Содержание VP 300
Страница 2: ......
Страница 10: ......
Страница 14: ......
Страница 19: ...Quick Reference Guide Hardware Toshiba VP 300 System Specifications Toshiba VP Systems Release 7 1 July 1994 ...
Страница 20: ...Toshiba VP Systems Release 7 1 July 1994 ...
Страница 52: ...Toshiba VP Systems Release 6 1 February 1993 2 14 Installation and Maintenance Manual ...
Страница 56: ...Toshiba VP Systems Release 7 1 July 1994 ...
Страница 146: ......
Страница 312: ...Toshiba VP Systems Release 7 1 July 1994 ...
Страница 314: ......
Страница 444: ......
Страница 496: ......
Страница 542: ......
Страница 598: ...Toshiba VP Systems Release 6 1 February 1993 ...
Страница 600: ...Toshiba VP Systems Release 6 1 February 1993 ...


