40
The emergency stop push button on the saw control box will trigger an emergency stop when
pressed. This will remove power from the saw and from TigerStop.
Kill Line
The red kill line on the front of the in feed table, when pulled, will trigger an emergency stop and
will remove power from the saw and from TigerStop.
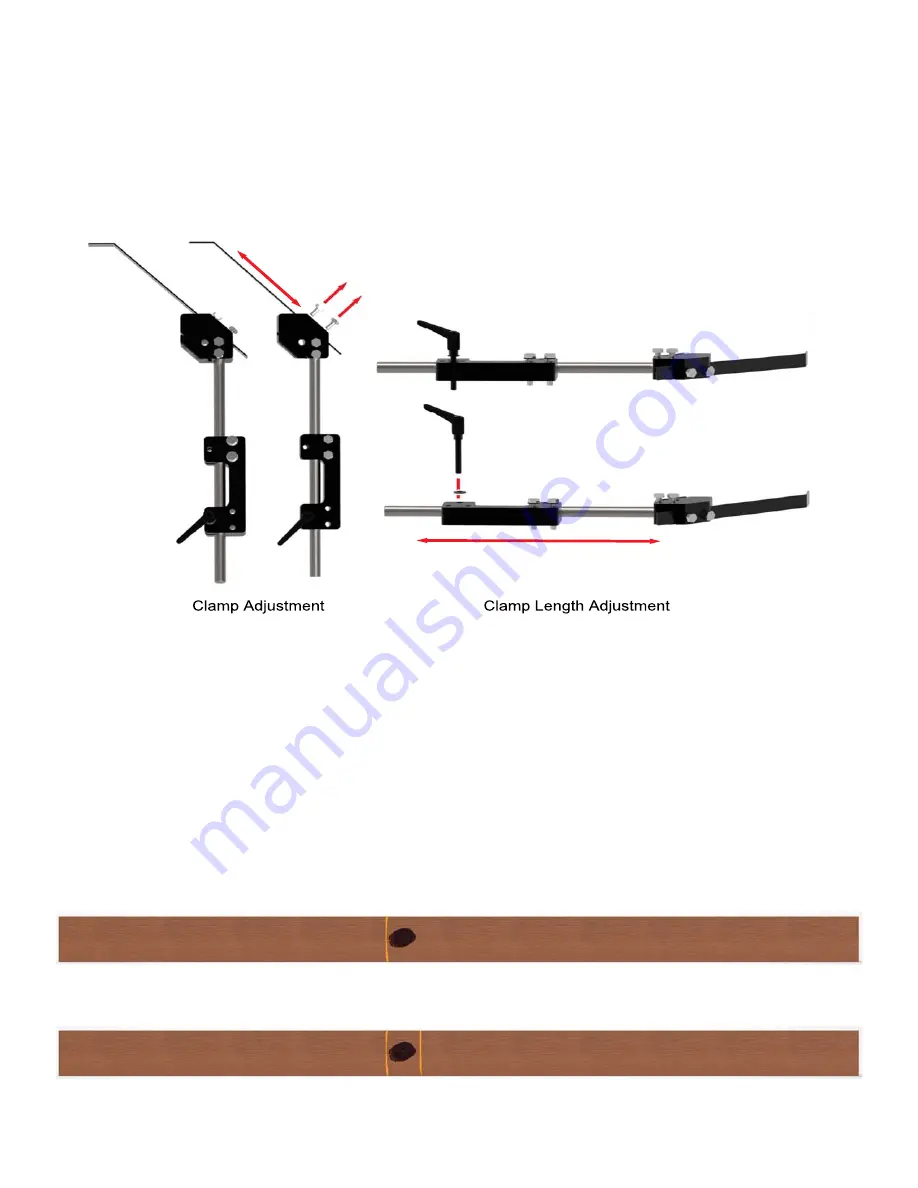
Setting the Clamps
TigerSaw 1000 clamps will need to be set to accommodate the material you are using. Set the
clamp as shown below.
Using Crayon Marking Mode
TigerSaw 1000 crayon marking mode is active when running optimized push feed lists only. Once a
push feed list is entered, crayon marking mode will activate at run time.
Note: For more information about push feed lists, see the full TigerStop operation manual at www.tigertamer.com.
1. Run your optimized push feed list.
2. TigerSaw will send the pusher foot forward to the load position.
Marking Defects
TigerSaw 1000 uses UV crayon marks to locate defects on the material. It will then cut out these
defects while it is processing parts from the parts list.
3. Put the stock you want to process on the loading posts.
4. Using a UV crayon, put one line at the beginning of the defect as shown.
5. Put one line at the end of the defect as shown.
Note: This tells TigerSaw 1000 where the beginning and the end of the defect are.
6. Repeat steps 3 through 5 for all defects on the stock.
Note: Stock can be marked ahead of time and stored for future use.
Содержание TigerSaw 1000
Страница 1: ......
Страница 2: ......
Страница 8: ...5 TigerSaw Cap Guard TigerSaw Guard Back ...
Страница 9: ...6 TigerSaw Guard Sides ...
Страница 10: ...7 TigerSaw Blade Access Door In Feed and Out Feed Table ...
Страница 11: ...8 Pusher Foot ...
Страница 15: ...12 1 Assemble table legs ...
Страница 17: ...14 5 Attach the back fence to the out feed table 6 Attach the material staging tubes to the in feed table ...
Страница 24: ...21 7 Attach the Printer Stand M8 X 35 ...
Страница 66: ......
Страница 67: ......


