44
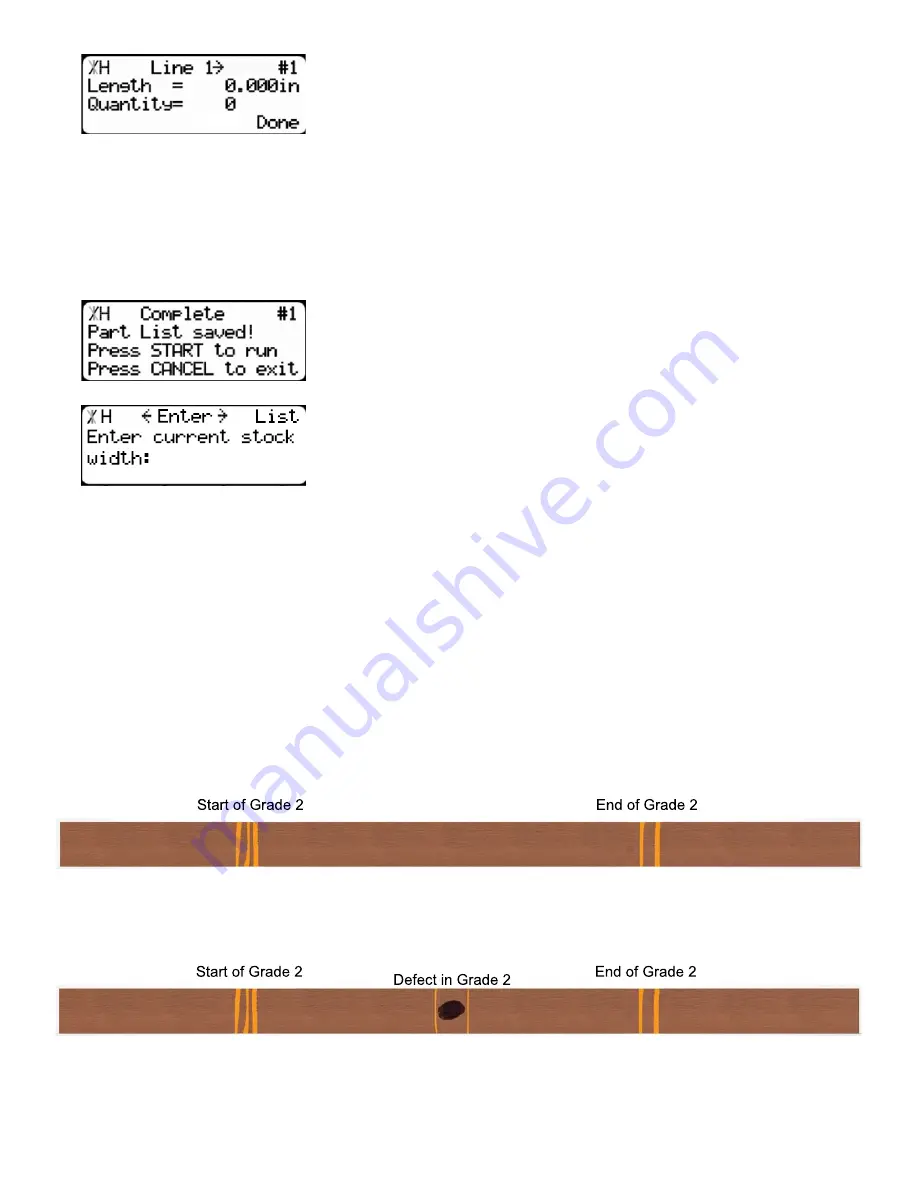
5.Once at Line 1, your cursor will be on the length line. Enter the
width of boards you need to make the panel. Then press the [OK] but-
ton.
6. The cursor will now move to the Quantity line. Enter the total height of the panels you want to make.
Press the [OK] button when finished.
Note: This number can be in Inches, Feet, Millimeters, Meters or any other measurement unit you would like. Just remem-
ber to consistently use the same units.
7. Press the [Done] soft key.
8.The list has now been saved. You can press [Start] to run it.
9.TigerStop will prompt for the current width of stock being pro-
cessed. Enter this value and press [Start]
Note: Remember to use the same units as you did in step 6!
10. Now use the UV crayon to mark a board and process them as you normally would.
11. TigerSaw 1000 will process material until it has processed at least the amount specified.
Note: During panel optimization processing, TigerSaw will round fractional width values.
Using Grade 2 Mode
When using TigerSaw 1000 in crayon marking mode, you can activate grade 2 while making
crayon marks. Grade 2 mode will tell TigerStop to only cut defects inside the grade 2 zones. This
allows the operator to cut from a cut list and section off a portion of the stock for defecting only, all at
the same time.
Marking Grade 2
The TigerSaw 1000 crayon marking system uses 3 marks close together to tell the system that you
want to use Grade 2.
Note: Each mark must be closer than the value of the Laser Error setting.
Marking Defects Inside Grade 2
Once you have started grade 2, you mark defects inside of grade 2 just as you normally would.
Содержание TigerSaw 1000
Страница 1: ......
Страница 2: ......
Страница 8: ...5 TigerSaw Cap Guard TigerSaw Guard Back ...
Страница 9: ...6 TigerSaw Guard Sides ...
Страница 10: ...7 TigerSaw Blade Access Door In Feed and Out Feed Table ...
Страница 11: ...8 Pusher Foot ...
Страница 15: ...12 1 Assemble table legs ...
Страница 17: ...14 5 Attach the back fence to the out feed table 6 Attach the material staging tubes to the in feed table ...
Страница 24: ...21 7 Attach the Printer Stand M8 X 35 ...
Страница 66: ......
Страница 67: ......


