43
8.Press the
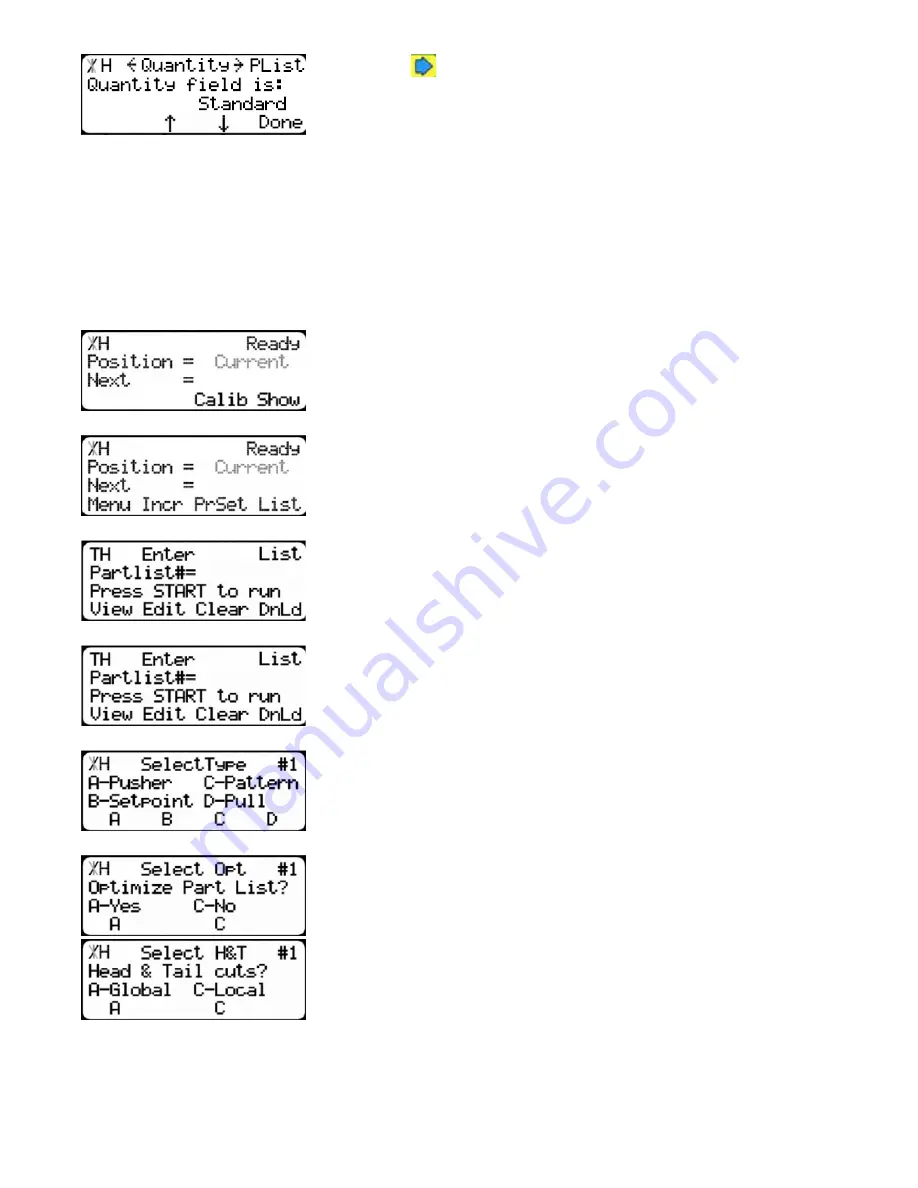
button until you get to the Quantity setting.
To change Quantity...
1. Press [B] or [C].
2. Enter the password followed by [=].
3. Press [B] or [C] to toggle the Quantity setting to Panel.
4. Press the [Done] soft key to save the parameter.
Note: The default password is set to the serial number of the TigerStop.
Making a Panel Optimization Pusher List
1.Start at the Ready Screen
2.Press the [Show] soft key.
3.Press the [List] soft key.
4.You are now at the list interface.
1.At the list interface, enter the list number you wish to program and
press the [Edit] soft key.
2.Press the [Pusher] soft key.
3.You will be asked to select if this is an optimized list. Press the [Yes]
soft key.
4.Select if you want to use a global or a local head and tail cut.
Note: Head and tail cuts are trim cuts at the beginning and end of your stock mate-
rial. It is used to eliminate defects and square up the end of the
material.
Global - Uses the head and tail cut setting from the part list menu as your head and tail cut values.
Local - Allows you to set a custom head and tail cut that is used for this list only.
Содержание TigerSaw 1000
Страница 1: ......
Страница 2: ......
Страница 8: ...5 TigerSaw Cap Guard TigerSaw Guard Back ...
Страница 9: ...6 TigerSaw Guard Sides ...
Страница 10: ...7 TigerSaw Blade Access Door In Feed and Out Feed Table ...
Страница 11: ...8 Pusher Foot ...
Страница 15: ...12 1 Assemble table legs ...
Страница 17: ...14 5 Attach the back fence to the out feed table 6 Attach the material staging tubes to the in feed table ...
Страница 24: ...21 7 Attach the Printer Stand M8 X 35 ...
Страница 66: ......
Страница 67: ......


