background image

Thermo Scientific 

150 


Содержание Nicolet Continuum

Страница 1: ......

Страница 2: ... information in the document is followed properly This document is not part of any sales contract between Thermo Fisher Scientific Inc and a purchaser This document shall in no way govern or modify any Terms and Conditions of Sale which Terms and Conditions of Sale shall govern all conflicting information between the two documents For U S Technical Support please contact Thermo Fisher Scientific 5...

Страница 3: ...icle focus and diopter adjustments 36 Condenser focus and alignment 38 Initializing the Reflex aperture 43 Analyzing Samples 49 Performing a reflection experiment 49 Performing a transmission experiment 63 Advanced Techniques 77 Polarization options 77 Visible polarization 77 Nomarski differential interference contrast 81 Infrared polarization 89 Optical filters 90 Attenuated total reflection 91 S...

Страница 4: ...asking off areas of interest 134 Adjusting the aperture size shape and orientation 135 Using the software to adjust the aperture 136 Using the manual controls to adjust the aperture 138 Using autofocus 141 Using auto ATR contact 145 Troubleshooting 151 Symptoms and solutions 151 Testing microscope performance 168 In reflection mode 168 In transmission mode 176 Upgrading the computer recovering fro...

Страница 5: ...pe is an infrared microsampling system that provides the highest available IR spatial resolution The Continuµm design enables unlimited sampling and mapping capability and incorporates unprecedented ease of use The on axis infinity corrected optical design of the Continuµm microscope provides exceptional sample viewing quality and exceptional infrared sampling ...

Страница 6: ... with OMNIC Atlµs see the instructions for collecting data that came with your spectrometer The Continuµm microscope must be installed as part of a Thermo Scientific spectrometer system and can be used only after it is properly connected to the spectrometer The Microscope Safety Guide that came with your microscope contains important safety information This guide is available in several languages ...

Страница 7: ...on This symbol tells you that you can find more information in the on line help and tutorials To access help or a tutorial click the Help menu in OMNIC This symbol tells you that you can find more information in this manual or other printed documentation that came with your instrument Note Notes contain helpful supplementary information Notice Follow instructions labeled Notice to avoid damaging t...

Страница 8: ...Thermo Scientific 4 Microscope components The following illustrations identify the microscope controls and components ...

Страница 9: ...Continuµm User Guide 5 Front panel ...

Страница 10: ...Thermo Scientific 6 Control panel on left side ...

Страница 11: ...the features of your microscope are available allow at least 20 seconds to elapse between the time that you power on the computer and microscope components and powering on the spectrometer Turning on power Always power on the components in your microscope system in the order that follows 1 Microscope 2 Stage controller systems with optional motorized stages only 4 Illuminators 5 Computer monitor p...

Страница 12: ...ower on for its temperature to stabilize before continuing If you are going to collect routine spectra the system is ready for use as soon as you power on Before you turn on the microscope power it is a good idea to verify that the illuminator controls are in the OFF position Rotate the controls counterclockwise until they click into the OFF position Then move the power switches to the ON position...

Страница 13: ...power switches are located On the control panel on the left side of the microscope On the front panel of the optional stage controller On the computer monitor printer and other peripheral devices On the spectrometer power supply ...

Страница 14: ...t For optimum performance leave the transmission and reflection illuminators on and set to medium intensity at all times except when a different intensity is required for viewing Finally turn on the spectrometer power To ensure that all the components are recognized the spectrometer always should be the last component in a microscope system that is powered on ...

Страница 15: ...nd splash proof goggles and follow precautions described in the material safety data sheets provided by your liquid nitrogen vendor Also note that liquid nitrogen can be hazardous and create an oxygen deficient atmosphere if handled in an insufficiently ventilated room Detectors that require cooling are encased in a stainless steel dewar Once cooled the detector will remain cold for about 13 hours...

Страница 16: ...the laboratory funnel into the fill port The fill ports are offset toward the front of the access port To prevent damage to the microscope internal components be sure that the neck of the funnel is inside the fill port Damage caused by spilled or misdirected liquid nitrogen is not covered by warranty ...

Страница 17: ...wing the nitrogen to drain into detector dewar The dewar is full when liquid nitrogen no longer drains into it 6 Allow the detector temperature to stabilize For best results allow the detector to stabilize for at least 20 minutes before analyzing samples Installing the purge baffle The purge baffle protects the optical components in the microscope from moisture in your breath The baffle deflects y...

Страница 18: ...lide stages require initialization Because the stage moves during the automated initialization process it is necessary to protect hardware components that could interfere with the stage s movement Prompts that appear during the initialization ask you to take precautions such as lowering the condenser or removing the nosepiece Note Whenever the OMNIC Atlµs or µView software is installed you change ...

Страница 19: ...ays remove the nosepiece and lower the condenser completely before you initialize the stage Stage collision damage is not covered by warranty See Changing the condenser and Changing the objective in the Setting up for experiments Help book available through Microscope Help topics in the OMNIC Help menu if you are unfamiliar with the procedures for removing and reinstalling the nosepiece or lowerin...

Страница 20: ...Thermo Scientific 16 2 Choose System Configuration from the Atlµs menu in OMNIC 3 Click the Z Axis button in the Microscope field ...

Страница 21: ... being initialized no other system configuration parameters are available for change and no other system configuration operations can be conducted To prevent accidental initiation of other actions during stage initialization no other fields are visible and the initialization button is disabled as shown below When the initialization is complete all fields in the System Configuration dialog box beco...

Страница 22: ...ays remove the nosepiece and lower the condenser completely before you initialize the stage Damage resulting from stage collisions is not covered by warranty See Changing the condenser and Changing the objective in the Setting up for experiments Help book available through Microscope Help topics in the OMNIC Help menu if you are unfamiliar with the procedures for removing and reinstalling the cond...

Страница 23: ...Continuµm User Guide 19 2 If a universal slide holder is installed remove it 3 Choose System Configuration from the Atlµs menu ...

Страница 24: ...llisions is not covered by warranty 5 When the Stage Initialization information box appears choose OK to begin calibrating horizontal stage movement Choose Cancel if you do not wish to calibrate the XY axes at this time 6 Wait while the stage initializes While the stage is being calibrated no other system configuration parameters can be edited and no other system configuration operations can be co...

Страница 25: ...alization button is disabled as shown below When the initialization is complete all fields in the System Configuration dialog box become visible again and all controls are reactivated The software now has the information about the location of the stage that it needs to control horizontal stage movement and display accurate stage coordinate values ...

Страница 26: ...ual or glide stages While performing reflection experiments on samples that are 2250 µm 0 09 in or less in thickness there in no need to use stage travel limits Simply lower the condenser to a level below the bottom of the stage or remove it all together and the full 27000 µm x 76200 µm 5 in x 3 in stage travel is available Notice Use care and avoid collisions while setting the travel limits Be su...

Страница 27: ...e wizard if you do not know the limits of stage travel The Stage Travel Wizard will prompt you to move the stage to the travel limits and record coordinates Choose Enter values manually if you know the limitations you wish to set If any stage travel limits were defined previously they are displayed in the Current Travel Limits box ...

Страница 28: ...t Reflection Condenser fully lowered 63500 38100 Transmission Rectangular stage insert installed 35797 19060 Without stage insert 47371 37084 4 If you chose to use the wizard click the Start Wizard button Move the stage as instructed on the screen When you are finished the new limits appear in the current Travel Limits box 5 Select Use Stage Travel Limits to save the setting and restrict stage tra...

Страница 29: ...quipped with the standard manual stage horizontal movement of the stage is controlled with the X and Y knobs located on the right side of the microscope If your microscope is equipped with an optional motorized stage you can use the stage movement tools or the joystick to move the stage horizontally Be sure that the stage has been initialized before you use either the joystick or software controls...

Страница 30: ...p or down to focus the microscope Notice To avoid damaging the microscope be careful not to move the stage up into the objective or down onto the condenser Stage and or sample collisions can permanently damage the optical components Damage caused by stage or sample collisions is not covered under warranty ...

Страница 31: ...ols are in OMNIC Atlµs To make a fine adjustment turn the knob just enough to cause movement of the stage To make a coarse adjustment turn the knob farther The harder the knob is turned the more course the adjustment the faster the stage movement Very fine focus adjustments can be made using the Z axis control in OMNIC Atlµs ...

Страница 32: ...rapid movement For systems equipped with a 32x objective and condenser we recommend using the fine adjustment slow speed This gives you greater control over the stage movement and can help prevent collisions between the stage and the optical components Damage caused by stage collisions is not covered under warranty Preparing the optical components The optical components can be optimized for each u...

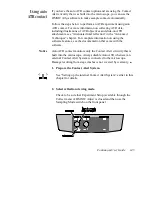
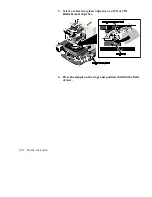
Страница 33: ...e of the microscope between the camera and the nosepiece Push the selector all the way in to view through the eyepieces only Pull the selector half way out when you want to direct visible light to both the eyepieces and the camera You will feel the rod click into place when you reach the correct position Pull the selector all the way out to direct visible light to the camera only 2 Select an infra...

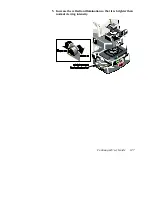
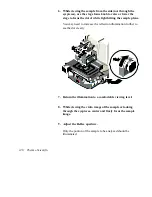
Страница 34: ... available through Microscope Help topics in the OMNIC Help menu if you need to install or change the objective and or condenser 3 Select reflection viewing mode by pressing the Sampling Mode switch on the front panel The Reflection indicator glows when reflection mode is selected Note The Sampling Mode switch is not active while Experiment Setup available through the OMNIC Atlµs Collect menu is o...

Страница 35: ...Continuµm User Guide 31 4 Adjust the reflection illumination to high intensity then adjust the transmission and Reflex aperture illumination to their lowest intensities ...

Страница 36: ...Open both field of view irises completely and then set both aperture irises for low contrast See Adjusting field of view and image contrast in the More about the Hardware chapter if you are not familiar with adjusting irises ...

Страница 37: ... 33 6 If you are using a Reflachromat objective and condenser set the objective and condenser compensation rings to 0 If you are using a fixed objective and condenser be sure it is rated for 0 refractive index compensation ...

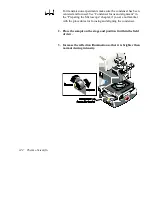
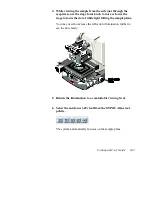
Страница 38: ...llow the stage to bump the objective or condenser Damage from stage collisions is not covered by warranty 8 Position the pinhole directly under the objective Look directly at the slide not through the viewer and use the stage focus controls to raise or lower the stage until the spot of white light on the slide is most concentrated the smallest spot size ...

Страница 39: ... pinhole is centered on the spot of white light When you are finished set the reflection illumination to medium intensity 9 Adjust the interocular distance on the eye pieces for comfort You should see a single image of the pinhole through the viewer when the eyepieces are positioned correctly ...

Страница 40: ... of the scale settings In the future you will be able to adjust the diopter quickly by turning the eyepiece to this reading 1 Focus the reticle in the right eyepiece Hold the inner ring with one hand and turn the outer ring until the reticle cross hairs are clear Once the cross hairs are clear use the stage focus knob to obtain a sharp image of the pinhole through the right eyepiece ...

Страница 41: ...ith your left eye turn the eyepiece until the image is in focus 3 When you are finished look at the reading on the scale on the outside of the left eyepiece the white dot indicates the numerical value In the future you will be able to adjust the diopter quickly by turning the eyepiece to this reading ...

Страница 42: ...t A focused and centered condenser is important in transmission mode for proper alignment of the infrared beam path In reflection mode the condenser is not in the beam path To focus the condenser 1 Use the Sampling Mode button on the front panel to switch the microscope into transmission sampling mode The transmission indicator lights whenever the microscope is in transmission sampling mode ...

Страница 43: ...ure has gone out of focus Note The Sampling Mode switch is not active while Experiment Setup available through the OMNIC Atlµs Collect menu is open 2 While looking through the eyepieces use the condenser focus knob to move the condenser up or down to bring the aperture back into sharp focus ...

Страница 44: ...the stage Once the condenser is focused you can verify that it is centered The post sample and pre sample aperture images should be centered on the same point To check condenser centering 1 Open the transmission and reflection field of view controls fully ...

Страница 45: ...Continuµm User Guide 41 2 Turn on Reflex aperture illuminator ...

Страница 46: ...the condenser is offset use the knobs to center it Each knob moves the condenser diagonally While their effect is independent these knobs are usually adjusted simultaneously to center the condenser image You will find that your adjustment technique improves with practice ...

Страница 47: ...scope For all other applications use the controls in OMNIC Atlµs or µView software to adjust the size shape and orientation of this aperture Be sure to set the view selector to allow viewing through the camera or through the eyepieces and the camera when setting the aperture using software Pull the control rod completely out to direct visible light to the camera only Pull the control rod half way ...

Страница 48: ...Thermo Scientific 44 ...

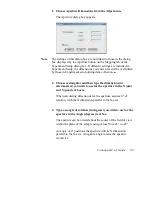
Страница 49: ... made to the Reflex aperture graphically using the box shown above or numerically in the Aperture Dimensions dialog box available through the Atlµs menu The aperture must be initialized before the first use and any time that the physical aperture and the virtual aperture are out of synch ...

Страница 50: ...gs or attempting to use the software to adjust the aperture the size and shape of the aperture may be unpredictable To synchronize the physical aperture with the automated aperture system 1 Open OMNIC and select Transmission discrete point standard sample from the Experiment drop down list box 2 Choose Show Atlµs Window from the Atlµs menu to open the Atlµs window When the Atlµs window opens you w...

Страница 51: ...a is brighter than the rest of the field of view The apertured area is rectangular Its current size shape and orientation depend on how the aperture was last adjusted 4 If the physical aperture and the virtual aperture are not the same size and orientation choose System Configuration from the Atlµs menu ...

Страница 52: ...es from minimum to maximum size through full rotations clockwise and counterclockwise and then settles to match the size shape and orientation of the virtual aperture When the initialization is finished the physical and virtual apertures are set to a 100 µm x 100 µm square 50 µm x 50 µm for objectives with greater than 15x magnification at 0 degrees rotation ...

Страница 53: ...lection experiment sample was shipped in the accessory box This sample can be used to perform your first discrete point reflection experiment and whenever you wish to confirm that your microscope is operating properly 1 Locate the Soda Can sample slide and install the slide in the universal holder and then install the holder on the stage The slide was provided with your microscope in the accessory...

Страница 54: ...et the objective compensation ring to match the thickness of the top window If you were analyzing the sample with a fixed compensation objective you would use an objective with a refractive index compensation value of 0 3 Start OMNIC and select Reflection discrete point standard sample from the Experiment drop down list box ...

Страница 55: ...When the Atlµs window opens you will see the video pane on the right side of the screen the navigation stage position pane on the left and the Atlµs tool palettes near the bottom of the screen You may or may not be able to see a clear image in the video pane at this point ...

Страница 56: ...and Reflex aperture illumination to their lowest intensities Set the reflection illumination to a comfortable viewing level Notice Use care when focusing images Be sure that the stage does not bump the objective or condenser Damage from stage collisions is not covered by warranty ...

Страница 57: ... If you already added liquid nitrogen to the detector dewar simply wait for temperature to stabilize If you have not yet cooled the detector do so before attempting to collect data You may also see a yellow circle in the Bench Status field if the quality checks available through the Quality tab in Experiment Setup have not been disabled The default quality check settings were designed for experime...

Страница 58: ...Thermo Scientific 54 Adjust the reflection aperture iris for good contrast in the video image ...

Страница 59: ...osition Use the tool palette and Atlµs menu items as follows Click the Full Range View button to zoom the navigation pane all the way out to display the full range of stage travel allowed by your stage controller You should now be able to see the sample crosshairs labeled with a number and the background point crosshairs with the letter B defined in the standard experiment If you cannot use the Zo...

Страница 60: ... shape and orientation of the virtual aperture to mask the area of interest immediately surrounding the sample point For other systems use the manual controls Adjust the Reflex aperture illumination if necessary If necessary adjust the location of the sample point so that it is completely within an inked pattern Use the X Y knobs joystick or move stage buttons and move the stage until an ink free ...

Страница 61: ...al aperture to drag the aperture to the size and shape preferred for your ink spot Release the mouse when the aperture sides reach the size and position you desire Use the arrow tool to grab a corner of the virtual aperture and drag it to the orientation preferred for your ink spot The aperture can be rotated to any angle between 45 and 45 For manual systems use the controls on the right side of t...

Страница 62: ...e Parameter Setting Collect tab Number of scans 16 Resolution 8 Final format Reflectance Correction None Background handling Background before every sample Collect 64 scans for background Bench tab Sample Compartment Left µscope R OR Right µscope R Detector your single element detector Usually MCT A Beamsplitter your compatible beamsplitter usually KBr Source IR Accessory None Window None continue...

Страница 63: ...988 Aperture 95 Advanced tab Zero filling none Apodization Happ Genzel Phase correction Mertz Set sample spacing based on spectral range On Set filters based on velocity On Single sided interferogram Off Reset bench at start of collection Off Start collection with external trigger Off Blanking regions None Quality tab All Off continued ...

Страница 64: ...point is defined Stage position of the background point was automatically set when you adjusted the point to your sample position Save video frames in map file On Prompt before collecting data On All others Off Rectangular On None Off Mapping focus options Do not focus during map collection When you are finished choose OK to save the settings and return to the Atlµs window ...

Страница 65: ... User Guide 61 13 Choose Collect Map from the Collect menu Observe as the video mosaic is collected 14 When the software prompts check if necessary adjust the position of your background point and then choose OK ...

Страница 66: ... prompts check and adjust the sample point location and focus and then choose OK Respond to any other prompts and then observe as the sample data is collected 16 When data collection is finished use the viewer pane to isolate areas of interest ...

Страница 67: ...ser is centered and focused Data taken through a condenser that is not centered and focused will not be accurate or repeatable 1 Locate the 1 0 mil PE Microscope sample slide It was provided with your microscope in the accessory box The slide includes an open beam position and an ink on polyethylene sample 2 Install the sample slide in the universal holder and then install the holder on the stage ...

Страница 68: ...thickness of the top window If your sample was on a substrate or in a compression cell you would set the condenser compensation ring to match the thickness of the substrate or bottom window of the cell If you were analyzing the sample with a fixed compensation objective and condenser you would use an objective and condenser with a refractive index compensation value of 0 ...

Страница 69: ...left and the Atlµs tool palettes near the bottom of the screen You may or may not be able to see a clear image in the video pane at this point You may also be able to see the default background crosshairs with the letter B and sampling points crosshairs with a number and an asterisk Whenever video capture is enabled at the sampling point an asterisk appears in the designator When more than one dis...

Страница 70: ...est intensity Set Reflex aperture illumination to a comfortable level Set the reflection illumination to a comfortable viewing level Notice Use care when focusing images Be sure that the stage does not bump the objective or condenser Damage from stage collisions is not covered by warranty ...

Страница 71: ...quid nitrogen to the detector dewar simply wait for temperature to stabilize If you have not yet cooled the detector do so before attempting to collect data You may also see a yellow circle in the Bench Status field if the quality checks available through the Quality tab in Experiment Setup have not been disabled The default quality check settings were designed for experiments conducted in the spe...

Страница 72: ...Thermo Scientific 68 Adjust the transmission and reflection aperture irises for good contrast in the video image ...

Страница 73: ...nt area settings for your sample position Use the tool palette and Atlµs menu items as follows Click the Full Range View button to zoom the navigation pane all the way out to display the full range of stage travel allowed by your stage controller You should now be able to see sample crosshairs labeled with a number the background point crosshairs with the letter B defined in the standard experimen...

Страница 74: ... the sample point so that it is completely within the XL ink pattern For automated aperture systems use the Arrow tool to adjust the size shape and orientation of the virtual aperture to mask the area of interest immediately surrounding the sample point for other systems use the manual controls Adjust the Reflex aperture illumination if necessary Use the X Y knob joystick or move stage buttons and...

Страница 75: ...to grab a handle on any side of the virtual aperture to drag the aperture to the size and shape preferred for your ink spot Release the mouse when the aperture sides reach the size and position you desire Use the arrow tool to grab a corner of the virtual aperture and drag it to the orientation preferred for your ink spot The aperture can be rotated to any angle between 45 and 45 For manual apertu...

Страница 76: ...mber of scans 16 Resolution 8 Final format Transmittance Correction None Background handling Background before every sample Collect 64 scans for background Bench tab Sample Compartment Left µscope T OR Right µscope T Detector your single element detector Usually MCT A Beamsplitter your compatible beamsplitter usually KBr Source IR Accessory None Window None Bench tab Sample Compartment Left or rig...

Страница 77: ...range limit 4000 Min range limit 650 Gain Autogain Velocity 1 8988 Aperture 95 Advanced tab Zero filling none Apodization Happ Genzel Phase correction Mertz Set sample spacing based on spectral range On Set filters based on velocity On Single sided interferogram Off Reset bench at start of collection Off Start collection with external trigger Off Blanking regions None continued ...

Страница 78: ...s Background Background point is defined Save video frames in map file On Prompt before collecting data On All others Off Rectangular On None Off Mapping focus options Do not focus during map collection When you are finished choose OK to save the settings and return to the Atlµs window 14 Choose Collect map from the Collect menu Observe as the video mosaic is collected ...

Страница 79: ...t if necessary and then choose OK Observe as the background is collected If prompted to save the background choose Yes 16 When the software prompts check and if necessary adjust the sample point When you are finished choose OK Respond to any other prompts and then observe as the sample data is collected ...

Страница 80: ...Thermo Scientific 76 17 When data collection finishes use the viewer pane to isolate peaks of interest ...

Страница 81: ...Polarization options The Continuµm microscope can be equipped with optional polarizers that polarize visible or infrared beams Visible polarization is used to generate contrast in anisotropic materials Polarization of the IR beam is used to determine molecular orientation Visible polarization To locate a feature of interest with visible light polarization 1 Slide the visible analyzer into the slot...

Страница 82: ...rizer into either of the color filter ports If your sample is suited for transmission data collection insert the polarizer in the transmission color filter port The transmission color filter port is located on the base of the microscope on the left side ...

Страница 83: ...t side of the microscope adjacent to the reflection illuminator 3 Select a sampling mode Check to be sure that Experiment Setup available through the Collect menu of OMNIC Atlµs is closed and then use the Sampling Mode switch on the front panel If your sample is suited to reflection techniques choose reflection mode If your sample is suited to transmission techniques choose transmission mode ...

Страница 84: ... rotating the sample If you still cannot see the sample after completely rotating it it is likely that there is no polarization data Try another technique 6 While viewing the sample through the eyepieces or through the video display rotate the sample or the round visible polarizer to see the differences in sample composition Note The optional rotatable stage is ideal for this type of experiment Th...

Страница 85: ...rski differential interference contrast The Nomarski differential interference contrast DIC technique is an extension of visible polarization It facilitates visual contrast in samples where achieving visualization is difficult The technique uses crossed polarizers to produce a dark field The Nomarski prisms use differences in optical pathlengths and refractive indices through the sample to enhance...

Страница 86: ...Thermo Scientific 82 Follow these steps to perform DIC experiments 1 Remove the purge baffle and then slide the visible analyzer into the slot directly below the viewer ...

Страница 87: ...olarizer into one of the color filter ports If your sample is suited for transmission data collection insert the polarizer in the transmission color filter port The transmission color filter port is located on the base of the microscope on the left side ...

Страница 88: ... side of the microscope adjacent to the reflection illuminator 3 Select a sampling mode Check to be sure that Experiment Setup available through the Collect menu of OMNIC Atlµs is closed and then use the Sampling Mode switch on the front panel If your sample is suited to reflection techniques choose reflection mode If your sample is suited to transmission techniques choose transmission mode ...

Страница 89: ...flection mode is selected 4 Rotate the round visible polarizer with your finger until the field of view becomes dark The polarizers are now crossed Note Some video cameras include autogain features that make it difficult to see when the polarizers are crossed Use the eyepieces for viewing while you are looking for crossed polarizers ...

Страница 90: ...Thermo Scientific 86 5 Loosen the thumbscrew and remove the purge baffle from the nosepiece 6 Insert a DIC prism with the lettering facing up into the nosepiece slot ...

Страница 91: ...Continuµm User Guide 87 7 If your sample is suited to transmission data collection remove the purge baffle from the condenser If your sample is suited to reflection data collection proceed to step 9 ...

Страница 92: ...ple is suited to transmission data collection insert a DIC prism with the lettering facing down into the condenser slot 9 Install the sample and focus 10 Rotate the DIC prism knob s to change the colors and contrast of the sample image ...

Страница 93: ... orientation that gives precise information about the molecular structure and molecular orientation of a sample or that is specific to polarization angle you can use the microscope to conduct polarized studies of infrared data An optional wire grid infrared polarizer can be installed in the nosepiece of the microscope and used for both transmission and reflection experiments 1 Loosen the thumbscre...

Страница 94: ...with the thumbscrew Optical filters The purge baffles located in the objective and the condenser can be used as holders for custom filters Round filters ranging in diameter from 29 to 36 mm with a maximum thickness of 3 5 mm The magnetic pads can be used to secure filters ...

Страница 95: ...absorbing materials and thick samples Analyzing surface coatings Analyzing surface defects inclusions or degradation For most ATR experiments the internal Contact AlertTM System helps you achieve proper contact pressure with an ATR objective or slide on ATR attachment During an ATR experiment the system monitors the force between the sample and ATR crystal Indicators on the front panel of the micr...

Страница 96: ... on ATR attachment is properly installed and aligned centered on the microscope See the documentation that came with the objective or attachment for details Caution Avoid shock hazard Before connecting the sensor plate always turn off the microscope power 1 Turn off the microscope computer spectrometer and stage controller power ...

Страница 97: ...Continuµm User Guide 93 2 Lower the condenser completely Use the condenser focus knob ...

Страница 98: ...Thermo Scientific 94 3 If the universal slide holder is in place remove it from the stage ...

Страница 99: ...alizes be sure that the cable that connects the sensor plate to the microscope is behind and under the stage 5 Power on the microscope stage controller if installed illuminators computer monitor printer and other computer peripherals and then finally power on the spectrometer Be sure that at least 20 seconds elapses between powering on the microscope and powering on the spectrometer ...

Страница 100: ...n the Preparing the Microscope chapter if you need help with powering on the system 6 For systems with optional motorized stages initialize the stage See Initializing the stage in the Preparing the Microscope chapter if you are unfamiliar with the stage initialization procedures 7 Place the sensor plate onto the stage The raised surface on the bottom of the sensor plate fits into the recess on the...

Страница 101: ...sure that the cable that connects the sensor plate to the microscope is on top of the stage 8 Choose System Configuration from the Atlµs menu in OMNIC 9 Click the Configuration button under Initialization in the Microscope field ...

Страница 102: ...box opens confirm that the Auto ATR checkbox is checked If Auto ATR is checked click the Close button to close the dialog box without changes If it is not check the box click the Save button and then click the Close button to enable Auto ATR and close the dialog box ...

Страница 103: ...return to the System Configuration dialog box click OK to save the Auto ATR setting and close the dialog box 12 Click the ATR Calibration button in the Video field See the OMNIC Atlµs Help system for more information about ATR calibration ...

Страница 104: ...Alert System Notice Before rotating the objective into position lower the stage to provide sufficient clearance between the stage and the objective 1 Select reflection viewing mode Check to be sure that Experiment Setup available through the Collect menu of OMNIC Atlµs is closed and then use the Sampling Mode switch on the front panel ...

Страница 105: ...nt into the viewing analyzing position 3 Select a view through position for the objective If you are using an ATR objective with a ZnSe or diamond crystal slide the selector into the survey position If you are using an ATR objective with a Ge or Si crystal you can move the selector to the ATR position The sample is not visible through Ge or Si crystals ...

Страница 106: ...e sample on a sample slide Placing the sample on a glass slide helps protect the ATR objective in case you apply too much pressure when making contact with the sample The glass will crack before the objective is damaged Applying transparent tape to the underside of the glass slide will prevent pieces from falling into the condenser should the slide break ...

Страница 107: ...te material into one of the holes in the metal slide that came with your system and then place the sample on that window If you choose to use the metal slide be very careful when you apply pressure It is very easy to damage the ATR crystal 6 Place the sample slide onto the sensor plate ...

Страница 108: ...he sample is not visible through a Ge or Si crystal When using a an ATR objective fixed with a crystal that does not allow you to see your sample center the sample area using a regular infrared objective and then select the ATR objective 8 While watching the sample directly not through the viewer carefully raise the stage using the stage focus knob or a Z position tool until the sample is close to...

Страница 109: ...TR attachment move the crystal slide to the middle position If you are using an ATR objective with a Ge or Si crystal you can move the selector to ATR 10 While watching the lower Contact Alert indicator on the front panel carefully and slowly raise the stage using the stage focus knob until the indicator illuminates This green indicator shows that the sample has made initial contact with the ATR c...

Страница 110: ... or diamond crystal look through the viewer and make sure the sample area of interest is positioned as desired in the field of view Good contact between the crystal and sample is indicated by a darkening or wetting of the sample image If the area of interest is not positioned as desired lower the stage until the sample is slightly below the objective reposition and focus the sample with the select...

Страница 111: ...nd experiment in the OMNIC Help system Index and go to Using Experiment Setup Note If you experience difficulty with sample material contaminating your background material try collecting the background first and checking it for contamination before you collect your sample data 15 Choose OK to close the Experiment Setup dialog box 16 Choose Collect Sample from the Collect menu to collect the sample...

Страница 112: ...xternal Contact Alert system the Contact and Stop indicators on the front panel of the microscope do not light they are replaced by the visual and audible alarms available through the controller Notice The contact alarm lines for this system are not monitored by software Always disable Auto ATR while using the external qualitative Contact Alert System Damage resulting from stage crashes is not cov...

Страница 113: ...Continuµm User Guide 109 To set up the external Contact Alert System 1 Turn off the microscope computer spectrometer and stage controller if installed power ...

Страница 114: ...Thermo Scientific 110 2 Lower the condenser fully Use the condenser focus knob ...

Страница 115: ...Continuµm User Guide 111 3 If the universal slide holder is in place remove it from the stage ...

Страница 116: ...e to the microscope is behind and under the stage 5 Power on the microscope stage controller illuminators computer monitor printer and other computer peripherals Contact Alert controller and then finally power on the spectrometer Be sure that at least 20 seconds elapses between powering on the microscope and powering on the spectrometer See Turning on power in the Preparing the Microscope chapter ...

Страница 117: ...r plate onto the stage The raised surface on the bottom of the sensor plate fits into the recess on the stage Caution Avoid shock hazard Before connecting the cable in the next step make sure the power cord for the Contact Alert system controller is disconnected from the AC source and that the controller power switch is in the OFF position 8 Choose System Configuration from the OMNIC Atlµs menu ...

Страница 118: ...onfiguration dialog box opens confirm that the Auto ATR is disabled the checkbox is not checked If Auto ATR is not checked click the Close button to close the dialog box without changes If it is click the checkbox to uncheck it click the Save button and then click the Close button to disable Auto ATR and close the dialog box ...

Страница 119: ...lose the dialog box 12 Click the Video Calibration button in the Video field See the OMNIC Atlµs Help system for more information about ATR calibration 13 Use the documentation that came with your external Contact Alert System and the OMNIC Atlµs documentation if you need information about using the system for data collection ...

Страница 120: ... about the molecular chemistry and orientation of surface films Applications of grazing angle microscopy include Analyzing contaminants on semiconductors Analyzing surface impurities on magnetic disks Analyzing imperfections on metallic surfaces Analyzing self assembled monolayers and Langmuir Blodgett films on metal surfaces Before you begin Make sure the GAO is properly installed and aligned on ...

Страница 121: ...the Sampling Mode switch on the front panel 2 Install the sample on an appropriate reflective substrate on a sample slide and place it on the microscope stage 3 Use the X Y knobs joystick or Move Stage tools to center the sample under the GAO Notice To avoid damaging the microscope be careful not to move the stage up into the GAO in the next steps Raise the stage slowly ...

Страница 122: ...Thermo Scientific 118 4 Using the stage focus knob slowly raise the stage so that the sample is approximately 2 mm from the bottom of the GAO 5 Slide the GAO mode selector to View ...

Страница 123: ...eck the Fast checkbox if you have difficulty controlling the stage using the very fine adjustment mode 7 While looking though the viewer or at the video image center and focus the sample image 8 Slide the GAO mode selector to the grazing position 9 Refocus the sample image 10 Adjust the Reflex aperture to define the area of interest on the sample ...

Страница 124: ...n adequate signal to noise ratio especially when band intensities are weak If you need help setting parameters find experiment in the OMNIC Help system Index and go to Using Experiment Setup 12 Choose collect Sample from the Collect menu to collect the sample spectrum Follow the instructions that appear on the screen 13 When you are prompted to collect the background spectrum position under the GA...

Страница 125: ...a collection is finished follow the instructions that appear on the screen to display the ratioed sample spectrum in a spectral window If Collect To a New Window is turned on in the Collect options the spectrum is displayed in a new spectral window automatically This spectrum shows the results of your analysis ...

Страница 126: ...Thermo Scientific 122 ...

Страница 127: ...he microscope Many accessories and other hardware options are available for your microscope These include filters and polarizers objectives and condensers sample stages viewers and eyepieces detectors and automation products See the documentation that came with the hardware for complete instructions Selecting a detector Continuµm microscopes are equipped with one single element detector A second o...

Страница 128: ...nsitivity specifications for each Detector Element size Spectral range Sensitivity D MCT A 50 µm 11 700 700 cm 1 60 x 109 W Hz cm 2 1 MCT A 250 µm 11 700 750 cm 1 60 x 109 W Hz cm 2 1 MCT A 250 µm 11 700 600 cm 1 42 x 109 W Hz cm 2 1 MCT B 250 µm 11 700 450 cm 1 7 x 10⁹ W Hz cm 2 1 InGaAs 250 µm 12 000 3800 cm 1 80 x 109 W Hz cm 2 1 Once you have selected the microscope as the sample compartment u...

Страница 129: ...or Quartz CaF2 XT KBr KBr CsI Solid substrate MCT A OK OK Best Best OK X MCT A OK OK Best Best OK X MCT B OK OK Best Best OK X InGaAs OK Best OK X X X Notes Best Optimum beamsplitter detector combination OK Compatible beamsplitter detector combination X Incompatible beamsplitter detector combination A ZnSe beamsplitter may also be used as a mid IR beamsplitter in extremely humid environments The n...

Страница 130: ...ight MCT B1 11 000 4002 ETC white light InGaAs1 12 000 3 800 ETC white light mid IR KBr MCT A 7 400 6002 ETC MCT A 7 400 6002 ETC MCT B 7 400 4002 ETC CsI3 MCT A 6 400 6002 ETC MCT A 6 400 6002 ETC MCT B 6 400 4002 ETC ZnSe MCT A 4 000 6502 ETC MCT A 4 000 6502 ETC MCT B 4 000 6502 ETC Notes 1 This spectral range reflects the combination of the ranges of the ETC and white light sources as well as ...

Страница 131: ...t is a simple matter to move a particular objective into the beam path Notice To prevent damage to the internal mirror avoid inserting your finger or any other object through the opening on the underside of an infrared objective or on the top of a condenser To move an objective into the beam path 1 Use the stage focus knob if necessary to lower the stage to provide adequate clearance for the objec...

Страница 132: ... Specifications and typical uses The table that follows lists many of the objectives that are available for use with a Continuµm microscope It includes a summary of their specifications and typical uses For transmission applications choose a condenser that matches magnification of the objective you are using ...

Страница 133: ...orking distance 11 mm Visual field of view 1400 µm Sample sizes 20 150 µm Refractive index compensation variable Used for transmission and reflection with variety of window thicknesses Optional Slide on ATR accessory 32X Reflachromat Numerical aperture 0 65 Working distance 7 mm Visual field of view 700 µm Sample sizes 10 70 µm Refractive index compensation variable Transmission and reflection No ...

Страница 134: ...th a refractive index equal to 1 49 the compensation ring settings correspond to the thickness of the substrate between the sample and the objective Check with the manufacturer if you are unsure about the refractive index of your substrate Thus if the sample is between 2 mm salt NaCl plates set the compensation rings to 2 0 If the sample is in a diamond compression cell set the compensation rings ...

Страница 135: ...te the knurled silver ring so that the number corresponding to the sample substrate thickness is aligned with the vertical white line Adjusting condenser compensation To adjust he compensation of the Reflachromat condenser rotate the wide knurled silver ring so that the indicator is aligned with the mark that corresponds to the sample substrate thickness ...

Страница 136: ...eld of view and image contrast The transmission and reflection illuminators each have a set of irises that control the field of view and image contrast The controls for the irises are located adjacent to the illuminator bulbs they serve ...

Страница 137: ...is Use the aperture iris to increase or decrease the contrast for best image quality You should not use it to control the light intensity Reflection irises The reflection illuminator has two circular irises that control the size of the illuminated field of view and the image contrast Field iris Use the field iris to adjust the size of the illuminated field of view It opens and closes concentricall...

Страница 138: ...ble By positioning the aperture while viewing the sample you ensure that what you see is what you get Each time the microscope is powered on the physical aperture initializes At the end of the initialization the physical aperture is synchronized with the virtual aperture that is tracked by software The Reflex aperture illumination control adjusts the illumination intensity of the aperture image in...

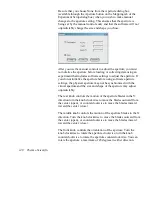
Страница 139: ...ed Reflex aperture the size shape and orientation of the Reflex aperture can be set by Loading an experiment file that has an aperture setting included in the saved parameters Using the mouse to point to a side or unmarked corner of the aperture box in the video pane and dragging it to the size shape and orientation you wish to use Setting the size and rotation in the Aperture Dimensions dialog Fo...

Страница 140: ...to match the box To rotate the aperture Drag a corner of the box Release the mouse button when the box is at the desired angle To change the size or shape of the aperture Use the mouse to point to a side or any corner of the box and drag it to the orientation you require Release the mouse button when the box is the desired size and shape Note If the post sample aperture image is not perfectly alig...

Страница 141: ...g data collection 2 Choose rectangular and then type the dimensions in micrometers you wish to use for the aperture in the X µm and Y µm text boxes When calculating dimensions for the aperture assume 0 of rotation with the X dimension parallel to the X axis 3 Type an angle of rotation in degrees you wish to use for the aperture in the Angle degrees text box The aperture can be rotated about the ce...

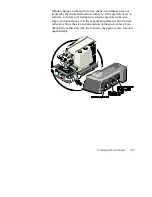
Страница 142: ...re for information about calibrating the aperture image for a specific objective magnification Using the manual controls to adjust the aperture Although your microscope is equipped with an automated Reflex aperture system you can adjust the aperture size shape or orientation manually This is useful for setting the aperture size while viewing the sample through the eye pieces Use the knobs on the r...

Страница 143: ...ture software If the aperture is set in software software will attempt to return the aperture to the size shape and orientation set in the experiment parameter prior to data collection Since the size and orientation of the aperture have been changed from that stored by the software the aperture may respond unpredictably ...

Страница 144: ... aperture settings the physical aperture may not be synchronized with the virtual aperture and the size and shape of the aperture may adjust unpredictably The rear knob controls the motion of the aperture blades in the Y direction turn the knob clockwise to move the blades outward from the center open or counterclockwise to move the blades inward toward the center close The middle knob controls th...

Страница 145: ...he software features see the documentation that came with the software 1 Select a sampling mode Check to be sure that Experiment Setup available through the Collect menu of OMNIC Atlµs is closed and then use the Sampling Mode switch on the front panel If your sample is suited to reflection techniques choose reflection mode If your sample is suited to transmission techniques choose transmission mod...

Страница 146: ...enser focus and alignment in the Preparing the Microscope chapter if you are not familiar with the procedures for focusing and aligning the condenser 2 Place the sample on the stage and position it within the field of view 3 Increase the reflection illumination so that it is brighter than normal viewing intensity ...

Страница 147: ...lower the stage to focus the dot of white light hitting the sample plane You may need to increase the reflection illumination further to see the dot clearly 5 Return the illumination to a comfortable viewing level 6 Select the autofocus AF tool from the OMNIC Atlµs tool palette The system automatically focuses on the sample plane ...

Страница 148: ...st use the aperture iris controls Decrease the field of view and create an artificial sharp contrast between the iris and the sample area use the field iris controls Note The autofocus feature moves the stage a maximum of 1 mm up or down to find the best image contrast You must be within 1 mm of focus for autofocus to succeed 7 Center the sample area of interest in the field of view and adjust the...

Страница 149: ...ues chapter For complete information on using the software features see the documentation that came with the software Notice Auto ATR contact monitors only the Contact Alert circuitry that is built into the microscope Always disable Auto ATR whenever an external Contact Alert System is connected to the microscope Damage resulting from stage crashes is not covered by warranty 1 Prepare the Contact ...

Страница 150: ...Thermo Scientific 146 3 Select a refractive glass objective or a 15X or 32X Reflachromat objective 4 Place the sample on the stage and position it within the field of view ...

Страница 151: ...Continuµm User Guide 147 5 Increase the reflection illumination so that it is brighter than normal viewing intensity ...

Страница 152: ...ting the sample plane You may need to increase the reflection illumination further to see the dot clearly 7 Return the illumination to a comfortable viewing level 8 While viewing the video image of the sample or looking through the eyepieces center and finely focus the sample image 9 Adjust the Reflex aperture Only the portion of the sample to be analyzed should be illuminated ...

Страница 153: ...d crystal is made It is not recommended but you can increase the contact pressure by using the software If you exceed the optimum contact pressure as determined by OMNIC Atlµs the software cannot caution you about potential damage to the crystal or sample from applying too much pressure when you increase the pressure beyond optimum Notice If you use the software to increase the contact pressure ap...

Страница 154: ...Thermo Scientific 150 ...

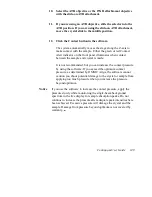
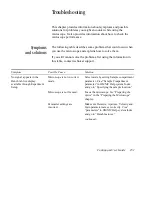
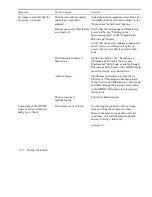
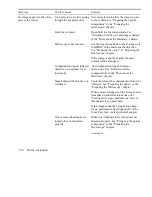
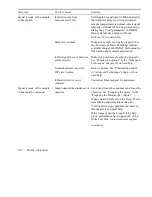
Страница 155: ...ormation in this table contact technical support Symptom Possible Cause Solution No signal appears in the Bench tab live display available through Experiment Setup Microscope is not in correct mode Select mode by setting Sample compartment parameter Find Sample Compartment parameter in OMNIC Help system Index and go to Specifying the sample location Microscope is not focused Focus the microscope S...

Страница 156: ...pe location Reflex aperture is closed Adjust aperture See Adjusting the aperture size shape and orientation in the More about the Hardware chapter If aperture does not respond turn microscope computer stage controller if installed and spectrometer power off and then power back on in the correct sequence See Turning on the microscope power in the Preparing the Microscope chapter if you are not fami...

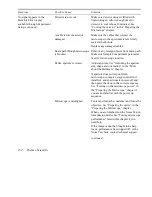
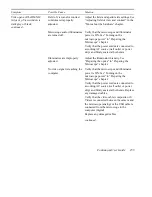
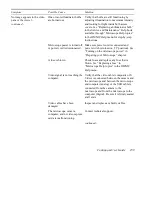
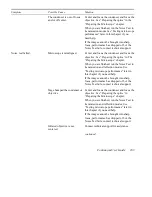
Страница 157: ...ensation rings to 0 Illumination is not adjusted properly Adjust Reflex aperture illuminator and appropriate aperture and field irises See Initializing the Reflex aperture in the Preparing the Microscope chapter Infrared polarizers are in place Remove the polarizers See Polarization options in the Advanced Techniques chapter Stage bumped the condenser or objective Center and focus the condenser an...

Страница 158: ...illuminator bulb s is burned out Replace the bulb s See Replacing an illuminator bulb in the Service and Maintenance Help book available through Microscope Help Topics in the OMNIC Help menu for step by step instructions A fuse is blown Check fuses and replace any fuse that is blown See Checking and changing fuses in the Service and Maintenance Help book available through Microscope Help topics in...

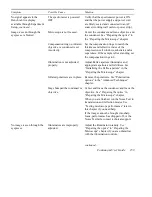
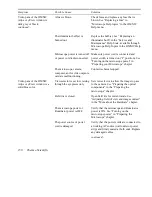
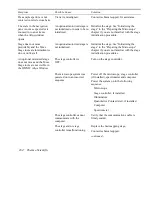
Страница 159: ... working AC source wall outlet or power strip and firmly seated at both ends Illuminators are improperly adjusted Adjust the illuminator intensity See Preparing the optics in Preparing the Microscope chapter No video signal is reaching the computer Verify that the microscope and illuminator power is ON See Turning on the microscope power in Preparing the Microscope chapter Verify that the power co...

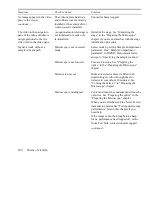
Страница 160: ...croscope camera computer and or video capture card are malfunctioning Contact technical support Video pane of the OMNIC Atlµs or µView window is a solid blue color View selector is set for viewing through the eyepieces only Set view selector to allow the image to pass to the camera See Preparing the optical components in the Preparing the microscope chapter Field iris is closed Open field iris for...

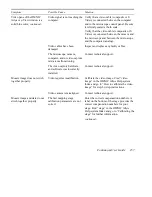
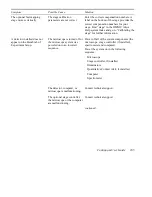
Страница 161: ...deo capture card are malfunctioning Contact technical support The video capture hardware and software was incorrectly installed Contact technical support Mosaic image does not stitch together properly Video requires recalibration Calibrate the video image Find video image in the OMNIC Atlµs Help system Index and go to How to calibrate the video image for step by step instructions Video camera is m...

Страница 162: ...t technical support Compensation ring on infrared objective or condenser is set incorrectly Set compensation ring and refocus microscope See Refractive index compensation in the More about the Hardware chapter Stage bumped the objective or condenser Center and focus the condenser and focus the objective See Preparing the optics in the Preparing the Microscope chapter When you are finished run the ...

Страница 163: ... power switch is turned on I position See Turning on the microscope power in Preparing your Microscope chapter A fuse is blown Check fuses and replace any fuse that is blown See Replacing a fuse in Microscope Help topics in the OMNIC Help menu Video signal is not reaching the computer Verify that the video cable composite or S Video is connected between the camera and the microscope and between th...

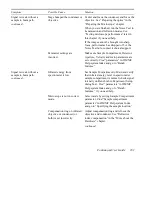
Страница 164: ... Select mode by setting Sample Compartment parameter Find Sample Compartment parameter in OMNIC Help system Index and go to Specifying the sample location Microscope is not focused Focus microscope See Preparing the optics in the Preparing the Microscope chapter Detector is not cool Make sure detector dewar is filled with liquid nitrogen Allow enough time for detector to cool about 10 minutes See ...

Страница 165: ...re set correctly Find parameters in OMNIC Help system Index and go to Bench features Signal is weak without a sample in beam path continued Infrared energy from spectrometer is low Set Sample Compartment to Main and verify that infrared energy level in spectrometer sample compartment is normal check signal intensity on Bench tab in Experiment Setup dialog box Find parameters in OMNIC Help system I...

Страница 166: ...tly Make sure polarizers are adjusted properly See Polarization options in the Advanced Techniques chapter if you need help Nomarski prisms used for DIC are in place Remove prisms See Polarization options in Advanced Techniques chapter if you need help Infrared objective is not centered Contact technical support for assistance Signal is weak with a sample in beam path continued Stage bumped the co...

Страница 167: ...ring the Microscope chapter When you are finished run the Noise Test in transmission and reflection modes See Testing microscope performance later in this chapter if you need help If the image cannot be brought into sharp focus performance has dropped off or the Noise Test fails contact technical support Stage bumped the condenser or objective Center and focus the condenser and focus the objective...

Страница 168: ...d Initialize the stage See Initializing the stage in the Preparing the Microscope chapter if you are not familiar with the stage initialization procedures An optional motorized stage does not move and the Move Stage tools are not visible in the OMNIC Atlµs Window The stage controller is OFF Turn on the stage controller The microscope system was powered on in an incorrect sequence Power off the mic...

Страница 169: ...does not appear on the Bench tab of Experiment Setup The microscope is turned off or the microscope system was powered on in an incorrect sequence Power off all of the system components the microscope stage controller if installed spectrometer and computer Power the system on in the following sequence Microscope Stage controller if installed Illuminators Quantitative Contact Alert if installed Com...

Страница 170: ... and or optional motorized stage controller is turned off Power off all of the system components the microscope stage controller spectrometer and computer Power the system on in the following sequence Microscope Stage controller if installed Illuminators Quantitative Contact Alert if installed Computer Spectrometer The message Failed to open communications All microscope and X Y automation has bee...

Страница 171: ...firmly seated at both ends Verify that the serial cable that connects the stage controller to the computer is attached firmly seated at both ends Verify that the cable that connects the stage controller to the stage is firmly seated at both ends Replace any damaged cables Verify that the serial ports identified in System Configuration match the hardware connections for the microscope and stage con...

Страница 172: ...tector is cooled and selected the objective is focused If you plan to run the test in transmission mode be sure the condenser is focused and centered See Cooling the detector in the Preparing the Microscope chapter and Selecting a detector in the More about hardware chapter if you are not familiar with the procedures for cooling and selecting the single element detector See Preparing the optical c...

Страница 173: ... this See the section entitled Initializing the Reflex aperture in the Preparing the Microscope chapter if you need help 2 Install the pinhole slide on the stage and use the joystick or software stage controls to position the gold mirror directly under the infrared objective ...

Страница 174: ...Thermo Scientific 170 3 Adjust the reflection illumination and Reflex aperture illumination to a comfortable viewing level ...

Страница 175: ...ain a sharp image of the mirror surface If you find it difficult to focus the image move the stage to position the edge of the mirror under the objective and focus on the edge Then move the stage so that the mirror is approximately centered under the objective ...

Страница 176: ...Thermo Scientific 172 5 Choose Experiment Setup from the Collect menu The Experiment Setup dialog box appears ...

Страница 177: ...before every sample Collect 32 scans for background Bench tab Sample Compartment Left µscope R OR Right µscope R Detector your single element detector Beamsplitter your compatible beamsplitter Source IR Accessory None Window None Max range limit 26001 Min range limit 25002 Notes 1 For InGaAs detectors set the Max range limit to 12000 cm 1 2 For InGaAs detectors set the Min range limit to 3800 cm 1...

Страница 178: ...e 95 Advanced tab Zero filling none Apodization Triangular Phase correction Mertz Set sample spacing based on spectral range On Set filters based on velocity On Single sided interferogram Off Reset bench at start of collection Off Start collection with external trigger Off Blanking regions None continued ...

Страница 179: ... Advanced mapping options On Save video frames in map file Off Prompt before collecting data On All others Off Rectangular On None Off Mapping focus options Do not focus during map collection Find experiment in the OMNIC Help system Index and go to Using Experiment Setup if you need help setting parameters 10 Choose OK to close the Experiment Setup dialog box 11 Choose Collect Sample from the Coll...

Страница 180: ...ors using a 15X objective For other detectors contact technical support to discuss areas of concern Older spectrometers that do not meet basic mid IR performance standards may have a higher noise level If the noise exceeds this level discuss the matter with your service representative Find noise in the OMNIC Help system Index and go to Measuring noise if you need more information about the Noise C...

Страница 181: ...e in the Preparing the Microscope chapter if you need help 2 Install the pinhole slide on the stage and use the joystick or software stage controls to position the large open hole directly under the infrared objective If you need help setting the parameters find experiment in the OMNIC Help system Index and go to Using Experiment Setup ...

Страница 182: ...tific 178 3 Adjust the transmission illumination to a comfortable viewing level 4 Focus and then center the condenser image See Condenser focus and alignment in the Preparing the Microscope chapter if you need help ...

Страница 183: ...Continuµm User Guide 179 5 Choose Experiment Setup from the Collect menu The Experiment Setup dialog box appears ...

Страница 184: ...efore every sample Collect 32 scans for background Bench tab Sample Compartment Left µscope T OR Right µscope T Detector your single element detector Beamsplitter your compatible beamsplitter Source IR Accessory None Window None Max range limit 26001 Min range limit 25002 Notes 1 For InGaAs detectors set the Max range limit to 12000 cm 1 2 For InGaAs detectors set the Min range limit to 3800 cm 1 ...

Страница 185: ...re 95 Advanced tab Zero filling none Apodization Triangular Phase correction Mertz Set sample spacing based on spectral range On Set filters based on velocity On Single sided interferogram Off Reset bench at start of collection Off Start collection with external trigger Off Blanking regions None continued ...

Страница 186: ...t is defined Profile type Chemigram Advanced mapping options On Save video frames in map file Off Prompt before collecting data On All others Off Rectangular On None Off Mapping focus options Do not focus during map collection If you need help setting the parameters find experiment in the OMNIC Help system Index and go to Using Experiment Setup 7 Choose OK to close the Experiment Setup dialog box ...

Страница 187: ... in a new spectral window automatically 11 Choose Noise from the Analyze menu The Noise dialog box appears The peak to peak noise should be less than 0 06 for MCT A detectors using a 15X objective and a 15X condenser For other detectors contact technical support to discuss areas of concern Older spectrometers that do not meet basic mid IR performance standards may have a high noise level If the no...

Страница 188: ...e and operating system requirements If you are unfamiliar with the minimum computer hardware and software requirements for your microscope system see the Computer requirements section in the manual entitled Preparing Your Site Contact technical support if you have further questions or wish information about supported computer upgrades 2 Power off the computer disconnect from the AC power source an...

Страница 189: ... instructions are provided in electronic form we recommend that you print a copy You will be powering off and restarting the computer during the remainder of this procedure Having a paper copy of all the manuals will simplify the installation Pay attention to any Display or other Control Panel setting requirements Service calls required to correct problems caused by incorrect installation and disp...

Страница 190: ...mputer does not require an add in USB2 card skip to step 11 10 Shutdown and power off the computer and install the USB 2 0 port add on card 11 Power on the computer and verify that all of the add on cards video capture serial port and USB 2 0 port have been recognized by the operating system and are working properly 12 Shut down and power off the computer and then if you are using a Magna IR or Ne...

Страница 191: ...background spectrum collecting with grazing angle objective 121 locating sampling position 55 setting sampling position 56 beamsplitter 125 blurry images 153 c collecting ATR spectra 91 background spectrum with grazing angle objective 121 spectra and maps 49 spectra with grazing angle objective 116 compensation for refractive index 130 condenser 131 objective 131 computer 184 condenser 127 adjusti...

Страница 192: ...isplacement 130 focus course and fine controls 35 knob 4 focusing 26 condenser 39 Reflex aperture image 135 front panel 5 Contact Alert indicators 96 g grazing angle objective 116 collecting background spectrum with 121 collecting spectrum with 120 GAO 116 scans required for signal to noise 120 i illumination adjusting 134 affected by Reflex aperture controls 134 iris 32 133 Reflex aperture 134 il...

Страница 193: ...0 preparing 28 p pinhole slide 34 polarizing infrared light 89 visible light 77 power switch positions 8 turning on or off 8 9 prism 81 purge 13 purge baffle 4 q quality check settings 67 quantitative Contact Alert 108 r recovering from viral attacks 184 Reflachromat 15x stage travel limits 23 32x stage travel limits 23 adjusting condenser for refractive index 131 adjusting objective for refractiv...

Страница 194: ...tting background collection location 55 setting sample collection location 56 stage collision damage 15 22 controller power 164 defining home position 55 does not move 164 focus knob 26 initializing 14 limiting travel 22 moving erratically 165 moving horizontally 25 moving vertically to focus 26 optional controller problems 166 positioning control locations 5 tools not visible 164 travel wizard 24...

Страница 195: ...Continuµm User Guide 191 w wire grid infrared polarizer 89 x XY axes calibration 18 initializing 18 z Z axis calibrating 15 course and fine control 35 zoom controlling with software 55 scale extreme 164 ...

Отзывы: