


6C-48 Power Assisted Steering System:
EPS Control Unit Removal and Installation
B931H26306002
Removal
1) Disconnect the battery (–) lead wire.
2) Remove the front fender. Refer to
“Front Side
Exterior Parts Removal and Installation: in
Section 9D”
.
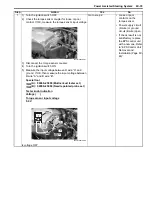
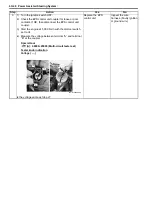
3) Disconnect the EPS control unit couplers.
4) Disconnect the torque sensor coupler (1).
5) Remove the clamp (2) and release the EPS motor
lead wire (3).
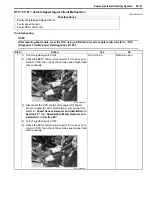
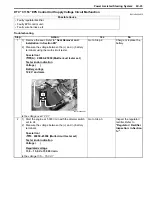
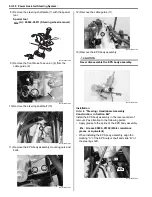
6) Release the clip part “A” of the EPS control unit plate
with the special tool.
Special tool
(A): 09942–83110 (Clip remover)
7) Remove the fastener (4) and bolt (5).
8) Remove the EPS control unit (6) along with the EPS
control unit plate (7).
9) Remove the EPS control unit (6) from the EPS
control unit plate (7) as shown in the EPS control unit
construction. Refer to “EPS Control Unit
Construction (Page 6C-47)”.
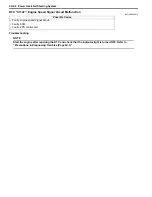
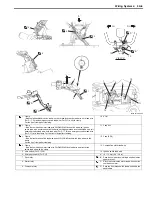
Installation
Install the EPS control unit in the reverse order of
removal. Pay attention to the following points:
• Tighten the EPS control unit mounting nut (1) to the
specified torque.
Tightening torque
EPS control unit mounting nut (a): 12 N·m (1.2
kgf-m, 8.5 lbf-ft)
I931H1630057-01
1
I931H1630097-01
2
3
I931H1630098-01
(A)
“A”
I931H1630059-02
6
7
5
4
I931H1630062-02
(a)
1
I931H1630063-01
Содержание 2009 LT-A500XP
Страница 2: ......
Страница 4: ......
Страница 14: ...00 9 Precautions ...
Страница 224: ...1E 3 Engine Lubrication System EXHAUST SIDE INTAKE SIDE I931H1150003 02 ...
Страница 304: ...1K 4 Exhaust System ...
Страница 346: ...2D 5 Wheels and Tires ...
Страница 438: ...3D 26 Propeller Shafts ...
Страница 482: ...4D 6 Parking Brake ...
Страница 512: ...5A 28 Automatic Transmission ...
Страница 582: ...9 ii Table of Contents Specifications 9E 7 Tightening Torque Specifications 9E 7 Special Tools and Equipment 9E 7 ...
Страница 624: ...Prepared by December 2008 Part No 99500 44080 03E Printed in U S A 624 ...