3D-20 Propeller Shafts:
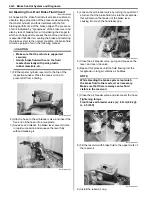
9) Remove the circlips (8) from the universal joint.
10) Remove the bearings (9) by tapping with the special
tool and remove the universal joint and propeller
shaft yoke.
Special tool
(A): 09913–70210 (Bearing installer set (10
– 75))
11) Shift into the reverse gear.
12) Unlock the lock-nut (10) with a chisel and remove
the lock-nut (10) and washer (11).
13) Remove the rear output shaft yoke (12).
Installation
CAUTION
!
The removed lock-nut, circlips and O-ring
must be replaced with new ones.
1) Apply grease to lip of the oil seal.
: Grease 99000–25160 (Water resistance
grease or equivalent)
2) Shift into the low gear.
3) Apply thread lock to the rear output shaft.
: Thread lock cement 99000–32030
(THREAD LOCK CEMENT SUPER 1303 or
equivalent)
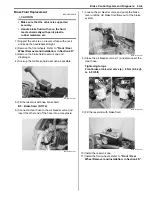
4) Install the rear output shaft yoke (1) and washer (2).
Tighten the rear output shaft nut (3) to the specified
torque.
Tightening torque
Rear output shaft nut (a): 100 N·m (10.0 kgf-m,
72.5 lbf-ft)
5) Lock the rear output shaft nut (3) with a center
punch.
8
8
I931H1340081-01
9
9
(A)
I931H1340082-01
10
12
11
I931H1340083-01
I931H1340084-01
1
2
(a)
3
I931H1340085-01
Содержание 2009 LT-A500XP
Страница 2: ......
Страница 4: ......
Страница 14: ...00 9 Precautions ...
Страница 224: ...1E 3 Engine Lubrication System EXHAUST SIDE INTAKE SIDE I931H1150003 02 ...
Страница 304: ...1K 4 Exhaust System ...
Страница 346: ...2D 5 Wheels and Tires ...
Страница 438: ...3D 26 Propeller Shafts ...
Страница 482: ...4D 6 Parking Brake ...
Страница 512: ...5A 28 Automatic Transmission ...
Страница 582: ...9 ii Table of Contents Specifications 9E 7 Tightening Torque Specifications 9E 7 Special Tools and Equipment 9E 7 ...
Страница 624: ...Prepared by December 2008 Part No 99500 44080 03E Printed in U S A 624 ...


