Replacing a controller fan module
83
2.
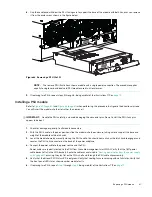
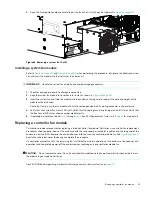
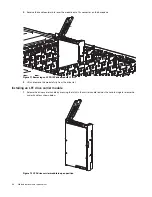
Grasp the fan module handle and carefully pull the fan out of its slot. See also the detail in
Figure 66 Removing a system fan (2 of 2)
Installing a system fan module
Refer to
when performing this procedure, but ignore the directional arrow.
You will insert the module into the slot rather than remove it.
IMPORTANT:
Handle the system fan carefully, and avoid damaging connectors.
1.
Check for damage, especially to all module connectors.
2.
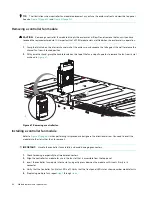
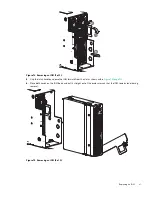
Align the system fan module for insertion into its slot, as shown in
3.
Insert the system fan, and slide the module into the enclosure, taking care to support the base and weight of the
module with both hands.
Gently, but firmly, push the fan module into its fully seated position with its mating connector in the enclosure.
4.
Verify that the System Fan Status LED is off. Verify that the cooling fans are spinning with no fail states. Verify that
the front panel LED states show no amber module faults.
5.
If replacing multiple fans, repeat
through
. See FRU Replacement Time Limit (
) for more details.
Replacing a controller fan module
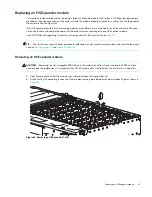
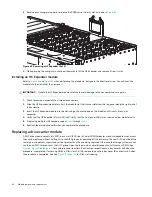
This section provides procedures for replacing a failed controller fan module. Illustrations in controller fan replacement
procedures show top panel views of the enclosure, with the fan properly oriented for insertion into the top panel of the
enclosure, near the IOMs. Remove the auxiliary bay cover
B
to access the controller module fan. See
Reattach auxiliary bay cover
B
when you complete the procedure.
If a controller channel fan fails, the remaining fan is sufficient to maintain operation of the enclosure. You need not halt
operations and completely power-off the enclosure when replacing only one controller module fan.
CAUTION:
Do not remove the cover from the controller fan module due to danger from electric shock inside. Return
the module to your supplier for repair.
See CAUTION bullets regarding
electrostatic discharge
and
anti-static protection
on
.


