background image

AP-120-MNT-CV Access Point Enclosure

Installation Guide

0510596-02

| July 2010

1

Introduction

The AP-120-MNT-CV access point (AP) enclosure is designed to provide some protection and limited 
access to an AP-121 or AP-125. The AP-120-MNT-CV can be installed directly over a standard junction 
box or on the ceiling, using ceiling tile rails. 

To install the AP-120-MNT-CV on a wall, proceed to 

"Installing the AP-120-MNT-CV on a Wall" on page 2

To install the AP-120-MNT-CV on a ceiling, proceed to 

"Installing the AP-120-MNT-CV on a Ceiling" on 

page 5

.

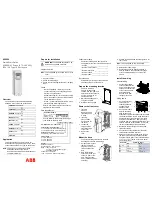
The AP-120-MNT-CV kit includes the following:

z

1x Plastic base, which attaches to the AP

z

1x Plastic cover, which hides the AP’s ports

z

1x Plastic outlet-mounting plate

z

1x 9/16" ceiling tile adapter

z

1x 15/16" ceiling tile adapter

Additional Tools

z

A screwdriver that matches the screws in the cover plate over the installed junction box

z

(Optional) flat-head screwdriver or similar tool to punch out antenna access cutouts

AP120_006

Cover

Base

Mounting

Plate

Parts not to scale

9/16" Rail Adapter

15/16" Rail Adapter

Содержание PowerConnect W-AP124

Страница 1: ...age 2 To install the AP 120 MNT CV on a ceiling proceed to Installing the AP 120 MNT CV on a Ceiling on page 5 The AP 120 MNT CV kit includes the following z 1x Plastic base which attaches to the AP z 1x Plastic cover which hides the AP s ports z 1x Plastic outlet mounting plate z 1x 9 16 ceiling tile adapter z 1x 15 16 ceiling tile adapter Additional Tools z A screwdriver that matches the screws ...

Страница 2: ...d junction box Figure 1 Save the screws Figure 1 Removing the installed cover plate b Identify the Ethernet cable or cables that will be connected to the AP 121 or AP 125 The Ethernet cable must have a male RJ 45 connector c Attach the mounting plate to the junction box using the screws from the removed cover plate Figure 2 Figure 2 Installing the mounting plate AP120_001 ...

Страница 3: ...own and out of the way 3 Place the AP into the base Figure 3 Place the top AP into the hooks on the base and align the back of the AP with the large opening in the base Figure 3 AP installed in the base 4 Connect the ethernet cable or cables to the AP Figure 4 Ensure that the cables do not obstruct any of the connection points between the base and the cover Figure 4 Cable path AP120_003 AP120_005 ...

Страница 4: ...ward until the pegs engage the slots at the top of the mounting holes c Optional Extend right and left antennas vertically before installing the cover d Once the AP is securely attached to mounting plate install the cover by placing the hooks on the cover into the holes on the bottom of the base Push the top of the cover towards to base until it clicks into places Figure 5 Completing the installat...

Страница 5: ...on a ceiling rail 1 Place the AP into the base Figure 7 Place the top AP into the hooks on the base and align the back of the AP with the large opening in the base Figure 7 AP Installed in base 2 Install the ceiling rail adapter that matches your ceiling rails Figure 8 Figure 8 Installing the AP ceiling rail adapter 3 AP120_007 ...

Страница 6: ... Ensure that the cables do not obstruct any of the connection points between the base and the cover Figure 9 Cable path 5 Hold the enclosure base next to the ceiling rail with the ceiling rail at approximately a 30 degree angle to the ceiling tile rail Figure 10 6 Rotate the enclosure base clockwise until the device clicks into place on the ceiling rail Figure 10 Installing the AP on a ceiling rai...

Страница 7: ...end The access is shown in Figure 11 8 Once the AP is secured to the ceiling rail install the cover by placing the hooks on the cover into the holes on the bottom of the base Figure 11 Push the top of the cover towards to base until it clicks into places Figure 11 Installing the cover Figure 12 Completed ceiling installation AP120_002 Access cutout ...

Страница 8: ...8 July 2010 0510596 02 2010 Aruba Networks Inc All rights reserved ...

Отзывы: