3
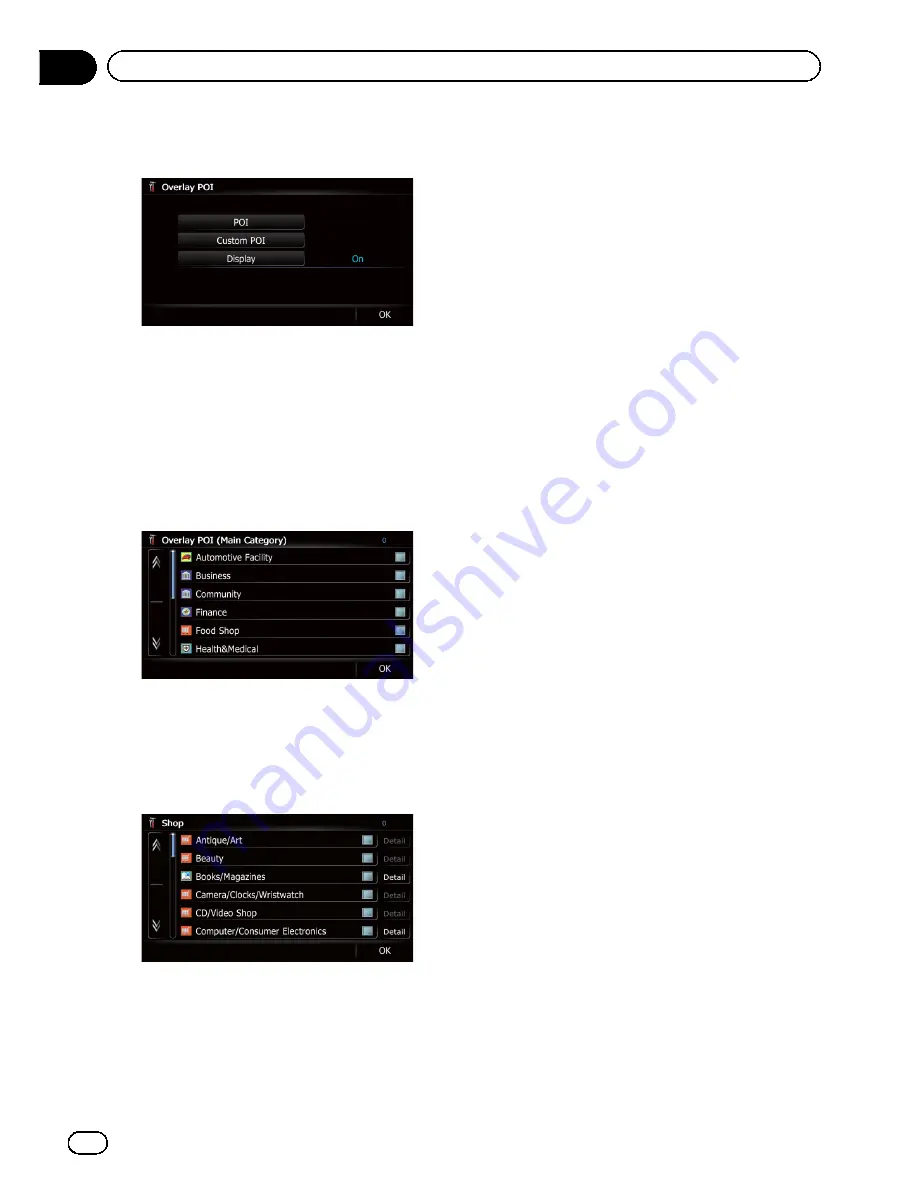
Touch [Display] to change the setting to
“
On
”
.
p
If you do not want to display the POI icon
on the map, touch [
Display
] to turn it
“
Off
”
. (Even if
“
Display
”
is turned
“
Off
”
,
the POI selection setting is retained.)
4
Touch [POI].
The
“
Overlay POI (Main Category)
”
screen
appears.
5
Touch the main category you want.
A list of subcategories under the selected
main category appears.
p
Categories that are already selected will
have a blue check mark.
6
Touch the subcategory to display.
A red check mark appears next to the selected
category. To cancel the selection, touch the
entry again.
If there are more detailed categories within the
subcategory, [
Detail
] is active. If you select
the subcategory that has more detailed cate
gories, all detailed categories within the sub
category is selected and [
Detail
] becomes
inactive.
#
Touch [
Detail
].
The detailed category list is displayed. Touch the
item and touch [
OK
] to complete selecting the
detailed categories you want to display.
p
When only a few types of the detailed cate
gories are selected, blue check marks will
appear.
7
Touch [OK].
The
“
Overlay POI (Main Category)
”
screen
returns.
If you want to select or deselect other items,
repeat these steps as many as necessary.
8
To finish the selection, touch [OK] in
the
“
Overlay POI (Main Category)
”
screen.
Displaying the customized POIs
Creating a customized POI is possible by
using the utility program AVIC FEEDS which is
available separately, on your PC. (AVIC FEEDS
will be available on our website.) Storing the
customized POI properly and inserting the SD
memory card enables the system to display
the icons on the map screen.
p
You can select up to 10 items from the sub
categories or detailed categories.
1
Insert an SD memory card into the SD
card slot.
=
For details of the operation, refer to
Insert
ing and ejecting an SD memory card
on
page 15.
2
Display the
“
Map Settings
”
screen.
=
For details, refer to
Displaying the
“
Map
Settings
”
screen
on page 154.
3
Touch [Overlay POI].
The
“
Overlay POI
”
screen appears.
En
158
Chapter
31
Customizing preferences
Содержание AVIC-X920BT
Страница 21: ...En 21 Chapter 02 Basic operation Basic operation ...
Страница 22: ...Screen switching overview 2 5 6 1 1 3 4 En 22 Chapter 03 How to use the navigation menu screens ...
Страница 253: ...Section ln_s_ta_I_la_ti_o_n GI Adjusting the microphone angle The microphone angle can be adjusted m J to iii r En ill ...
Страница 287: ......


