Setting a route to your
destination
1
Searching for a location.
=
For details, refer to Chapter 6.
After searching for the destination, the Loca
tion confirmation screen appears.
2
Touch [OK].
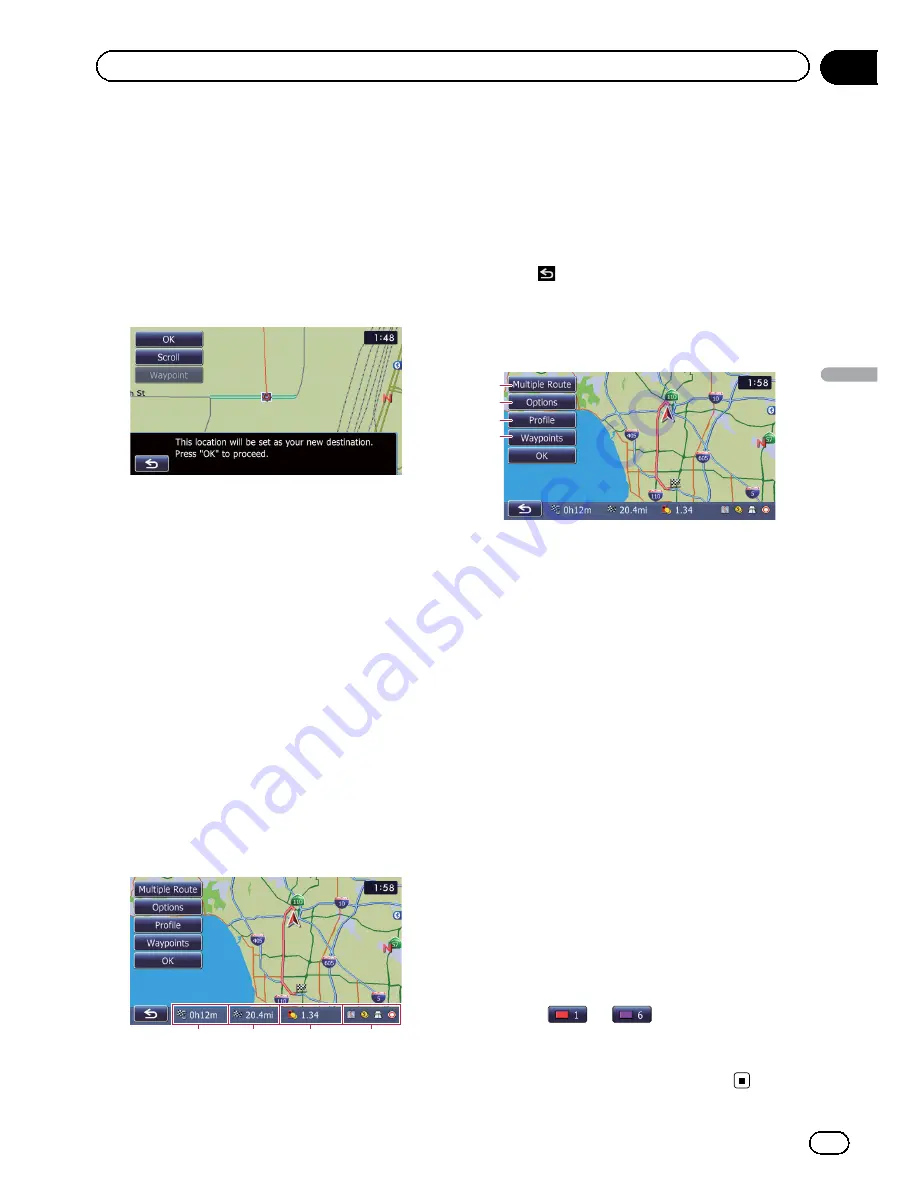
Location confirmation screen
The destination is set, and then route calcula
tion starts.
When the route calculation is completed,
Route confirmation screen appears.
p
If you press the
MODE
button during route
calculation, the calculation is canceled and
the map screen appears.
#
Touch [
Scroll
].
The map display changes to the scroll mode. You
can fine tune the location in the scroll mode, and
then you can set the location as your destination
or do various operations.
#
Touch [
Waypoint
].
The location is added to the
“
Waypoints List
”
screen.
p
If a destination is not set, [
Waypoint
] is not
available.
3
Touch [OK].
Route confirmation screen
1
2
3
4
Sets the displayed route as your route, and
starts the route guidance.
1
Travel time to your destination
2
Distance to the destination
3
Estimated fuel cost to your destination
=
For details, refer to
Inputting the fuel
consumption information for calculating
the fuel cost
on page 150.
4
Route calculation condition
#
Touch
.
The message confirming whether to cancel the
calculated route appears.
Touch [
Yes
] to cancel the calculated route, and
then the map screen appears.
2
3
1
4
1
Multiple Route
=
For details, refer to
Display multiple
routes
on this page.
2
Options
=
For details, refer to
Modifying the route
calculation conditions
on the next page.
3
Profile
=
For details, refer to
Checking the current
itinerary
on page 43.
4
Waypoints
=
For details, refer to
Editing waypoints
on
page 44.
Display multiple routes
You can select a desired route from multiple
route options. Calculated routes are shown in
different colors.
p
If you set waypoints, you cannot display
multiple routes.
1
Touch [Multiple Route] on the Route
confirmation screen.
Multiple route options appear.
2
Touch
to
.
Another route is displayed.
3
Touch [OK].
Route confirmation screen appears.
En
41
Chapter
07
After
the
location
is
decided
After the location is decided
Содержание AVIC-X920BT
Страница 21: ...En 21 Chapter 02 Basic operation Basic operation ...
Страница 22: ...Screen switching overview 2 5 6 1 1 3 4 En 22 Chapter 03 How to use the navigation menu screens ...
Страница 253: ...Section ln_s_ta_I_la_ti_o_n GI Adjusting the microphone angle The microphone angle can be adjusted m J to iii r En ill ...
Страница 287: ......


