5-10
Chapter 5: Troubleshooting and Testing
Importing ITS Configuration Files
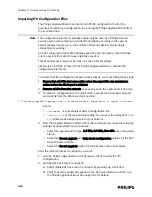
The Philips Upgrade Wizard can import an APC/AP configuration file (for the
purposes of restoring a configuration) by running the Philips Upgrade Wizard from
the command line.
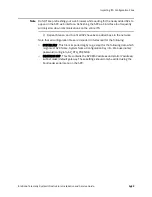
Note
The configuration file import process should only be done by a Phillips-trained
service person who is familiar with the ITS installation and only in the case of
system disaster recovery (i.e., the IntelliVue Telemetry System monitoring is
completely not working).
An APC configuration file is MAC address-specific and can only be imported back
into the system from which it was originally exported.
This import process must not be done on active clinical systems.
Use Revision A.00.16 (or later) of the Philips Upgrade Wizard to compete the
configuration file import.
To ensure that the configuration import works properly, you must follow these steps:
1. Ensure that all APCs that were online when the export file was created are
online before the file import is initiated.
2. Remove all APs from the network by powering down the appropriate PoE Units.
3. To import a configuration to the master APC, execute the following command
and options from the Windows command line:
where:
•
<filename>
is a previously exported configuration file.
•
-importDelay 20
is the typical delay setting. You may set the delay from
10
to
100
milliseconds as appropriate for your network.
4. After the Upgrade Wizard is started from the command line, make the following
settings as appropriate for your network:
• Select the appropriate AP type, 1.4 GHz, 2.4 GHz, Core APs when the wizard
starts.
• Select the Do not upgrade and Only check configuration options for the APC
when the wizard starts.
• Select the Do not upgrade option for the APs when the wizard starts.
After the import process is complete, you must:
1. Run the Philips Upgrade Wizard configuration check to verify the ITS
configuration.
2. Add the APs back onto the network:
a) Add multiple APs back onto the network by powering up a PoE Unit.
b) Verify that newly added APs appear in the APC web interface and then run
the Philips Upgrade Wizard. See page 3-41 for details.
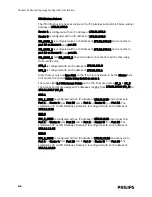
C:\TelemetryUpgrader\Upgrader.exe -writemasterconfig -importDelay 20 import <filename>
Содержание IntelliVue Telemetry System Infrastructure
Страница 8: ...viii Contents ...
Страница 14: ...xiv About This Guide ...
Страница 100: ...3 22 Chapter 3 Installing and Configuring the ITS Figure 3 10 APC Filter Configuration Screen ...
Страница 102: ...3 24 Chapter 3 Installing and Configuring the ITS Figure 3 11 BOOTP DHCP Server Configuration Screen ...
Страница 162: ...5 12 Chapter 5 Troubleshooting and Testing ...
Страница 168: ...A 6 Chapter A Installing Multiple ITSs at a Single Hospital Site ...
Страница 180: ...Index 8 Index ...


