56
Clip Management: Thumbnail and Clip Management
4
Press the SET button.
◆
NOTE:
• Selecting [THUMBNAIL INIT] opens a confirmation dialog.
Select [YES].
5
Press the MENU button to end processing.
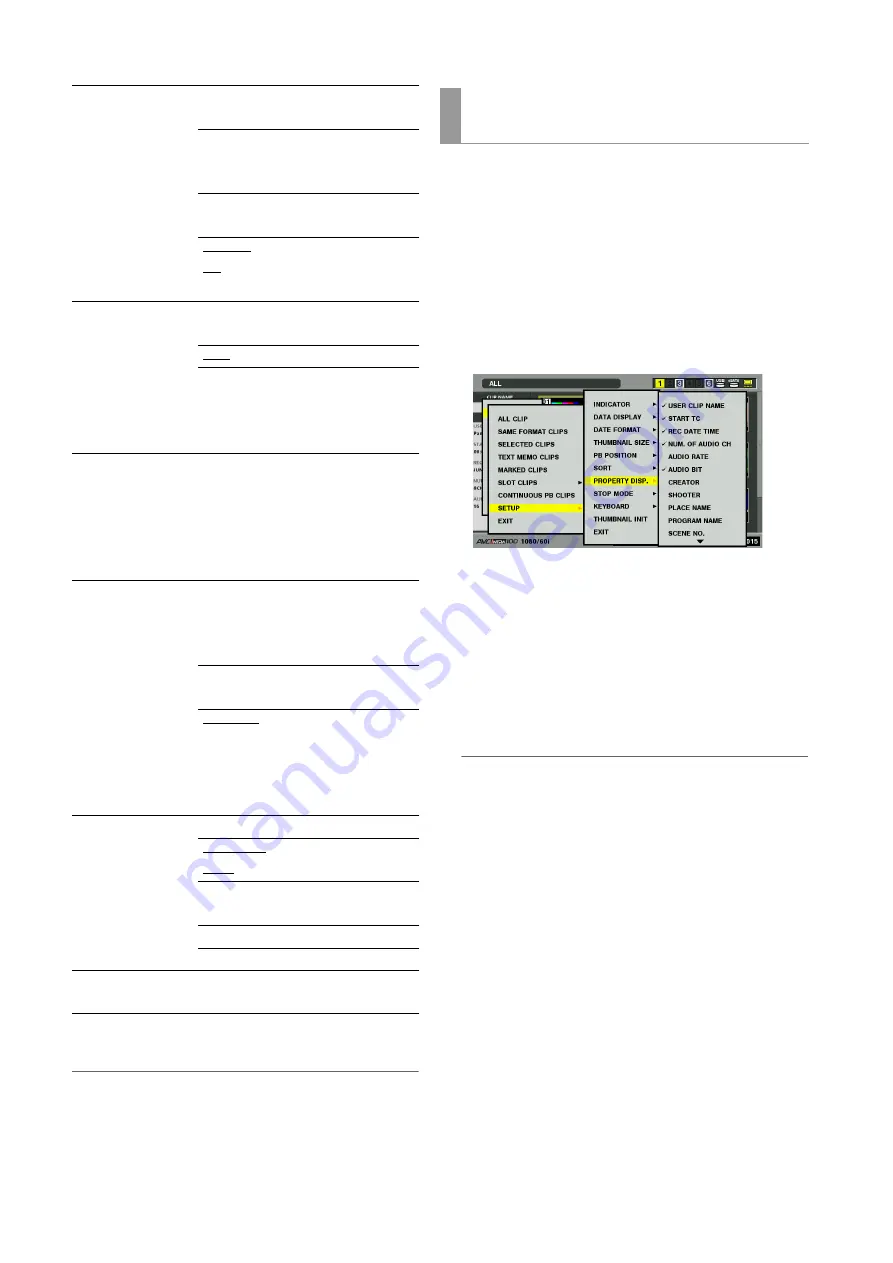
Select items that will appear in a simplified property display on
the left side of the thumbnail.
1
Open the thumbnail screen.
2
Press the MENU button.
3
Use the cursor buttons to choose [THUMBNAIL] –
[SET UP] – [PROPERTY DISP.].
4
Press the SET button to open the setup menu.
All selected items are indicated by check marks.
5
Press the SET button and add check marks for items
to be displayed.
Pressing the SET button causes unchecked items to be
checked and checked items to be unchecked.
◆
NOTE:
• Up to six items can appear simultaneously.
• When the sixth item has been selected, no other unchecked
item can be selected. Removing the check mark for a checked
item makes it possible to select other items.
PB POSITION:
Set the playback start position for
playback in the thumbnail screen.
RESUME
From the position
where playback was
stopped
THUMBNAIL
TC
From the time code of
thumbnail position
START
TC
From the start time
code (beginning of the
clip)
SORT:
Specify the order thumbnails
appear.
OFF
In recorded order
SLOT
Slot order (clips in the
same slot appear
according to date and
time of recording).
PROPERTY DISP.:
Specifies the items that will appear
in a simplified property display on
the left side of the thumbnail.
➝
Refer to “Selecting items to be
displayed as properties” (this
page).
STOP MODE:
Specifies whether or not to return to
the thumbnail screen after stopping
playback started from the
thumbnail screen.
STAY
Stays in playback
mode
RETURN
Return to thumbnail
mode
➝
Refer to “Playing
Back Clips” (page
59).
KEYBOARD:
Set the USB keyboard to be used.
QWERTY
(101)
QWERTY101 keyboard
QWERTY
(109)
QWERTY109 keyboard
AZERTY
AZERTY keyboard
QWERTZ
QWERTZ keyboard
THUMBNAIL INIT:
Return above settings to their
factory defaults (initial values).
Selecting items to be displayed as
properties


