Workflow of the Océ ClearConnect user panel
The home screen
Introduction
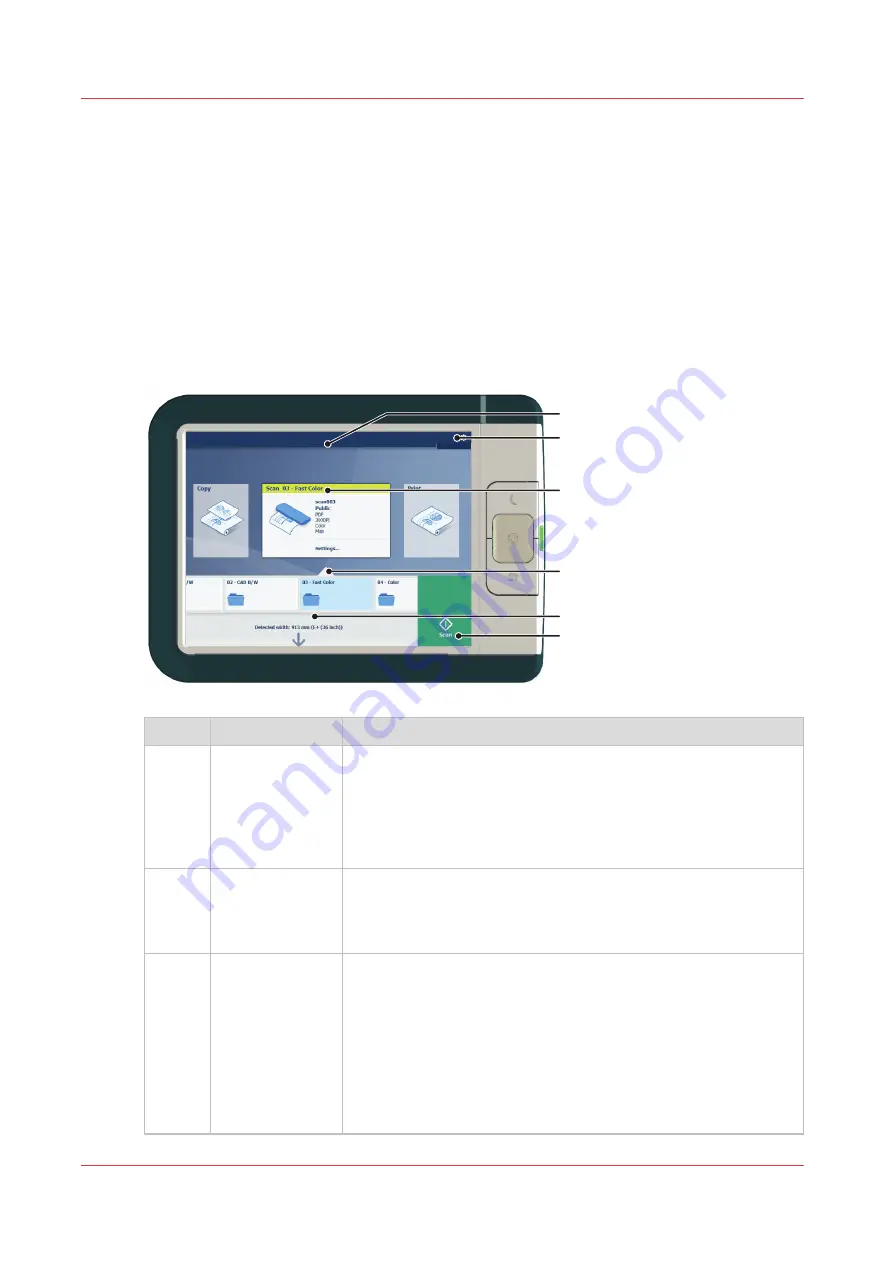
The default screen of the Océ ClearConnect user panel is the home screen.
From the home screen you can manage jobs and enter the system menu.
The home screen
1
4
2
3
5
6
No.
Component
Function
1.
dynamic bar and
[active job]
In the dynamic bar you can see the system states (warming-up,
cleaning etc.) and the active job when present.
• When you tap the active job the job queue appears with the list
of waiting jobs.
• When you tap the active job the pause tile appears, with which
you can pause the printing process.
2.
[system menu]
In the dynamic bar you can access the system menu.
• When you tap the system menu thumbnail, a new window
opens with a dynamic view of the system and printer setup set-
tings.
3.
[Copy tile]
[Scan tile]
[Print tile]
These dynamic tiles help you to perform copy, scan and print jobs.
Select the correct tile for your job:
• When you tap one of the tiles and then use the Smart Access,
you can start your job immediately.
• As default the print tile is selected, but when you insert an origi-
nal into the scanner the copy tile is selected. When you insert
an original and a USB key the scan tile is selected.
• When you want to make more settings you can tap the tile
twice, and a new window with presets or settings opens.
4
Workflow of the Océ ClearConnect user panel
32
Chapter 2 - Get to Know the Printing System
Содержание plotwave 345
Страница 1: ...Operation guide Oc PlotWave 345 365...
Страница 4: ......
Страница 10: ...Contents 10...
Страница 11: ...Chapter 1 Introduction...
Страница 16: ...Available documentation 16 Chapter 1 Introduction...
Страница 17: ...Chapter 2 Get to Know the Printing System...
Страница 40: ...The cloud 40 Chapter 2 Get to Know the Printing System...
Страница 41: ...Chapter 3 Define your Workflow with Oc Express WebTools...
Страница 136: ...Connect your mobile device to Oc Mobile WebTools 136 Chapter 3 Define your Workflow with Oc Express WebTools...
Страница 137: ...Chapter 4 Use the Printing System...
Страница 208: ...Clear the system 208 Chapter 4 Use the Printing System...
Страница 209: ...Chapter 5 Maintain the Printing System...
Страница 221: ...12 Close the media drawer Move and re adjust the printing system Chapter 5 Maintain the Printing System 221...
Страница 250: ...Calibrate the scanner 250 Chapter 5 Maintain the Printing System...
Страница 251: ...Chapter 6 License Management...
Страница 257: ...Chapter 7 Account Management...
Страница 264: ...Workflow on the printer 264 Chapter 7 Account Management...
Страница 265: ...Chapter 8 Solve Problems...
Страница 279: ...Chapter 9 Support...
Страница 287: ...Chapter 10 Contact...
Страница 299: ......


