3-17
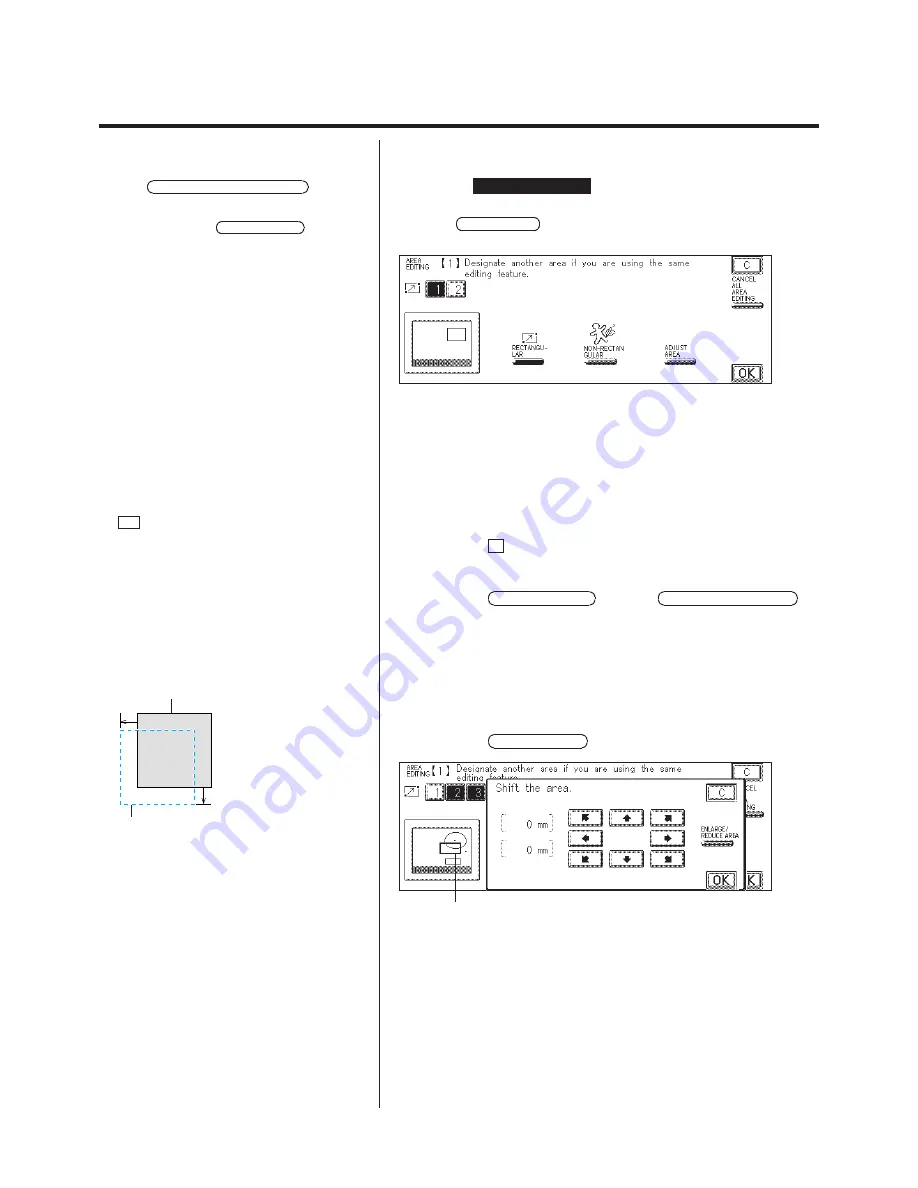
Area Designation (Using the Edit Pen)
2.
Press the
AREA EDITING
key for which you want to
change the settings.
Press the NEXT PAGE key to display the area editing on the next
screen.
P
If the CANCEL ALL AREA EDITING key is
pressed, the displayed areas are canceled.
P
(When the Area Editing key is pressed) if an
area is not already set, ADJUST AREA is shaded.
3.
Change the area if necessary.
N
To delete an area
1. Press the key corresponding to the number area to be deleted.
2. Press the C key.
N
To add an area
1. Press the RECTANGULAR key or the NON-RECTANGULAR
key.
2. Designate an area with an edit pen to be added.
N
To change an area position
1. Press the key corresponding to the number area to be changed.
The number corresponding to the area selected switches from
highlighted to normal text.
2. Press the ADJUST AREA key.
The area selected is displayed with a thick line
in the area monitor.
P
The key corresponding to the area number
selected changes from being reversed to the normal
state.
P
The display in the monitor does not change until
the OK key is pressed and the settings value are
confirmed.
P
Changes to the location are used when the
designated size was correct, but the copy was
mode with the position off-set. Corrections only to
the area can be made without moving the original
on the platen glass.
P
For the horizontal direction, movement to the
left is display by “+”, and movement to the right is
“–”.
P
For the vertical direction, movement up is
display by “–”, and movement down is “+”.
P
The width of movement is calculated as follows.
5mm
Edited area
5mm
Designated area
In this case, shift the original 5 mm to the left and 5
mm down.
Содержание Color System 200
Страница 2: ...ic...
Страница 67: ...1 55 Color Creation 4 Press the YES key 5 Press the OK key The display returns to the Color Creation display...
Страница 84: ...1 72...
Страница 190: ...4 48...
Страница 191: ...I 1 Offset Plate Original Creating Color Separations of a Color Original Index Index I 2...


