


5. Click the
Apply
button to save the settings.
A message appears, letting you know that the settings have been saved.
6. Click the
Back
button to return to the
E-Alert Settings
page.
7. In the
Summary of All Email Recipients
section, click the
Configure
link next to a recipient. This takes
you to the
Configure E-Alert Recipient
page.
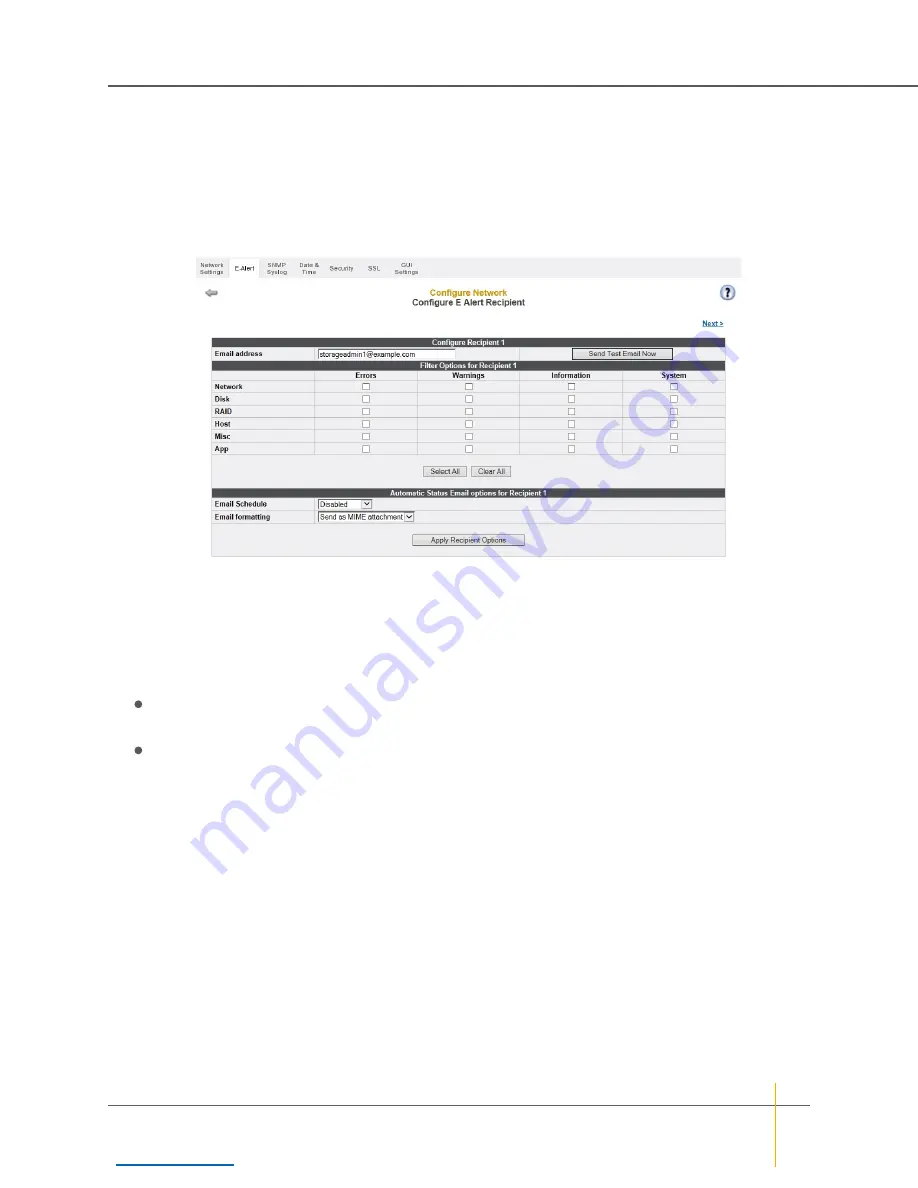
Figure 1-11:
Configure E-Alert Recipient
page
8. Enter a valid email address in the
Email address
field.
9. In the
Filter Options for Recipient N
section, check the boxes for the kinds of messages that you wish to
notify the recipient of by email.
10. In the
Automatic Status Email options for Recipient N
section, use the drop-down lists to select the
Email schedule
and
Email formatting
for automatic status emails for this recipient.
For
Email schedule
, you can select
Disabled
,
Every 1 Day
,
Every 2 Days
,
Every 4 Days
,
Weekly
, or
Monthly
.
For
Email formatting
, you can select
Send as MIME attachment
or
Send as plain-text email
.
11. Click the
Apply Recipient Options
button to save the changes.
A message appears, letting you know that the settings have been updated.
12. Select
Quick Start > Check List
to return to the
Quick Start Configuration Checklist
.
Chapter 1: Basic Setup — Set up the system
Nexsan High-Density Storage
User Guide
27