2-22 General Description
Power ON
To power on NEC Express5800/ft series, press the POWER switch (the one whose in-built LED
is lit).
Follow the steps below to turn on the power.
1.
Power on the display unit and other peripheral devices connected to the server.
CHECK:
If the power code is connected to a power controller like a UPS, ensure
that it is powered on.
2.
Remove the front bezel.
3.
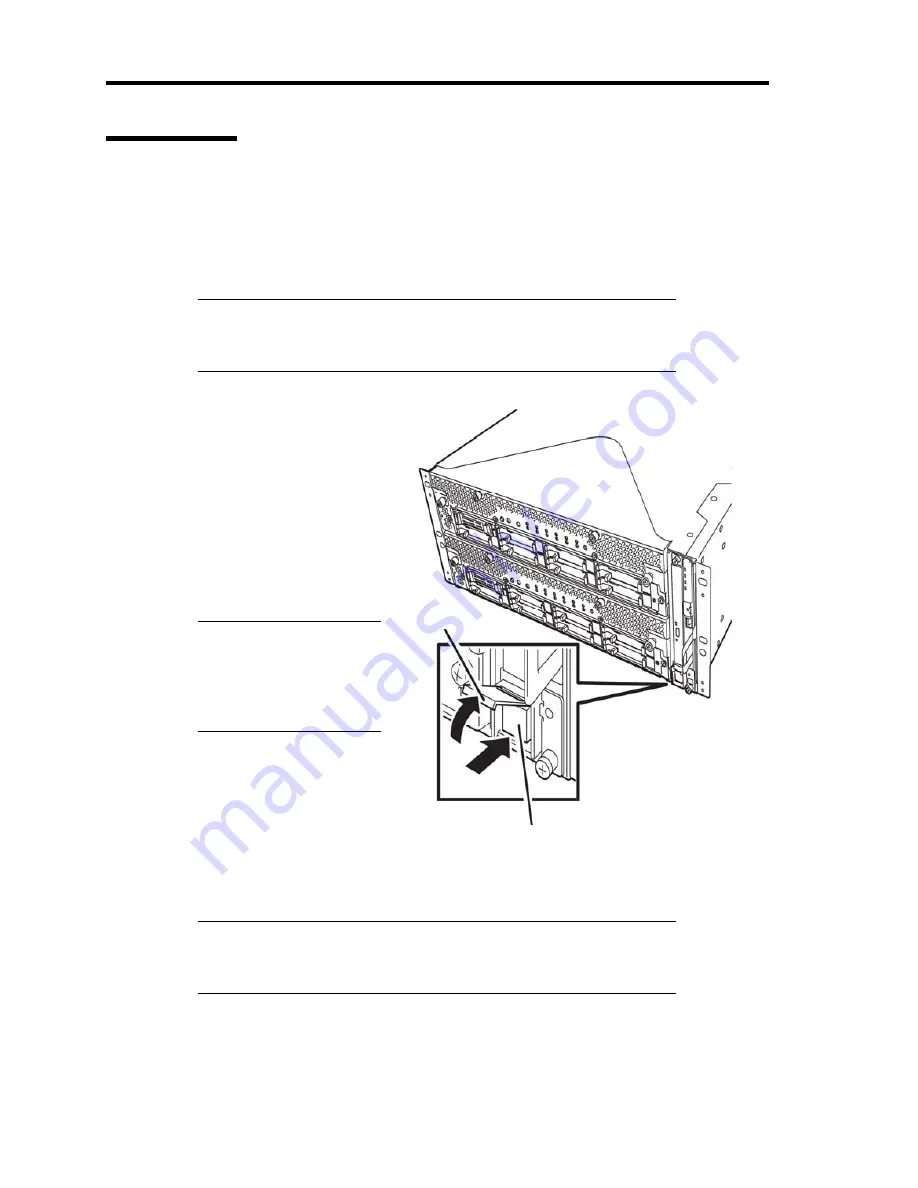
Press the power switch
located on the front panel.
Lift up the acrylic cover in
front of the power switch,
and press power switch of
the front panel.
After a while, the “NEC”
logo will appear on the
screen
.
IMPORTANT:
Do not turn off the power
before you see the “NEC”
logo and a character below
the logo.
While the “NEC” logo is
displayed on the screen,
NEC Express5800/ft series
is performing a power-on
self test (POST) to check
itself. For details, see
“POST Check” described later in this chapter.
Upon the completion of POST, OS will start.
CHECK:
If the server finds errors during POST, it will interrupt POST and
display the error message. See Chapter 7.
Power Switch
Acrylic cover
Содержание N8800-162F
Страница 10: ...this page is intentionally left blank...
Страница 43: ...General Description 2 7 Front View With front bezel attached With front bezel removed...
Страница 46: ...2 10 General Description Rear View R320a E4 R320b M4...
Страница 49: ...General Description 2 13 CPU IO Module 1 PCI Riser card R320a E4 top cover removed R320b M4 top cover removed...
Страница 90: ...3 22 Linux Setup and Operation This page is intentionally left blank...
Страница 107: ...System Configuration 4 17 Security Move the cursor onto Security to display the Security menu...
Страница 124: ...4 34 System Configuration Exit Move the cursor onto Exit to display the Exit menu...
Страница 136: ...4 46 System Configuration This page is intentionally left blank...
Страница 162: ...5 26 Installing and Using Utilities DIMM Allows the information of DIMM on the CPU modules to be viewed...
Страница 212: ...6 16 Maintenance This page is intentionally left blank...
Страница 236: ...7 24 Troubleshooting This page is intentionally left blank...
Страница 267: ...System Upgrade 8 31 PCI 2 PCI 1 R320a E4 R320b M4 PCI 2 PCI 1 PCI 4 PCI 3 Riser Card...


