System Upgrade 8-15
Installing CPU/IO Module
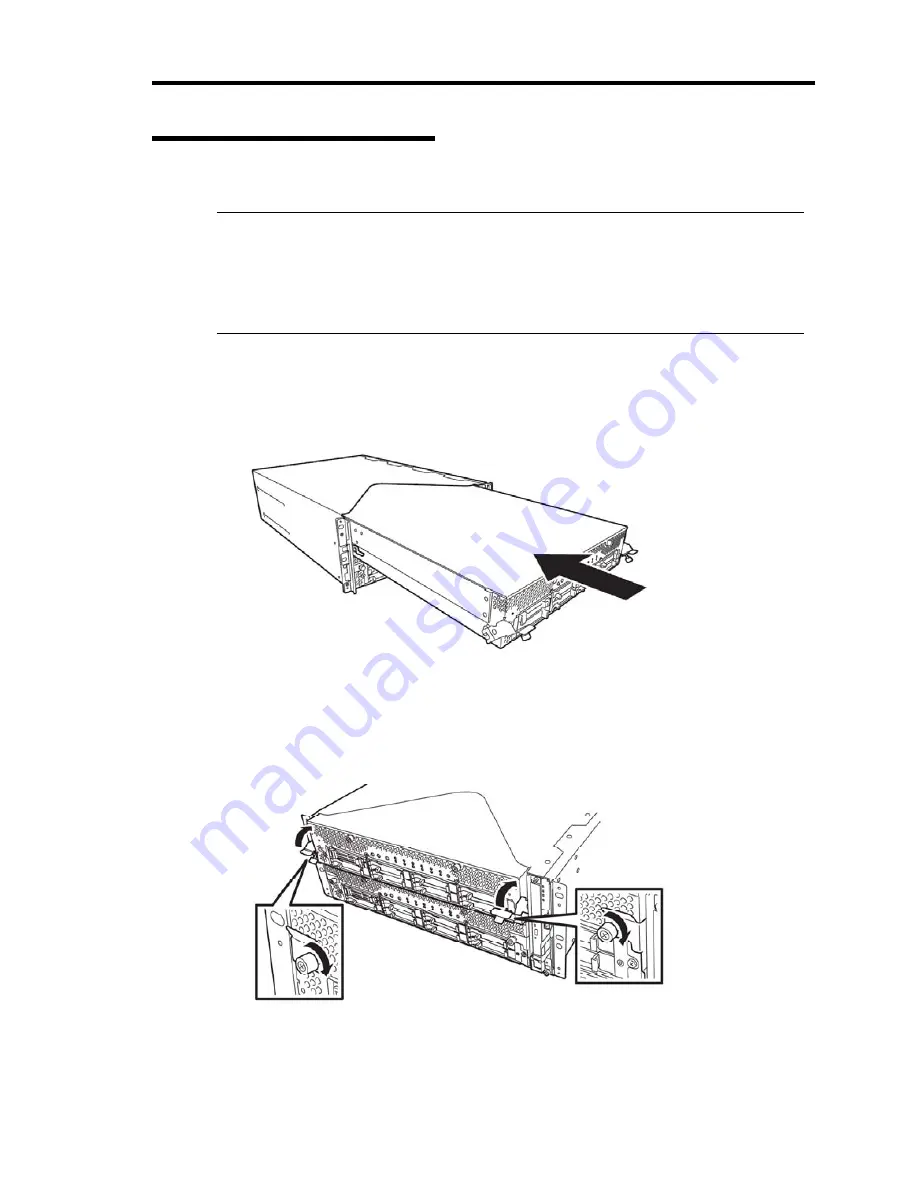
Follow the procedure below to install the CPU/IO module:
IMPORTANT:
Ensure to read “ANTI-STATIC MEASURES” and “PREPARING YOUR
SYSTEM FOR UPGRADE.”
Insert the black lever slowly and fasten the screws tightly. Be careful not to cause a
shock to the device at this time.
1.
Firmly hold the CPU/IO module with both hands and insert it into the rack.
Hold the CPU/IO module in such a way that its back panel connector faces the back of the
rack and engage the guides of the module and chassis, and insert it slowly.
2.
Push up the black levers placed on the left and right sides of the front of the CPU/IO module,
and fasten them with screws with pressing closer against the front face of the CPU/IO module.
Содержание N8800-162F
Страница 10: ...this page is intentionally left blank...
Страница 43: ...General Description 2 7 Front View With front bezel attached With front bezel removed...
Страница 46: ...2 10 General Description Rear View R320a E4 R320b M4...
Страница 49: ...General Description 2 13 CPU IO Module 1 PCI Riser card R320a E4 top cover removed R320b M4 top cover removed...
Страница 90: ...3 22 Linux Setup and Operation This page is intentionally left blank...
Страница 107: ...System Configuration 4 17 Security Move the cursor onto Security to display the Security menu...
Страница 124: ...4 34 System Configuration Exit Move the cursor onto Exit to display the Exit menu...
Страница 136: ...4 46 System Configuration This page is intentionally left blank...
Страница 162: ...5 26 Installing and Using Utilities DIMM Allows the information of DIMM on the CPU modules to be viewed...
Страница 212: ...6 16 Maintenance This page is intentionally left blank...
Страница 236: ...7 24 Troubleshooting This page is intentionally left blank...
Страница 267: ...System Upgrade 8 31 PCI 2 PCI 1 R320a E4 R320b M4 PCI 2 PCI 1 PCI 4 PCI 3 Riser Card...


