System Upgrade 8-29
14.
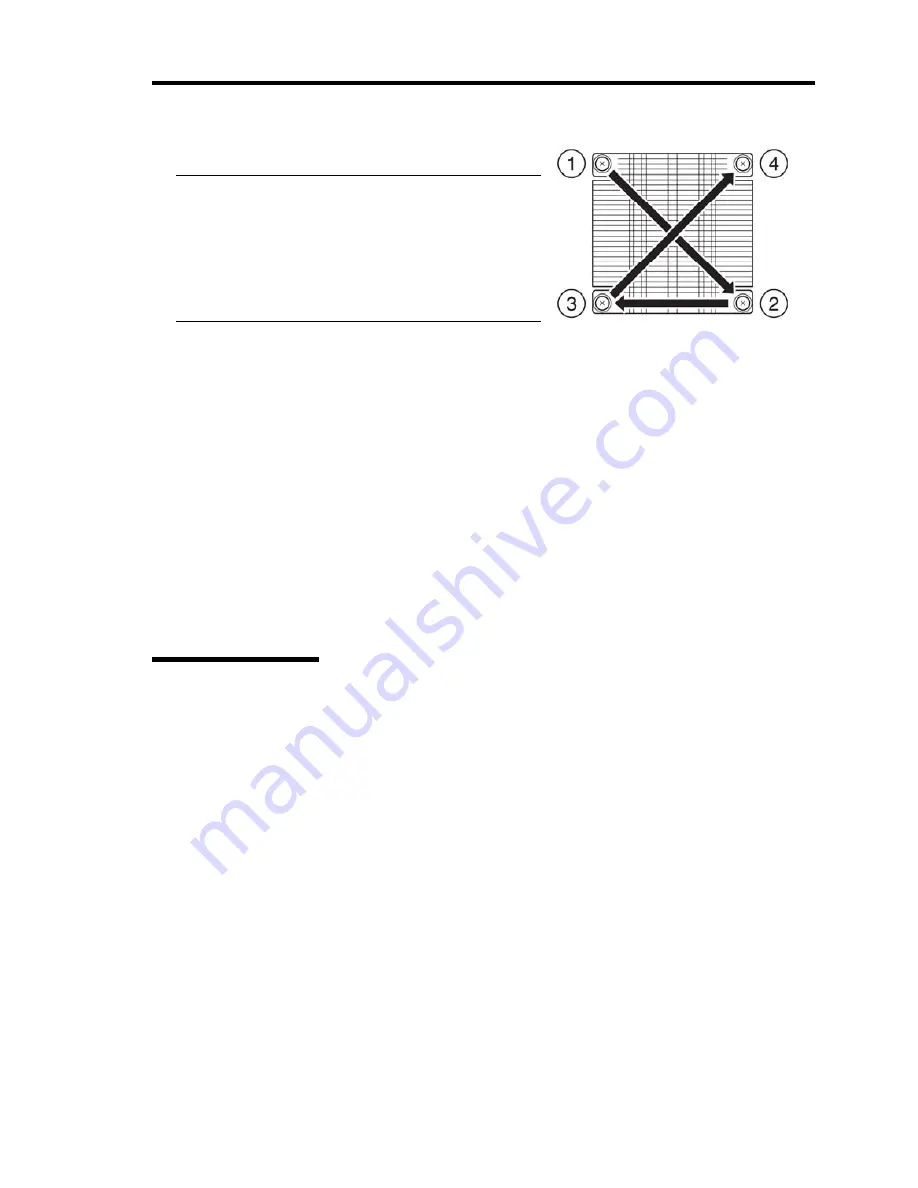
Fasten the heat sink with four screws..
IMPORTANT:
Check that you have tentatively fastened the screws
diagonally with the order on the right figure, and that
they the heat sink is attached to the CPU socket in
parallel level.
Then, tighten the screws with the order shown on the
right.
15.
Install the air duct.
16.
Refer to page 8-12 and install the CPU/IO module.
17.
Connect the power cord.
18.
Turn on the power by pressing the POWER switch.
19.
Verify that POST displays no error message. If an error message is displayed, write it down and
check it in the error message list on page 7-4.
Removing CPU
Removal of a heat sink and CPU is the reverse procedure of installation.
Содержание N8800-162F
Страница 10: ...this page is intentionally left blank...
Страница 43: ...General Description 2 7 Front View With front bezel attached With front bezel removed...
Страница 46: ...2 10 General Description Rear View R320a E4 R320b M4...
Страница 49: ...General Description 2 13 CPU IO Module 1 PCI Riser card R320a E4 top cover removed R320b M4 top cover removed...
Страница 90: ...3 22 Linux Setup and Operation This page is intentionally left blank...
Страница 107: ...System Configuration 4 17 Security Move the cursor onto Security to display the Security menu...
Страница 124: ...4 34 System Configuration Exit Move the cursor onto Exit to display the Exit menu...
Страница 136: ...4 46 System Configuration This page is intentionally left blank...
Страница 162: ...5 26 Installing and Using Utilities DIMM Allows the information of DIMM on the CPU modules to be viewed...
Страница 212: ...6 16 Maintenance This page is intentionally left blank...
Страница 236: ...7 24 Troubleshooting This page is intentionally left blank...
Страница 267: ...System Upgrade 8 31 PCI 2 PCI 1 R320a E4 R320b M4 PCI 2 PCI 1 PCI 4 PCI 3 Riser Card...


