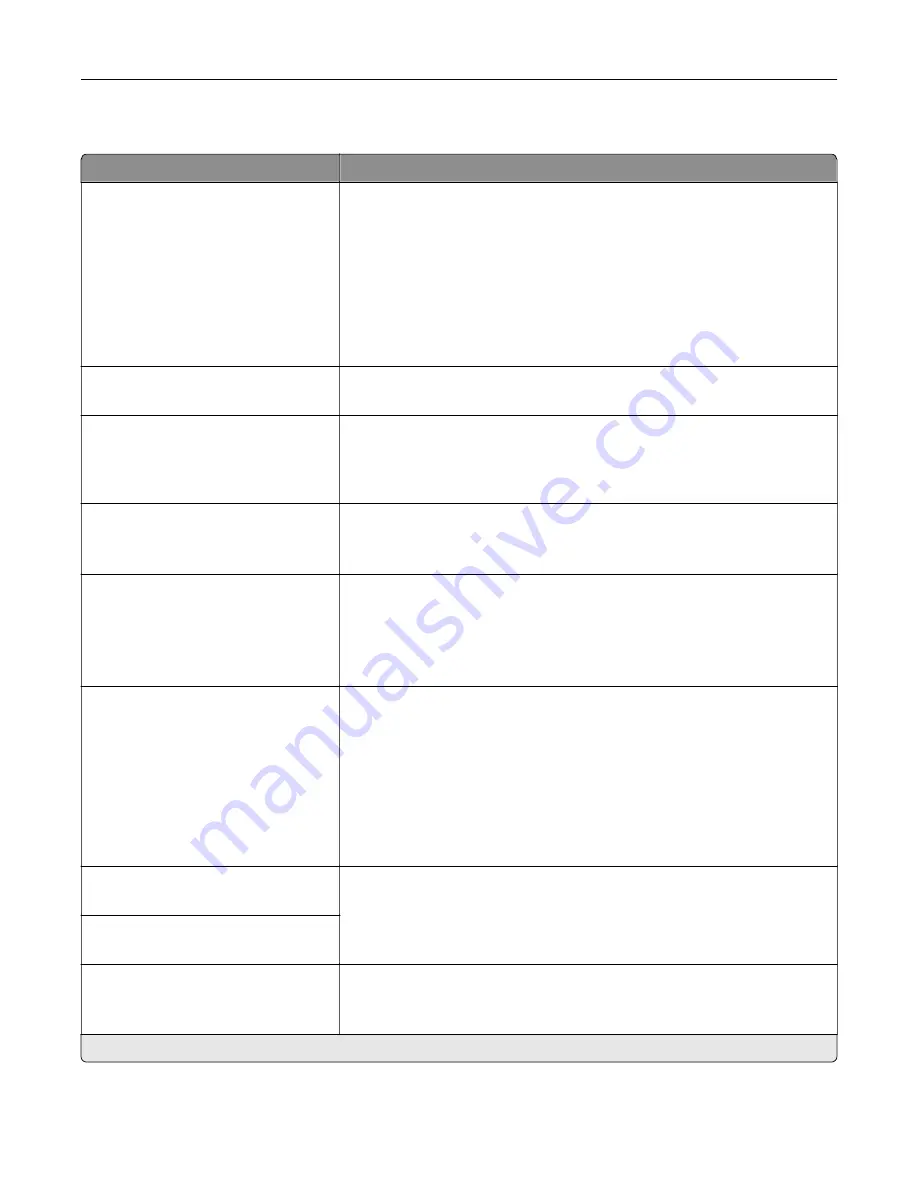
PCL
Menu item
Description
Font Source
Resident*
Disk
Download
Flash
Font Card
All
Select the source which contains the default font selection.
Notes:
•
Disk and Flash appear only when a non-defective, non-protected
hard disk or intelligent storage drive (ISD) that contains fonts is
installed.
•
Download appears only if downloaded fonts exist in the printer
memory.
•
Font Card appears only when an ISD is installed.
Font Name
[List of available fonts] (Courier*)
Select a font from the specified font source.
Symbol Set
[List of available symbol set] (10U
PC
‑
8*)
Specify the symbol set for each font name.
Note:
A symbol set is a set of alphabetic and numeric characters,
punctuation, and special symbols. Symbol sets support the different
languages or specific programs such as math symbols for scientific text.
Pitch
0.08–100.00 (10.00*)
Specify the pitch for fixed or monospaced fonts.
Note:
Pitch refers to the number of fixed
‑
space characters in a horizontal
inch of type.
Orientation
Portrait*
Landscape
Reverse Portrait
Reverse Landscape
Specify the orientation of text and graphics on the page.
Lines per Page
1–255
Specify the number of lines of text for each page printed through the PCL®
data stream.
Notes:
•
This menu item activates vertical escapement that causes the
selected number of requested lines to print between the default
margins of the page.
•
60 is the U.S. factory default setting. 64 is the international factory
default setting.
PCL5 Minimum Line Width
1–30 (2*)
Set the initial minimum stroke width.
PCLXL Minimum Line Width
1–30 (2*)
A4 Width
198 mm*
203 mm
Set the width of the logical page on A4
‑
size paper.
Note:
Logical page is the space on the physical page where data is
printed.
Note:
An asterisk (*) next to a value indicates the factory default setting.
Use printer menus
91
Содержание C4342
Страница 46: ...4 Install the ISP into its housing Set up install and configure 46 ...
Страница 47: ...5 Attach the housing to the controller board shield Set up install and configure 47 ...
Страница 48: ...6 Connect the ISP extended cable to the ISP connector in the controller board Set up install and configure 48 ...
Страница 52: ...Set up install and configure 52 ...
Страница 55: ...Set up install and configure 55 ...
Страница 56: ...3 Install the wireless module into its housing Set up install and configure 56 ...
Страница 57: ...4 Attach the wireless module to the controller board shield Set up install and configure 57 ...
Страница 58: ...5 Connect the wireless assembly to the ISP connector in the controller board Set up install and configure 58 ...
Страница 122: ...Replacing parts and supplies Replacing a toner cartridge 1 Open door B Maintain the printer 122 ...
Страница 123: ...2 Remove the used toner cartridge 3 Unpack the new toner cartridge Maintain the printer 123 ...
Страница 124: ...4 Insert the new toner cartridge 5 Close door B Maintain the printer 124 ...
Страница 125: ...Replacing the black imaging unit 1 Open door B Maintain the printer 125 ...
Страница 127: ...3 Remove the toner cartridges Maintain the printer 127 ...
Страница 128: ...4 Disconnect the imaging kit cable Maintain the printer 128 ...
Страница 132: ...9 Insert the imaging kit Maintain the printer 132 ...
Страница 134: ...Replacing the color imaging kit 1 Open door B Maintain the printer 134 ...
Страница 136: ...3 Remove the toner cartridges Maintain the printer 136 ...
Страница 137: ...4 Disconnect the imaging kit cable Maintain the printer 137 ...
Страница 138: ...5 Remove the used imaging kit Maintain the printer 138 ...
Страница 141: ...8 Insert the black imaging unit into the new imaging kit Maintain the printer 141 ...
Страница 142: ...9 Insert the new imaging kit Maintain the printer 142 ...
Страница 144: ...Replacing the waste toner bottle 1 Open door B Maintain the printer 144 ...
Страница 153: ...2 Remove the used separator bracket 3 Unpack the new separator bracket Maintain the printer 153 ...
Страница 200: ...Jam locations 1 Standard bin 2 Door A 3 Trays 4 Multipurpose feeder Troubleshoot a problem 200 ...
Страница 203: ...2 Remove the jammed paper Note Make sure that all paper fragments are removed 3 Open door A1 Troubleshoot a problem 203 ...


