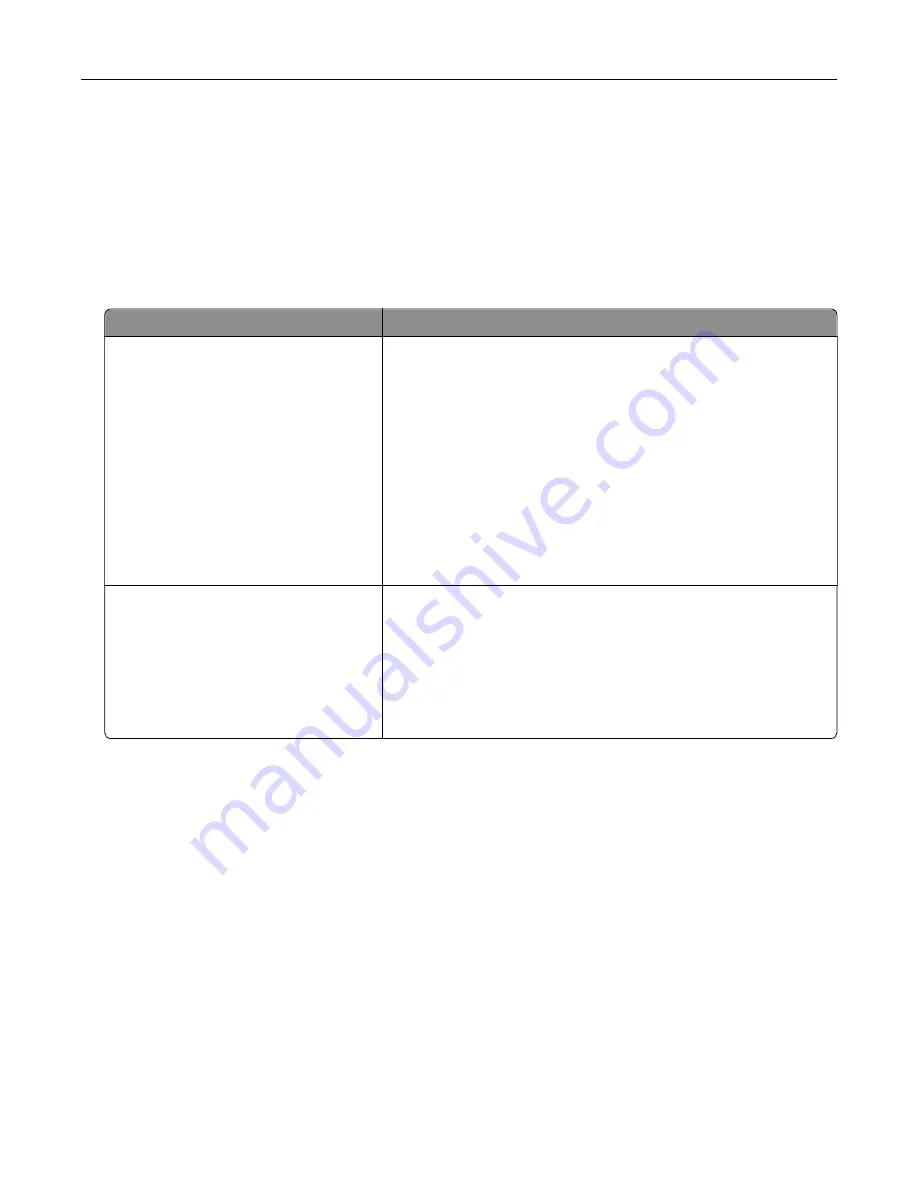
Color quality problems
Modifying the colors in printed output
1
From the home screen, touch
Settings
>
>
Quality
>
Advanced Imaging
>
Color Correction
.
2
In the Color Correction menu, touch
Manual
>
Color Correction Content
.
3
Choose the appropriate color conversion setting.
Object type
Color conversion tables
RGB Image
RGB Text
RGB Graphics
•
Vivid—Produces brighter, more saturated colors and may be
applied to all incoming color formats.
•
sRGB Display—Produces an output that approximates the colors
shown on a computer monitor. Black toner usage is optimized for
printing photographs.
•
Display
‑
True Black—Produces an output that approximates the
colors shown on a computer monitor. This setting uses only black
toner to create all levels of neutral gray.
•
sRGB Vivid—Provides an increased color saturation for the sRGB
Display color correction. Black toner usage is optimized for
printing business graphics.
•
Off
CMYK Image
CMYK Text
CMYK Graphics
•
US CMYK—Applies color correction to approximate the
Specifications for Web Offset Publishing (SWOP) color output.
•
Euro CMYK—Applies color correction to approximate Euroscale
color output.
•
Vivid CMYK—Increases the color saturation of the US CMYK color
correction setting.
•
Off
FAQ about color printing
What is RGB color?
RGB color is a method of describing colors by indicating the amount of red, green, or blue used to produce
a certain color. Red, green, and blue light can be added in various amounts to produce a large range of colors
observed in nature. Computer screens, scanners, and digital cameras use this method to display colors.
What is CMYK color?
CMYK color is a method of describing colors by indicating the amount of cyan, magenta, yellow, and black
used to reproduce a particular color. Cyan, magenta, yellow, and black inks or toners can be printed in various
amounts to produce a large range of colors observed in nature. Printing presses, inkjet printers, and color
laser printers create colors in this manner.
How is color specified in a document to be printed?
Software programs are used to specify and modify the document color using RGB or CMYK color
combinations. For more information, see the software program Help topics.
Troubleshoot a problem
216
Содержание C4342
Страница 46: ...4 Install the ISP into its housing Set up install and configure 46 ...
Страница 47: ...5 Attach the housing to the controller board shield Set up install and configure 47 ...
Страница 48: ...6 Connect the ISP extended cable to the ISP connector in the controller board Set up install and configure 48 ...
Страница 52: ...Set up install and configure 52 ...
Страница 55: ...Set up install and configure 55 ...
Страница 56: ...3 Install the wireless module into its housing Set up install and configure 56 ...
Страница 57: ...4 Attach the wireless module to the controller board shield Set up install and configure 57 ...
Страница 58: ...5 Connect the wireless assembly to the ISP connector in the controller board Set up install and configure 58 ...
Страница 122: ...Replacing parts and supplies Replacing a toner cartridge 1 Open door B Maintain the printer 122 ...
Страница 123: ...2 Remove the used toner cartridge 3 Unpack the new toner cartridge Maintain the printer 123 ...
Страница 124: ...4 Insert the new toner cartridge 5 Close door B Maintain the printer 124 ...
Страница 125: ...Replacing the black imaging unit 1 Open door B Maintain the printer 125 ...
Страница 127: ...3 Remove the toner cartridges Maintain the printer 127 ...
Страница 128: ...4 Disconnect the imaging kit cable Maintain the printer 128 ...
Страница 132: ...9 Insert the imaging kit Maintain the printer 132 ...
Страница 134: ...Replacing the color imaging kit 1 Open door B Maintain the printer 134 ...
Страница 136: ...3 Remove the toner cartridges Maintain the printer 136 ...
Страница 137: ...4 Disconnect the imaging kit cable Maintain the printer 137 ...
Страница 138: ...5 Remove the used imaging kit Maintain the printer 138 ...
Страница 141: ...8 Insert the black imaging unit into the new imaging kit Maintain the printer 141 ...
Страница 142: ...9 Insert the new imaging kit Maintain the printer 142 ...
Страница 144: ...Replacing the waste toner bottle 1 Open door B Maintain the printer 144 ...
Страница 153: ...2 Remove the used separator bracket 3 Unpack the new separator bracket Maintain the printer 153 ...
Страница 200: ...Jam locations 1 Standard bin 2 Door A 3 Trays 4 Multipurpose feeder Troubleshoot a problem 200 ...
Страница 203: ...2 Remove the jammed paper Note Make sure that all paper fragments are removed 3 Open door A1 Troubleshoot a problem 203 ...


