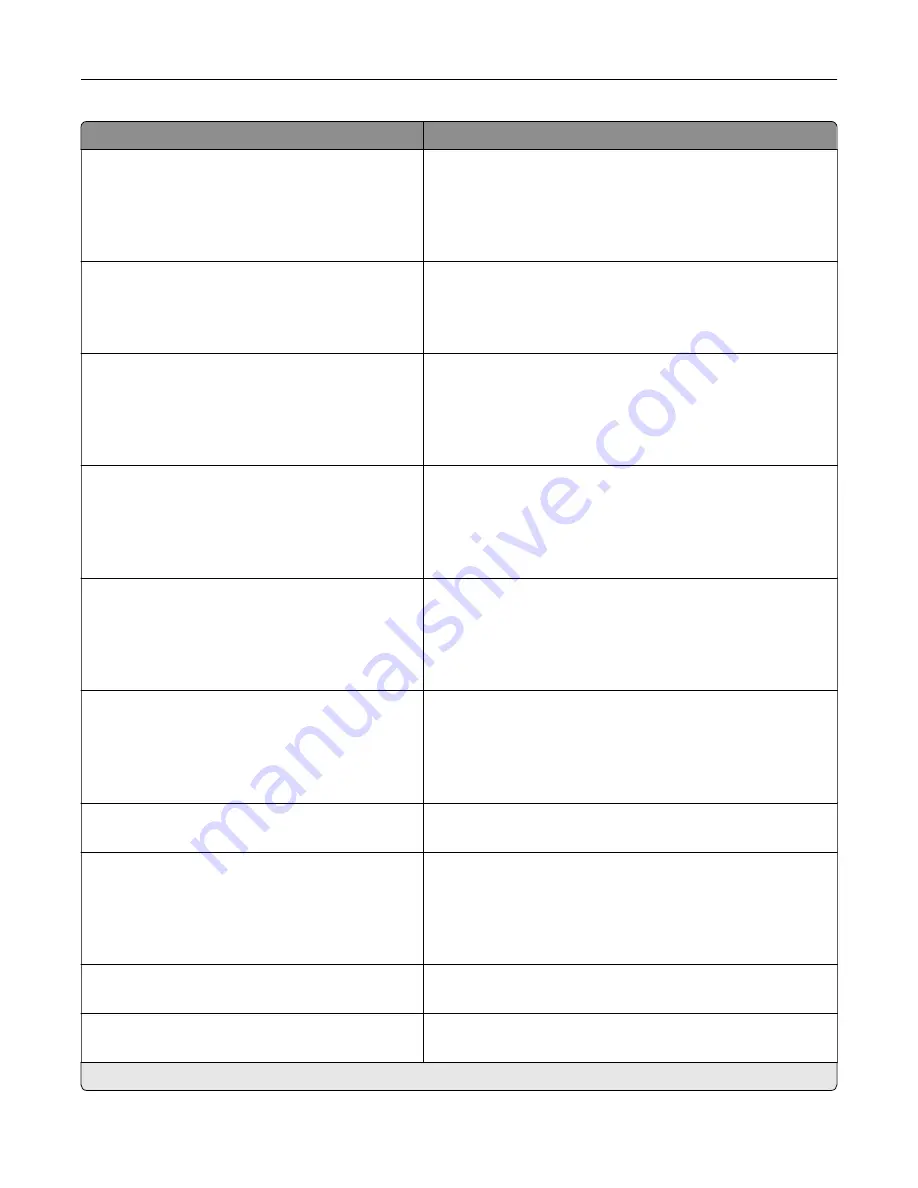
Menu item
Description
Tray Configuration
Show Tray Insert Message
Off
Only for unknown sizes*
Always
Display a message that lets the user change the paper size and
paper type settings after inserting the tray.
Tray Configuration
A5 Loading
Short Edge
Long Edge*
Determine the default loading orientation for the A5 size paper
in all paper sources.
Tray Configuration
Paper Prompts
Auto*
Multipurpose Feeder
Manual Paper
Set the paper source that the user fills when a prompt to load
paper appears.
Note:
For Multipurpose Feeder to appear, in the Paper menu,
set Configure MP to Cassette.
Tray Configuration
Envelope Prompts
Auto*
Multipurpose Feeder
Manual Envelope
Set the paper source that the user fills when a prompt to load
envelope appears.
Note:
For Multipurpose Feeder to appear, in the Paper menu,
set Configure MP to Cassette.
Tray Configuration
Action for Prompts
Prompt user*
Continue
Use current
Set the printer to resolve paper- or envelope-related change
prompts.
Reports
Menu Settings Page
Event Log
Event Log Summary
HealthCheck Statistics
Print reports about printer menu settings, status, and event
logs.
Supply Usage And Counters
Clear Supply Usage History
Reset the supply usage history to the factory default level.
Supply Usage And Counters
Reset Black Cartridge Counter
Reset Cyan Cartridge Counter
Reset Magenta Cartridge Counter
Reset Yellow Cartridge Counter
Reset the counter after installing a new cartridge.
Supply Usage And Counters
Reset Black Imaging Unit Counter
Reset the counter after installing a new black imaging unit.
Supply Usage And Counters
Reset Color Imaging Kit Counter
Reset the counter after installing a new color imaging kit.
Note:
An asterisk (*) next to a value indicates the factory default setting.
Use printer menus
81
Содержание C4342
Страница 46: ...4 Install the ISP into its housing Set up install and configure 46 ...
Страница 47: ...5 Attach the housing to the controller board shield Set up install and configure 47 ...
Страница 48: ...6 Connect the ISP extended cable to the ISP connector in the controller board Set up install and configure 48 ...
Страница 52: ...Set up install and configure 52 ...
Страница 55: ...Set up install and configure 55 ...
Страница 56: ...3 Install the wireless module into its housing Set up install and configure 56 ...
Страница 57: ...4 Attach the wireless module to the controller board shield Set up install and configure 57 ...
Страница 58: ...5 Connect the wireless assembly to the ISP connector in the controller board Set up install and configure 58 ...
Страница 122: ...Replacing parts and supplies Replacing a toner cartridge 1 Open door B Maintain the printer 122 ...
Страница 123: ...2 Remove the used toner cartridge 3 Unpack the new toner cartridge Maintain the printer 123 ...
Страница 124: ...4 Insert the new toner cartridge 5 Close door B Maintain the printer 124 ...
Страница 125: ...Replacing the black imaging unit 1 Open door B Maintain the printer 125 ...
Страница 127: ...3 Remove the toner cartridges Maintain the printer 127 ...
Страница 128: ...4 Disconnect the imaging kit cable Maintain the printer 128 ...
Страница 132: ...9 Insert the imaging kit Maintain the printer 132 ...
Страница 134: ...Replacing the color imaging kit 1 Open door B Maintain the printer 134 ...
Страница 136: ...3 Remove the toner cartridges Maintain the printer 136 ...
Страница 137: ...4 Disconnect the imaging kit cable Maintain the printer 137 ...
Страница 138: ...5 Remove the used imaging kit Maintain the printer 138 ...
Страница 141: ...8 Insert the black imaging unit into the new imaging kit Maintain the printer 141 ...
Страница 142: ...9 Insert the new imaging kit Maintain the printer 142 ...
Страница 144: ...Replacing the waste toner bottle 1 Open door B Maintain the printer 144 ...
Страница 153: ...2 Remove the used separator bracket 3 Unpack the new separator bracket Maintain the printer 153 ...
Страница 200: ...Jam locations 1 Standard bin 2 Door A 3 Trays 4 Multipurpose feeder Troubleshoot a problem 200 ...
Страница 203: ...2 Remove the jammed paper Note Make sure that all paper fragments are removed 3 Open door A1 Troubleshoot a problem 203 ...


