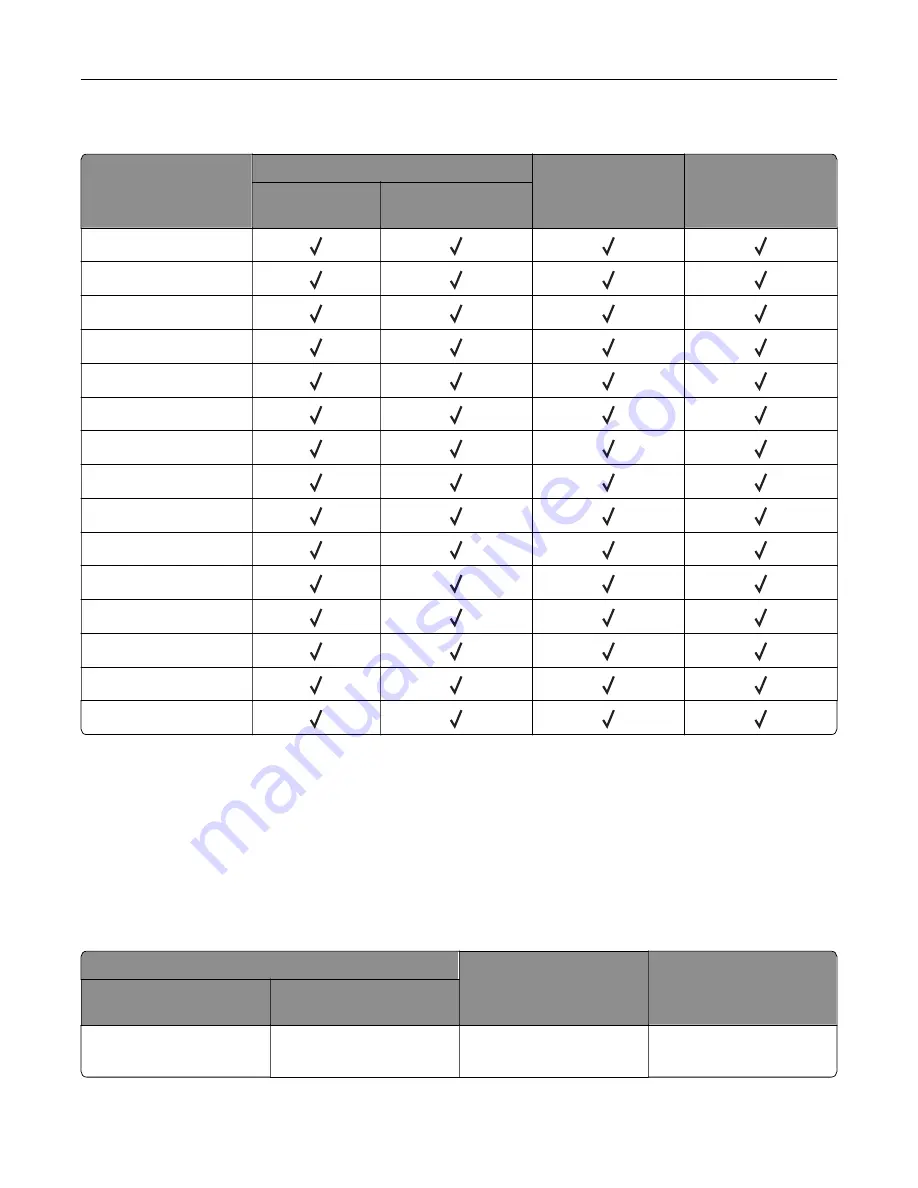
Supported paper types
Paper type
650
‑
sheet duo tray
Optional 550
‑
sheet
tray
Two
‑
sided printing
550
‑
sheet tray
100
‑
sheet
multipurpose feeder
Plain
Card stock
Recycled
Glossy
Labels
Vinyl Labels
Bond
Envelope
Letterhead
Preprinted
Colored Paper
Light
Heavy
Rough/Cotton
Custom Type [x]
Notes:
•
Labels, envelopes, and card stock always print at reduced speed.
•
Card stock is supported in two
‑
sided printing only up to 163 g/m
2
(90
‑
lb bond). Anything heavier is
supported only in one
‑
sided printing.
•
Vinyl labels are supported for occasional use only and must be tested for acceptability. Some vinyl labels
may feed more reliably from the multipurpose feeder.
Supported paper weights
650
‑
sheet duo tray
Optional 550
‑
sheet tray
Two
‑
sided printing
550
‑
sheet tray
100
‑
sheet multipurpose
feeder
60–218 g/m
2
(16–58
‑
lb bond)
60–218 g/m
2
(16–58
‑
lb bond)
60–218 g/m
2
(16–58
‑
lb bond)
60–218 g/m
2
(16–43
‑
lb bond)
Learn about the printer
17
Содержание C4342
Страница 46: ...4 Install the ISP into its housing Set up install and configure 46 ...
Страница 47: ...5 Attach the housing to the controller board shield Set up install and configure 47 ...
Страница 48: ...6 Connect the ISP extended cable to the ISP connector in the controller board Set up install and configure 48 ...
Страница 52: ...Set up install and configure 52 ...
Страница 55: ...Set up install and configure 55 ...
Страница 56: ...3 Install the wireless module into its housing Set up install and configure 56 ...
Страница 57: ...4 Attach the wireless module to the controller board shield Set up install and configure 57 ...
Страница 58: ...5 Connect the wireless assembly to the ISP connector in the controller board Set up install and configure 58 ...
Страница 122: ...Replacing parts and supplies Replacing a toner cartridge 1 Open door B Maintain the printer 122 ...
Страница 123: ...2 Remove the used toner cartridge 3 Unpack the new toner cartridge Maintain the printer 123 ...
Страница 124: ...4 Insert the new toner cartridge 5 Close door B Maintain the printer 124 ...
Страница 125: ...Replacing the black imaging unit 1 Open door B Maintain the printer 125 ...
Страница 127: ...3 Remove the toner cartridges Maintain the printer 127 ...
Страница 128: ...4 Disconnect the imaging kit cable Maintain the printer 128 ...
Страница 132: ...9 Insert the imaging kit Maintain the printer 132 ...
Страница 134: ...Replacing the color imaging kit 1 Open door B Maintain the printer 134 ...
Страница 136: ...3 Remove the toner cartridges Maintain the printer 136 ...
Страница 137: ...4 Disconnect the imaging kit cable Maintain the printer 137 ...
Страница 138: ...5 Remove the used imaging kit Maintain the printer 138 ...
Страница 141: ...8 Insert the black imaging unit into the new imaging kit Maintain the printer 141 ...
Страница 142: ...9 Insert the new imaging kit Maintain the printer 142 ...
Страница 144: ...Replacing the waste toner bottle 1 Open door B Maintain the printer 144 ...
Страница 153: ...2 Remove the used separator bracket 3 Unpack the new separator bracket Maintain the printer 153 ...
Страница 200: ...Jam locations 1 Standard bin 2 Door A 3 Trays 4 Multipurpose feeder Troubleshoot a problem 200 ...
Страница 203: ...2 Remove the jammed paper Note Make sure that all paper fragments are removed 3 Open door A1 Troubleshoot a problem 203 ...


