183
F(L)CS Data Acquisition
Setup
tab and enter
1
(
). This will automatically take a new image after
photobleaching all points.
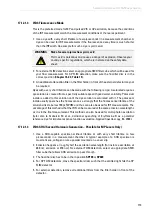
11. Set the laser used for photobleaching to 100 %.
12. Under
Measurement Duration
, enter a suitable bleaching period; this will typically be a
few seconds (
).
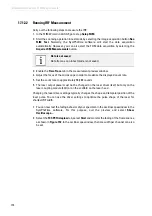
13. Start the bleaching series from LAS AF by clicking the image acquisition button
Run FCS
.
14. In the image acquired after photobleaching, compare the markings with the actual
bleach points.
15. To archive your measurement, you can create a snapshot of the image with your bleach
points. To do so, right-click this image and select
Snapshot
.
If the actual bleach points are not exactly what you want, repeat the calibration
(
).
18.1.4
Adjusting the Correction Ring on the Objective
To guarantee the correct form of the detection volume, the correction ring at the objective
must be adjusted to the thickness of the specimen slide below the specimen. You must
always make this adjustment when you change the specimen carrier, even if it comes from
the same batch. You should also repeat this adjustment if the temperature changes. Follow
these steps:
1. Start LAS AF.
2. Use the objective
63x Plan APO 1.2W CORR CS 0.14
to
0.18
. Add immersion water to the
objective and position the FCS specimen.
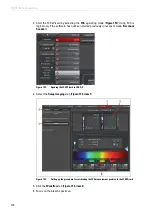
3. When you open the
Setup Corr-ring
step in the FCS Wizard, a preconfigured setting of
the beam path is loaded. Adjust the settings as follows:
•
Select scan mode
xz-y
(z-Galvo).
•
Set the format to 512 x 512.
•
Set the zoom to the smallest possible setting.
•
Select the laser line at 488 nm.
•
Use bidirectional scan.
•
Set the AOBS to reflection.
•
Enable a SP PMT (no HyD and no SP FLIM PMT).
•
Adjust the detector range to detect the laser line as well.
•
Select
Glow (O&U)
in the color look-up table (LUT).
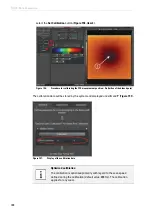
4. Click the
Live
image acquisition button.
A live image of the reflection line is displayed, which you can now optimize.
Содержание TCS SP8 SMD
Страница 1: ...10 Living up to Life User Manual Leica TCS SP8 SMD for FCS FLIM and FLCS ...
Страница 4: ...4 Copyright ...
Страница 14: ...14 Contents ...
Страница 18: ...18 Intended Use ...
Страница 20: ...20 Liability and Warranty ...
Страница 28: ...28 General Safety Notes ...
Страница 32: ...32 Additional Notes on Handling the System ...
Страница 44: ...44 System Overview and Properties ...
Страница 60: ...60 SMD Components Figure 31 DSN 102 Dual SPAD Power Supply ...
Страница 80: ...80 Safety Features ...
Страница 102: ...102 Switching On the System ...
Страница 116: ...116 LAS AF ...
Страница 214: ...214 Changing the Specimen ...
Страница 216: ...216 Changing the Objective ...
Страница 218: ...218 Piezo Focus on an Upright Microscope Figure 186 Piezo focus controller Figure 187 Spacer on objective ...
Страница 238: ...238 Switching Off the System ...
Страница 242: ...242 Repairs and Service Work ...
Страница 244: ...244 Maintenance ...
Страница 246: ...246 Disassembly and Transport ...
Страница 248: ...248 Disposal ...
Страница 254: ...254 Contact ...
Страница 256: ...256 Recommended Literature ...
Страница 266: ...266 Appendix Figure 225 Declaration of conformity ...
Страница 268: ...268 Appendix ...
Страница 269: ......


