88
(2) At this site, select SV-15 from the STIKA drop-down menu. Then download the Windows Driver that
corresponds to which version of Windows you have installed on your computer.
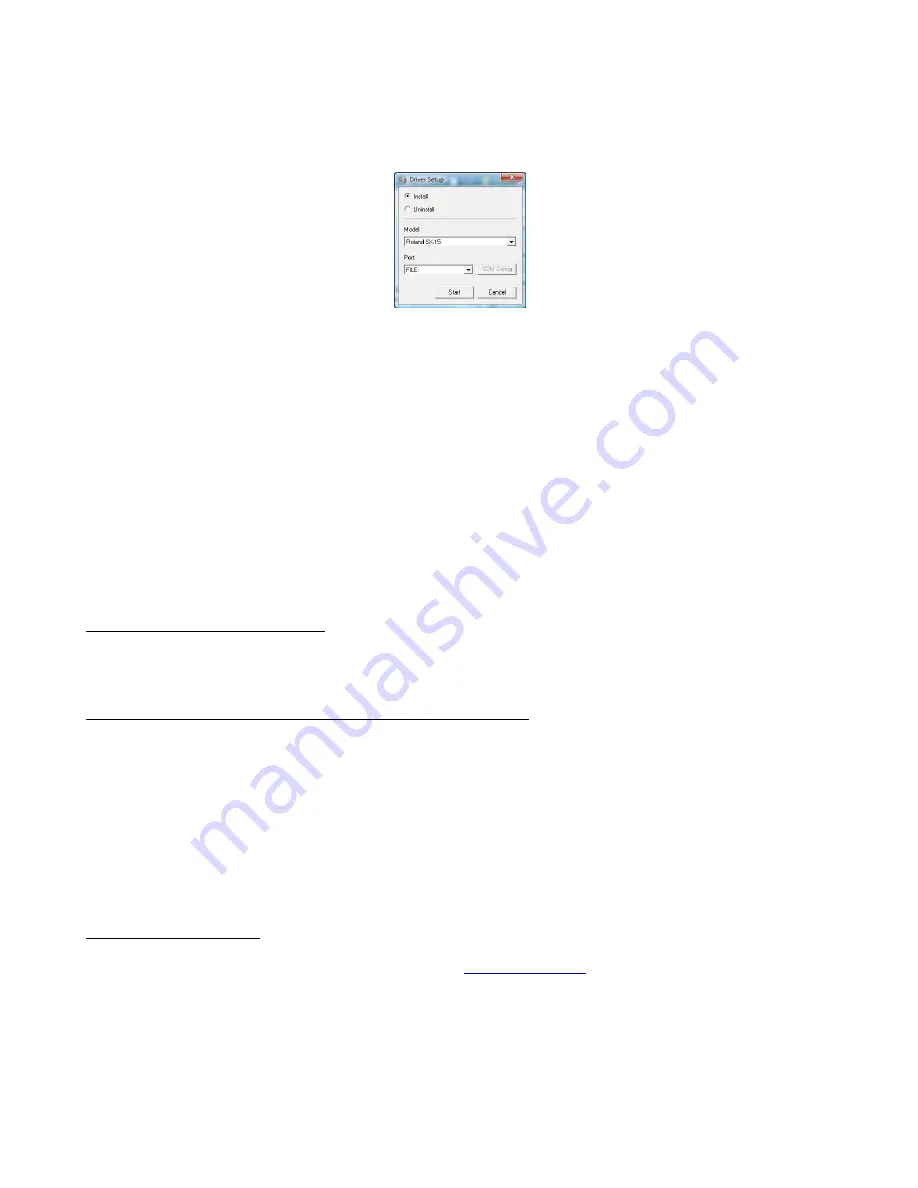
(3) Launch the downloaded file and a new folder will be created and the files extracted. From within that new
folder, run the setup.exe. When the following window pops open, select the same settings as shown:
(4) The driver will install. Now create a new folder on your hard drive for the .plt files that will be created from
your gsd files. For example, you could name it: c:\PLTFiles. Keep it short as you will need to remember it
every time you convert a file.
(5) Open your gsd image in RoboMaster or Wishblade Advance.
(6) Click on the
Output Settings
icon (or go to
File>Output Settings
) and select the
Print Settings
tab.
Under
Printer
, select the Roland SX-15 on FILE. Then click on
Output to Printer
and then
OK
. A window
will open asking for the number of copies. Just click on
OK
.
(7) A small window will open asking for the Output File Name. Enter the precise location and name your file,
for example: c:\PLTFiles\
House.plt. Note that you must include the “.plt” at the end of the file name.
(8) Open KNK Studio and go to
File>Import
. Change
Files of Type
to
All Files
. Locate the plt file and import.
(9) You will need to recolor lines, as needed for some files, such as paper piecings. Also, this method tends to
generate many nodes for all curved paths. Thus you will need to use one of the methods presented in
Section 7.3 Reducing Nodes
to reduce the number to a reasonable amount for cutting.
Converting from .KNK to .GSD
GSD is the format used by the Craft Robo, Wishblade, and Silhouette. There are two methods for converting an
image from KNK Studio to share with owners of these cutters.
Method 1: Convert to Bitmap and Using Auto-Trace in RoboMaster
(1)
In KNK Studio, select your image(s) and change the color to black. Turn on
Fill.
(2)
Go to
File>Export Image
, select
Monochrome
and a
Resolution
of 300. Save the file as a .bmp.
(3)
In the gsd program (e.g. RoboMaster), start a new document and go to
Insert>File
and locate the screen
capture you saved.
(4)
With the image selected, go to
Edit>Get Outline
and a new window will open with the image. Click on
Convert to Outline
. Then click on
Paste then Exit.
A vector tracing will now be on top of the screen
capture image. To separate, go to
Edit>Ungroup
. Click away. Then click on the image and drag. The
colored image will be the original file and can be deleted.
Method 2: Using Inkscape
(1) Install Inkscape, a free downloadable program from
. Because the KNK Studio’s .dxf
format will not import into the software used by the .gsd programs, it must be first sent to Inkscape to save
as a .dxf.
(2) With the image opened in KNK Studio, go to
File>Export
and select
.svg
from the menu under
Save as
Type
. Name the file and note the location being saved. Click on
Export
.
(3) Launch Inkscape and use
File>Open
to open the saved .svg file. The image will be flipped. To correct,
marquis-select the image and go to
Object>Flip Vertical
. Then go to
File>Save As
and select .dxf from
the bottom right dropdown menu. Name the file at the top and click on
Save
. A black window will flash open


