79
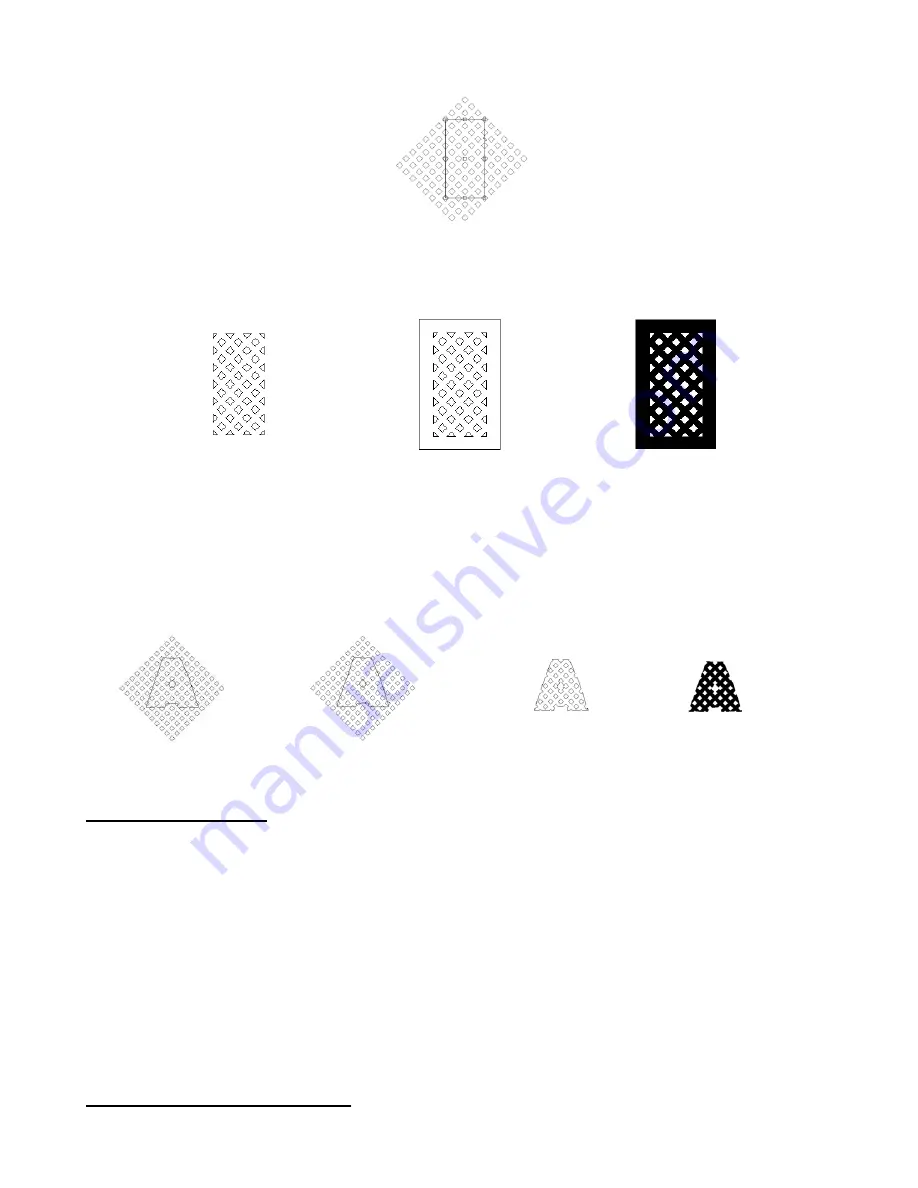
(6) Marquis-select the grid and the rectangle. From the
Weld Tools
on the
Tools
toolbar, select the middle
AND Weld
tool. The surrounding grid will disappear, leaving the middle rectangle. Draw a rectangle around
the perimeter. Marquis-select and go to
Arrange>Make Path
. This is the image that will now be cut. Again,
the warped squares are an oddity from the computer monitor. The results will be perfect.
(7) In the second example, arrange an image, such as a letter, over the lattice. In this case, use
Ctrl-F
to make
sure the letter is on top of the lattice.
(8) Then marquis-select the grid and the letter and select the third
XOR Weld
from the
Weld Tools
on the
Tools
toolbar.
(9) It will appear that nothing has happened, but carefully click on the trace lines of the letter to highlight it and
drag away. The letter is now filled with a lattice.
8.13 Freehand Drawing
Freehand drawing, like manual tracing, is performed using the
Graphics Edit
Tools
on the
Tools
toolbar.
Select the middle tool called
Free Edit
. You can now use the mouse to freely draw on the screen.
Unlike Node Edit mode, in
Free Edit
mode you can release the mouse button to stop your drawing at any
point and begin again at another point on the screen.
If you wish to draw a straight line, at any point, hold down the
Shift
key or
Ctrl
key and continue drawing.
It will appear that you are no longer drawing, but upon releasing the key, a straight line will appear.
At any time, you can click on the
spacebar
and close the
Free Edit
mode. Double clicking any of your
paths will bring up the nodes for editing.
Remember that
Transform>Round Corner
can be used to convert your single line paths into closed
paths for cutting.
8.14 Enhancing Your Design Files
Before sharing or selling your designs, consider a few of the following options:
Immediately after
AND Weld
Add a rectangle to
the outside.
Apply
Arrange<Make Path
and turn on
Fill.
Arrange letter over grid.
Apply
XOR Weld
Drag letter away from grid.
Turn on
Fill
.


