78
8.11 Another Kind of Stenciling
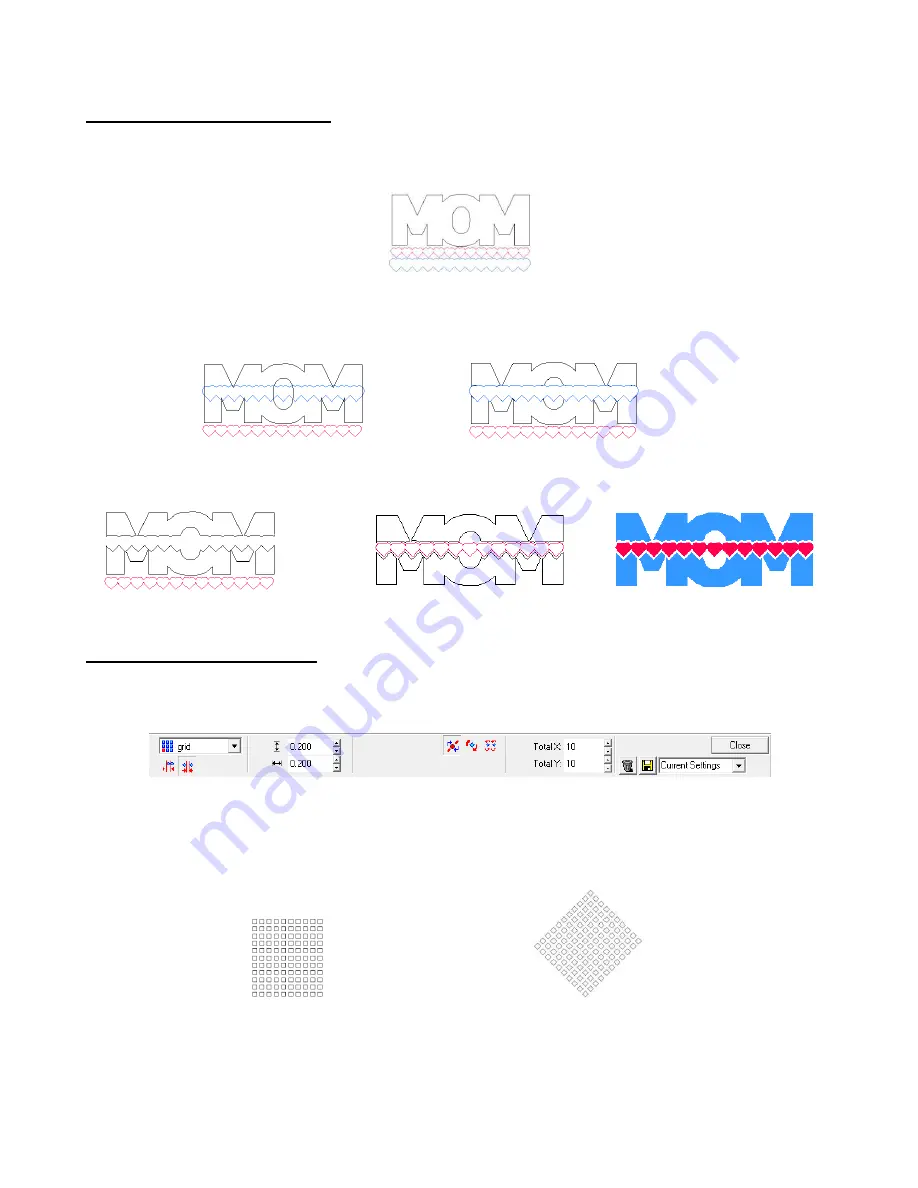
(1) Using the Basic Weld feature, you can create customized designs using a function called stenciling. In this
example, we have a welded word, a heart border and then also an outline mat for the heart border.
(2) Arrange the outline mat over the word and use
Ctrl-F
to make sure the mat is on top of the word. Note the
border needs to be a different color from the word. Select both and then apply the
Basic Weld
tool from the
Tools
toolbar.
Before welding
After welding
(3) Delete the outline and then the border can be cut and arrange inside the stenciled opening in the word.
Outline deleted
Heart border positioned
Final design
8.12 Creating Lattice Designs
(1)
Draw a square and make it .25” on both sides.
(2) Select the square and go to
Layout>Array
. Duplicate the settings shown here. Then click on
Close.
(3) Use
Ctrl-A
to select all of the boxes and go to
Arrange>Make Path
. With the array of boxes selected, enter
45 under
Rotation
on the Smart Bar. Click on the
Enter
key and the array will be rotated 45 degrees. The
boxes may look somewhat warped but when you zoom in close, you will see that they are still perfect
squares.
(4) Use
Ctrl-D
to make a duplicate of your array. Set aside for the second example below.
(5) Draw the shape you want to fill with the lattice and arrange exactly how you want the lattice to look. Notice
how the edges of the rectangle go through the centers of the diagonal boxes. This will make it look more
uniform:
It will appear that nothing
happened during
welding.
Before rotation
After rotating 45 degrees


