


Mirus for H2 Classic GrainGage
80
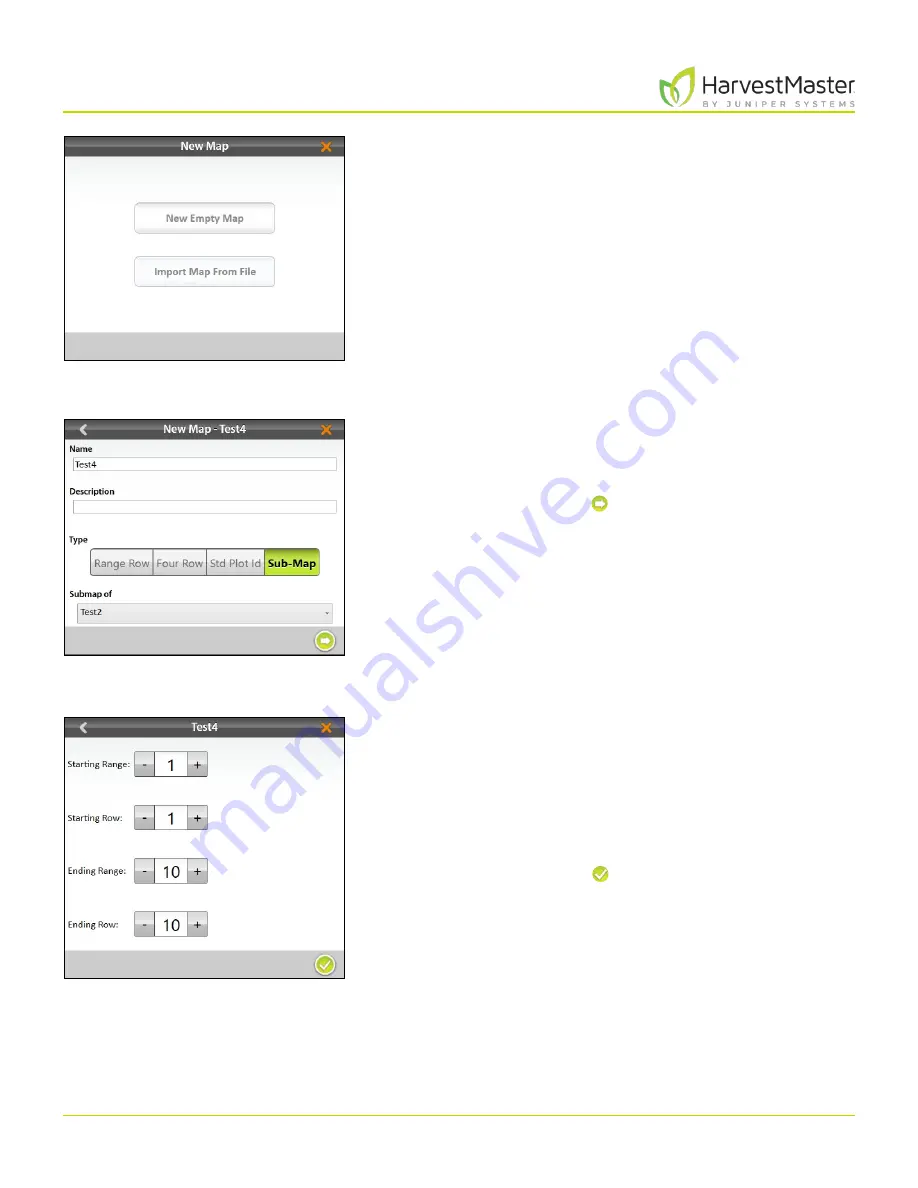
Field Maps
2. Select
New Empty Map
.
3. Name and describe the map.
4. Tap
Sub-Map
.
5. Select which map this will be a sub-map of.
6. Tap the next arrow .
Note: The
Name
box will only accept basic letters and
numbers. Do not use emojis or the following special
characters:
> < : ” \ ? | / *
7. The plot and range increments are the same as the
larger field map. Set the following:
•
Starting range
•
Starting row
•
Ending range
•
Ending row
8. Tap the check icon to save the map.
Содержание HarvestMaster mirus H2
Страница 1: ......
Страница 7: ...CHAP TER ONE Mirus Ins tallation...
Страница 11: ...Mirus and GrainGage S etup CHAP TER T WO...
Страница 32: ...H2 Clas sic GrainGage Diagnos tic s and Aler t s CHAP TER THREE...
Страница 42: ...GrainGage Calibration CHAP TER FOUR...
Страница 71: ...Field Maps CHAP TER FIVE...
Страница 98: ...Har ves t Mode CHAP TER SIX...
Страница 111: ...Mirus for H2 Classic GrainGage 111 Harvest Mode 6 3 7 List View In List View you can see the data in the form of a chart...
Страница 120: ...Standard Grain Information APPENDIX A...
Страница 123: ...Troubleshooting APPENDIX B...
Страница 129: ...Limited Warrant y APPENDIX C...


