Mirus for H2 Classic GrainGage
44
H2 Classic GrainGage Calibration
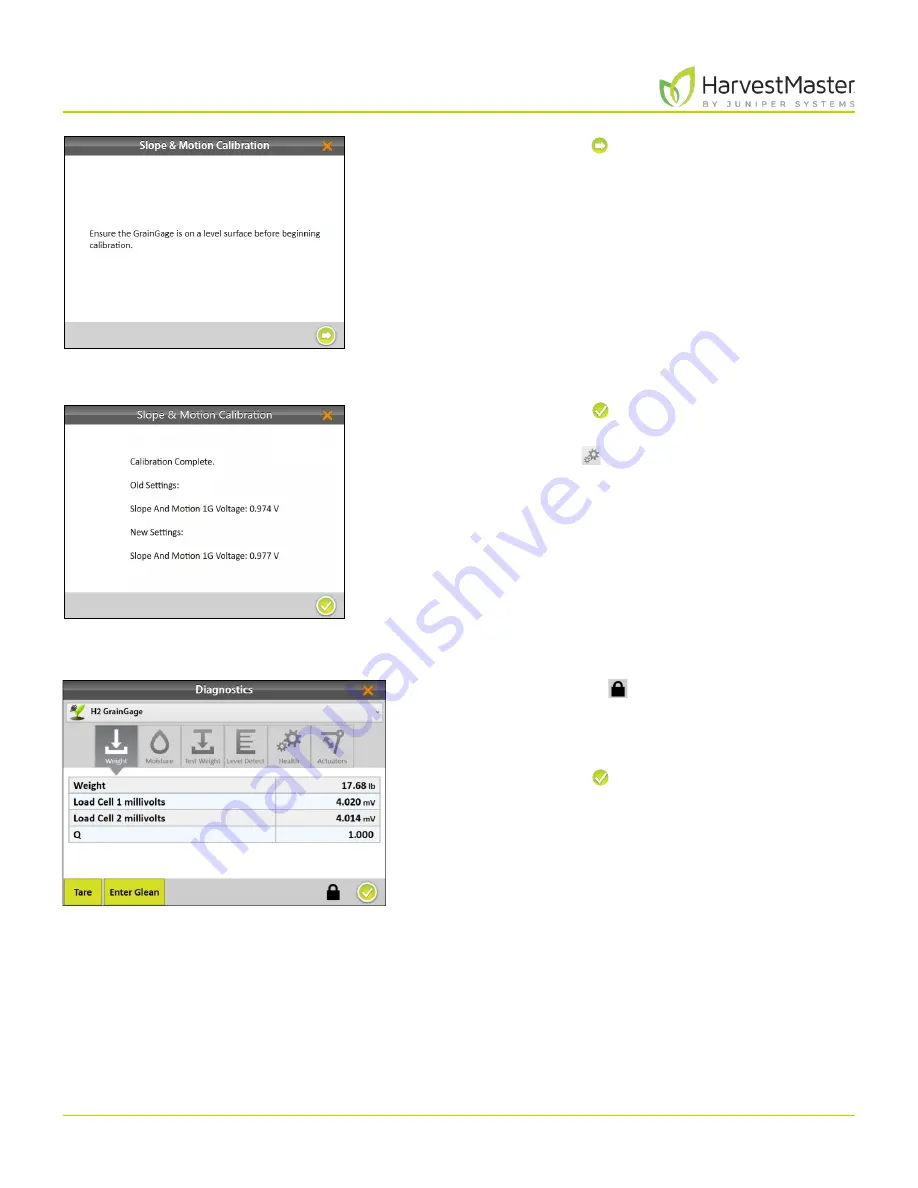
7. Tap the next arrow to initiate the calibration.
8. Tap the check icon to apply the new slope and
motion settings.
9. Tap the gear icon below the calibration wizard to
open Diagnostics.
10. Tap the padlock icon to extend the dialog box.
11. Verify that slope and motion compensation has been
enabled by checking the Q value. It should be 1.000
+/- .01.
12. Tap the check icon to close Diagnostics.
Содержание HarvestMaster mirus H2
Страница 1: ......
Страница 7: ...CHAP TER ONE Mirus Ins tallation...
Страница 11: ...Mirus and GrainGage S etup CHAP TER T WO...
Страница 32: ...H2 Clas sic GrainGage Diagnos tic s and Aler t s CHAP TER THREE...
Страница 42: ...GrainGage Calibration CHAP TER FOUR...
Страница 71: ...Field Maps CHAP TER FIVE...
Страница 98: ...Har ves t Mode CHAP TER SIX...
Страница 111: ...Mirus for H2 Classic GrainGage 111 Harvest Mode 6 3 7 List View In List View you can see the data in the form of a chart...
Страница 120: ...Standard Grain Information APPENDIX A...
Страница 123: ...Troubleshooting APPENDIX B...
Страница 129: ...Limited Warrant y APPENDIX C...


