Mirus for H2 Classic GrainGage
64
H2 Classic GrainGage Calibration
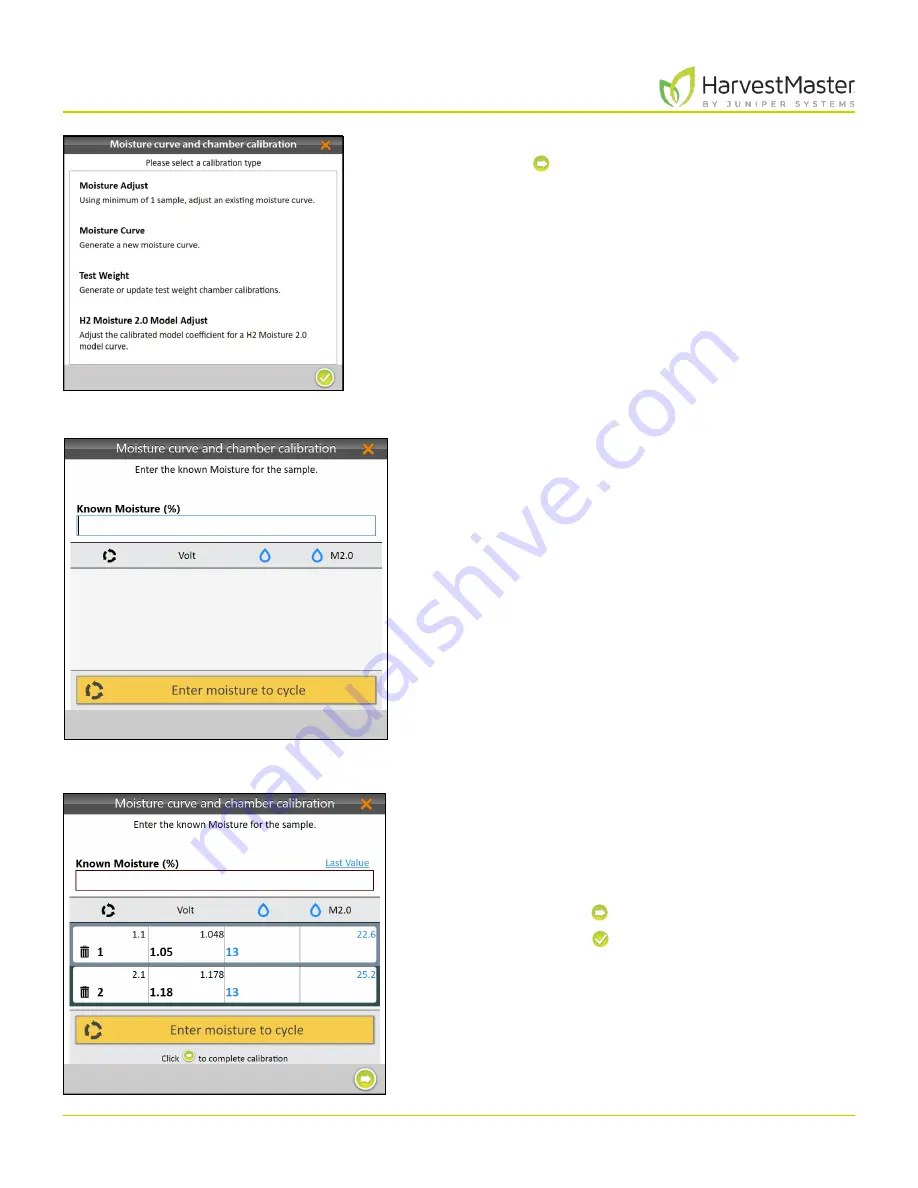
6. Select
H2 Moisture 2.0 Model Adjust
and tap the
next arrow .
Note: Multiple samples can be used to adjust an
existing moisture curve.
7. Pour the grain sample into the hopper (to simulate
harvest). Ensure the isolation gate is open so the grain
drops into the GrainGage.
8. Enter the Known Moisture percentage.
9. Tap
Click to run a sample
.
10. Repeat steps 7–9 with the same sample at least two
more times
Note: The
Last Value
button can be used to fill the
Known Moisture field with the previous percentage
when the same sample is run multiple times.
11. Tap the next arrow to complete the recalibration.
12. Tap the check icon .
Mirus displays the adjusted moisture curve with its
moisture percentages and voltages.
Содержание HarvestMaster mirus H2
Страница 1: ......
Страница 7: ...CHAP TER ONE Mirus Ins tallation...
Страница 11: ...Mirus and GrainGage S etup CHAP TER T WO...
Страница 32: ...H2 Clas sic GrainGage Diagnos tic s and Aler t s CHAP TER THREE...
Страница 42: ...GrainGage Calibration CHAP TER FOUR...
Страница 71: ...Field Maps CHAP TER FIVE...
Страница 98: ...Har ves t Mode CHAP TER SIX...
Страница 111: ...Mirus for H2 Classic GrainGage 111 Harvest Mode 6 3 7 List View In List View you can see the data in the form of a chart...
Страница 120: ...Standard Grain Information APPENDIX A...
Страница 123: ...Troubleshooting APPENDIX B...
Страница 129: ...Limited Warrant y APPENDIX C...


