Mirus for H2 Classic GrainGage
74
Field Maps
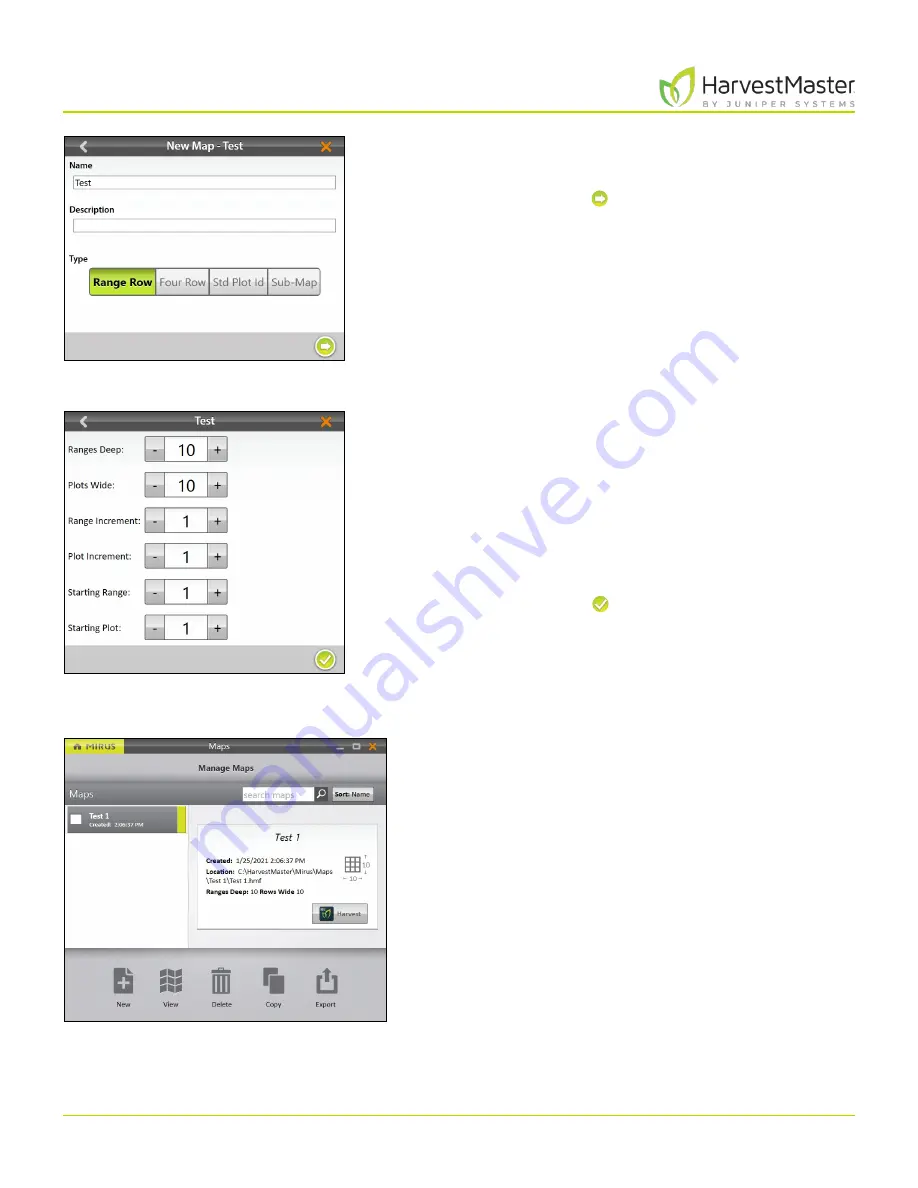
4. Name and describe the map.
5. Tap
Range Row
.
6. Tap the next arrow .
Note: The
Name
box will only accept basic letters and
numbers. Do not use emojis or the following special
characters:
> < : ” \ ? | / *
7. Set the following:
•
Ranges deep
•
Plots wide
•
Range increment
•
Plot increment
•
Starting range
•
Starting plot
8. Tap the check icon to save the map.
Mirus displays a description of the map on the Manage
Maps screen. From this screen, Mirus allows you to do the
following with your maps:
•
Create new
•
View
•
Delete
•
Copy
•
Export
You also have the option to begin harvest.
Содержание HarvestMaster mirus H2
Страница 1: ......
Страница 7: ...CHAP TER ONE Mirus Ins tallation...
Страница 11: ...Mirus and GrainGage S etup CHAP TER T WO...
Страница 32: ...H2 Clas sic GrainGage Diagnos tic s and Aler t s CHAP TER THREE...
Страница 42: ...GrainGage Calibration CHAP TER FOUR...
Страница 71: ...Field Maps CHAP TER FIVE...
Страница 98: ...Har ves t Mode CHAP TER SIX...
Страница 111: ...Mirus for H2 Classic GrainGage 111 Harvest Mode 6 3 7 List View In List View you can see the data in the form of a chart...
Страница 120: ...Standard Grain Information APPENDIX A...
Страница 123: ...Troubleshooting APPENDIX B...
Страница 129: ...Limited Warrant y APPENDIX C...


