Mirus for H2 Classic GrainGage
100
Harvest Mode
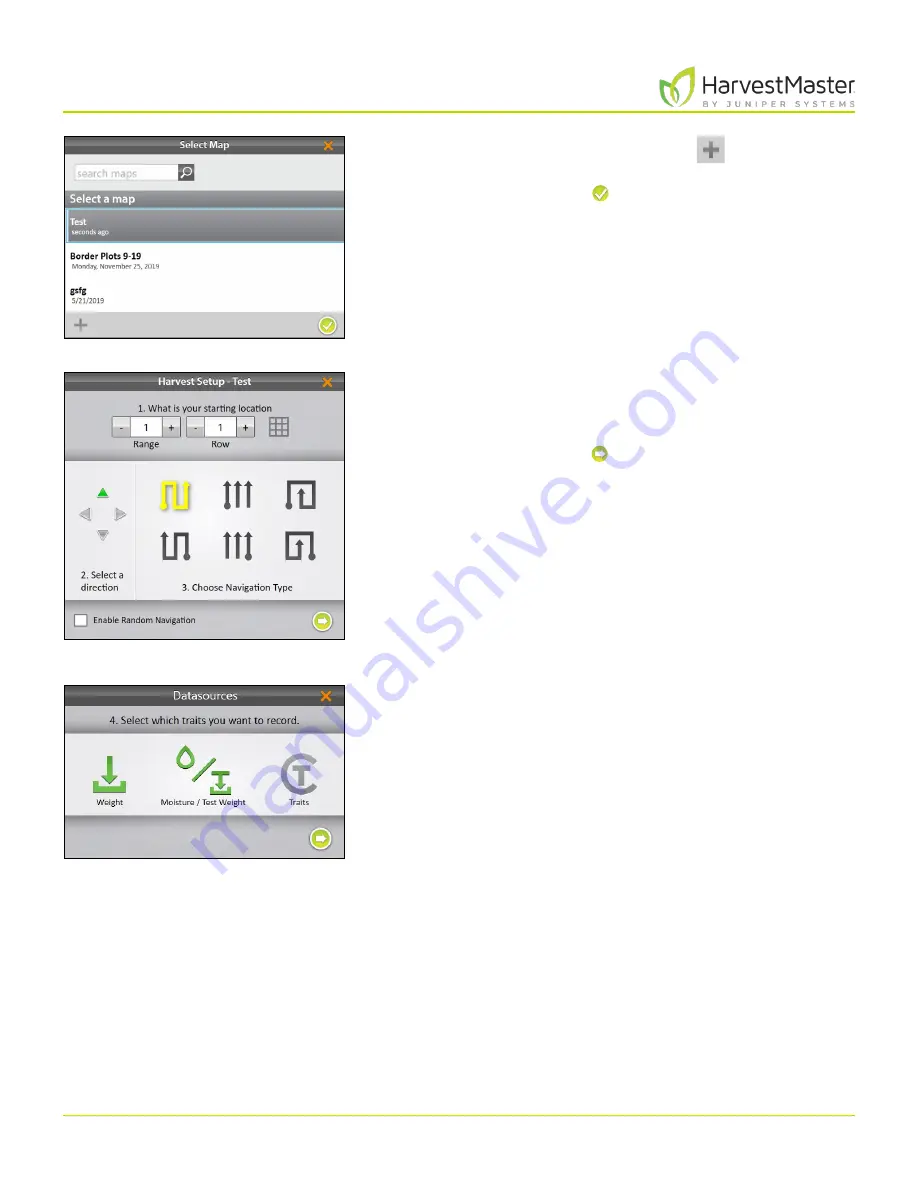
2. Select a map or tap the plus icon
to create a new
map.
3. Tap the check icon .
4. Enter the starting location.
5. Select the direction of harvest.
6. Choose a navigation type.
7. Tap the next arrow .
Note: If you check
Enable Random Navigation
, you will be
able to change your location on the main Harvest screen
just by tapping on the desired plot. This is mostly used for
note taking.
8. Select which attributes you plan to record.
Содержание HarvestMaster mirus H2
Страница 1: ......
Страница 7: ...CHAP TER ONE Mirus Ins tallation...
Страница 11: ...Mirus and GrainGage S etup CHAP TER T WO...
Страница 32: ...H2 Clas sic GrainGage Diagnos tic s and Aler t s CHAP TER THREE...
Страница 42: ...GrainGage Calibration CHAP TER FOUR...
Страница 71: ...Field Maps CHAP TER FIVE...
Страница 98: ...Har ves t Mode CHAP TER SIX...
Страница 111: ...Mirus for H2 Classic GrainGage 111 Harvest Mode 6 3 7 List View In List View you can see the data in the form of a chart...
Страница 120: ...Standard Grain Information APPENDIX A...
Страница 123: ...Troubleshooting APPENDIX B...
Страница 129: ...Limited Warrant y APPENDIX C...


