


4 Planning and installation – Installing the heating system
69
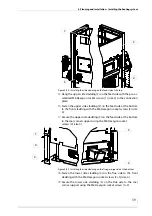
30.
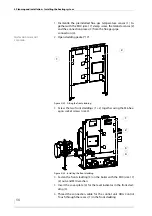
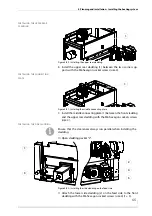
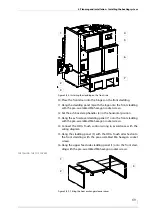
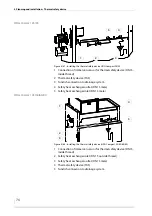
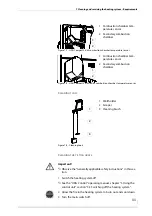
Place the front door onto the hinges on the front cladding.
31.
Hang the cladding panel (6) with the logo onto the front cladding
with the pre-assembled M6 hexagon socket screws.
32.
Set the ash box clamp handles (3) in the horizontal position.
33.
Hang the ash removal cladding panel (7) onto the front cladding
with the pre-assembled M6 hexagon socket screws.
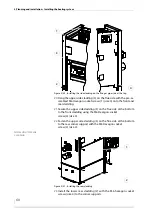
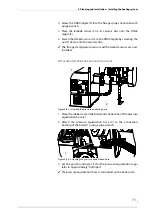
34.
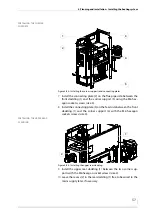
Connect the HDG Touch control wiring in accordance with the
wiring diagram.
35.
Hang the cladding panel (5) with the HDG Touch attached onto
the front cladding with the pre-assembled M6 hexagon socket
screws.
36.
Hang the upper feed side cladding panel (1) onto the front clad-
ding with the pre-assembled M6 hexagon socket screws.
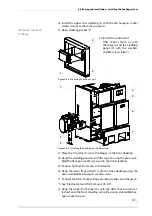
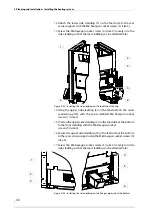
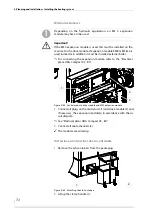
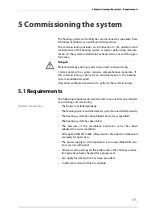
I
NSTALLING
THE
TOP
COVERS
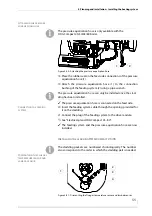
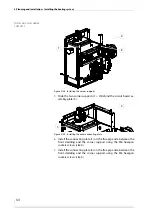
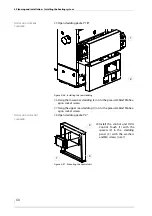
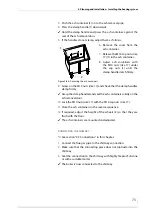
Figure 4/58 - Installing the cladding on the front side
6
5
4
1
7
3
2
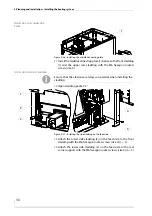
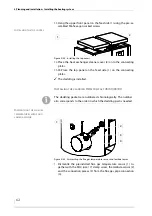
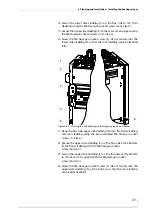
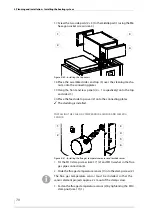
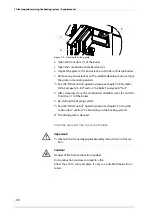
Figure 4/59 - Fitting the heat exchanger cleaner cover
1
2
3
Содержание Compact 25
Страница 1: ...hdg bavaria com HDG Compact 25 35 HDG Compact 45 50 65 HDG Compact 80 Operating manual ...
Страница 2: ......
Страница 6: ...Operation Manual HDG Compact 25 80 Content 6 ...
Страница 107: ......


