

4 Planning and installation – Installing the heating system
61
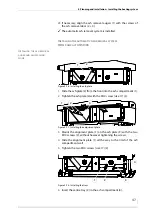
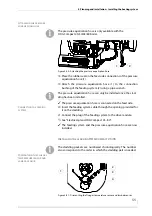
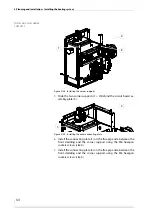
24.
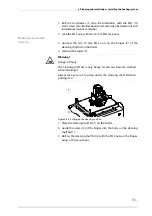
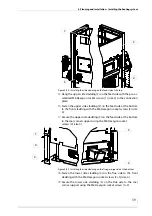
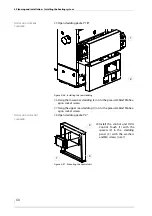
Install the upper rear cladding (1) with the M6 hexagon socket
screws (size 4) to the corner supports.
I
NSTALLING
THE
FRONT
CLADDING
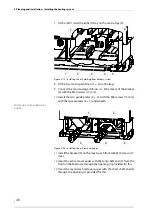
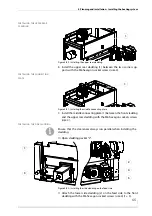
25.
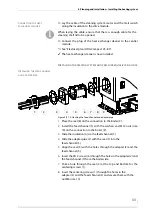
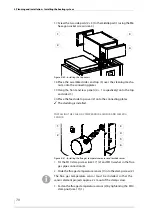
Open cladding packet “4”.
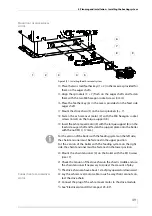
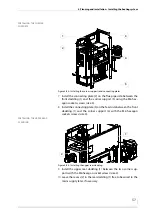
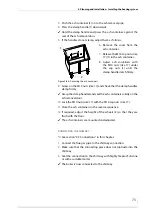
27.
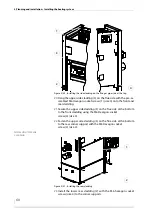
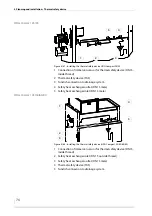
Place the front door (2) onto the hinges on the front cladding.
28.
Hang the cladding panel (6) with the logo on using the pre-assem-
bled M6 Hexagon socket screws onto the front cladding.
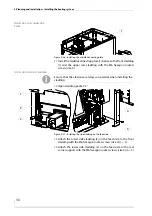
29.
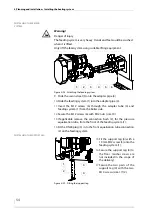
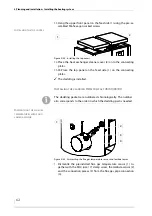
Position both ash box levers to horizontal.
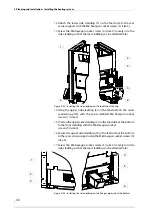
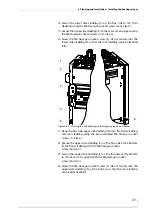
30.
Hang the lower front panel (7) onto the front cladding using the
pre-assembled M6 hexagon socked screws.
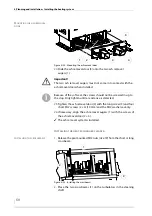
31.
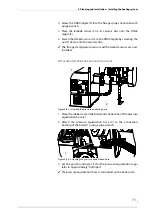
Connect the HDG Touch wiring according to the circuit diagram.
✎
See “Electrical plans HDG Compact 25 - 80”.
32.
Hang the upper front panel (5), with the HDG Touch control at-
tached, onto the front cladding using the pre-assembled M6 hex-
agon socked screws.
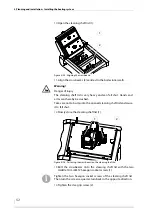
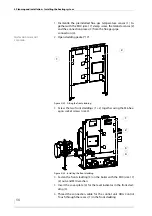
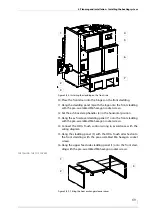
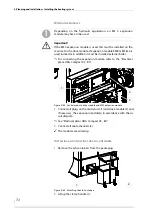
26.
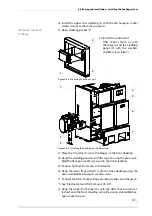
Install the control unit
HDG Control Touch (1) with
the spacers (2) in the cladding
panel (3) with the washers
and M4 screws (size 7).
Figure 4/42 - Mounting the control unit
1
1
3
2
Figure 4/43 - Installing the cladding on the front side
6
5
4
1
7
3
2
Содержание Compact 25
Страница 1: ...hdg bavaria com HDG Compact 25 35 HDG Compact 45 50 65 HDG Compact 80 Operating manual ...
Страница 2: ......
Страница 6: ...Operation Manual HDG Compact 25 80 Content 6 ...
Страница 107: ......


