5-70
L90 Line Current Differential System
GE Multilin
5.2 PRODUCT SETUP
5 SETTINGS
5
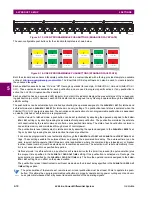
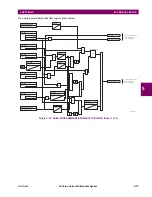
Figure 5–13: USER-PROGRAMMABLE PUSHBUTTONS (ENHANCED FACEPLATE)
The user-configurable pushbuttons for the standard faceplate are shown below.
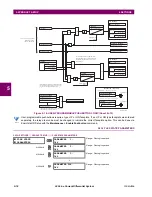
Figure 5–14: USER-PROGRAMMABLE PUSHBUTTONS (STANDARD FACEPLATE)
Both the standard and enhanced faceplate pushbuttons can be custom labeled with a factory-provided template, available
online at
http://www.gedigitalenergy.com/multilin
. The EnerVista UR Setup software can also be used to create labels for
the enhanced faceplate.
Each pushbutton asserts its own “On” and “Off” FlexLogic operands (for example,
PUSHBUTTON 1 ON
and
PUSHBUTTON 1
OFF
). These operands are available for each pushbutton and are used to program specific actions. If any pushbutton is
active, the
ANY PB ON
operand will be asserted.
Each pushbutton has an associated LED indicator. By default, this indicator displays the present status of the correspond-
ing pushbutton (on or off). However, each LED indicator can be assigned to any FlexLogic operand through the
PUSHBTN 1
LED CTL
setting.
The pushbuttons can be automatically controlled by activating the operands assigned to the
PUSHBTN 1 SET
(for latched and
self-reset mode) and
PUSHBTN 1 RESET
(for latched mode only) settings. The pushbutton reset status is declared when the
PUSHBUTTON 1 OFF
operand is asserted. The activation and deactivation of user-programmable pushbuttons is dependent
on whether latched or self-reset mode is programmed.
•
Latched mode
: In latched mode, a pushbutton can be set (activated) by asserting the operand assigned to the
PUSH-
BTN 1 SET
setting or by directly pressing the associated front panel pushbutton. The pushbutton maintains the set state
until deactivated by the reset command or after a user-specified time delay. The state of each pushbutton is stored in
non-volatile memory and maintained through a loss of control power.
The pushbutton is reset (deactivated) in latched mode by asserting the operand assigned to the
PUSHBTN 1 RESET
set-
ting or by directly pressing the associated active front panel pushbutton.
It can also be programmed to reset automatically through the
PUSHBTN 1 AUTORST
and
PUSHBTN 1 AUTORST DELAY
set-
tings. These settings enable the autoreset timer and specify the associated time delay. The autoreset timer can be
used in select-before-operate (SBO) breaker control applications, where the command type (close/open) or breaker
location (feeder number) must be selected prior to command execution. The selection must reset automatically if con-
trol is not executed within a specified time period.
•
Self-reset mode
: In self-reset mode, a pushbutton will remain active for the time it is pressed (the
pulse duration
) plus
the dropout time specified in the
PUSHBTN 1 DROP-OUT TIME
setting. If the pushbutton is activated via FlexLogic, the
pulse duration is specified by the
PUSHBTN 1 DROP-OUT TIME
only. The time the operand remains assigned to the
PUSH-
BTN 1 SET
setting has no effect on the pulse duration.
The pushbutton is reset (deactivated) in self-reset mode when the dropout delay specified in the
PUSHBTN 1 DROP-OUT
TIME
setting expires.
The pulse duration of the remote set, remote reset, or local pushbutton must be at least 50 ms to operate the push-
button. This allows the user-programmable pushbuttons to properly operate during power cycling events and vari-
ous system disturbances that may cause transient assertion of the operating signals.
842814A1.CDR
USER
LABEL 1
USER
LABEL 2
USER
LABEL 3
USER
LABEL 4
USER
LABEL 5
USER
LABEL 6
USER
LABEL 7
USER
LABEL 8
USER
LABEL 9
USER
LABEL 10
USER
LABEL 11
USER
LABEL 12
USER
LABEL 13
USER
LABEL 14
USER
LABEL 15
USER
LABEL 16
USER LABEL
USER LABEL
USER LABEL
USER LABEL
USER LABEL
USER LABEL
7
9
11
8
10
12
USER LABEL
1
3
5
2
4
6
USER LABEL
USER LABEL
USER LABEL
USER LABEL
USER LABEL
842779A1.CDR
NOTE
Содержание UR Series L90
Страница 14: ...xiv L90 Line Current Differential System GE Multilin 0 1 BATTERY DISPOSAL 0 BATTERY DISPOSAL 0 ...
Страница 68: ...2 34 L90 Line Current Differential System GE Multilin 2 4 SPECIFICATIONS 2 PRODUCT DESCRIPTION 2 ...
Страница 138: ...4 30 L90 Line Current Differential System GE Multilin 4 3 FACEPLATE INTERFACE 4 HUMAN INTERFACES 4 ...
Страница 604: ...9 58 L90 Line Current Differential System GE Multilin 9 6 FAULT LOCATOR 9 THEORY OF OPERATION 9 ...
Страница 652: ...A 16 L90 Line Current Differential System GE Multilin A 1 PARAMETER LISTS APPENDIX A A ...
Страница 772: ...B 120 L90 Line Current Differential System GE Multilin B 4 MEMORY MAPPING APPENDIX B B ...
Страница 802: ...C 30 L90 Line Current Differential System GE Multilin C 7 LOGICAL NODES APPENDIX C C ...
Страница 812: ...D 10 L90 Line Current Differential System GE Multilin D 1 IEC 60870 5 104 APPENDIX D D ...
Страница 824: ...E 12 L90 Line Current Differential System GE Multilin E 2 DNP POINT LISTS APPENDIX E E ...
Страница 834: ...F 10 L90 Line Current Differential System GE Multilin F 3 WARRANTY APPENDIX F F ...
Страница 846: ...xii L90 Line Current Differential System GE Multilin INDEX ...


