____________________________________________________________________
G1000 System Maintenance Manual
Page 9-5
190-00903-00
Rev.
A
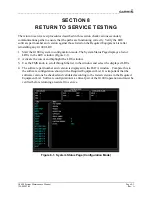
Figure 9-2. GFC Status Page
NOTE
Once the test starts the servo will begin to drive. If, for any reason, the test must
be stopped, firmly grasp the aircraft control being moved and press the red AP
DISC switch on the aircraft control stick.
1.
Start PFD1 in Configuration Mode.
2.
Start the MFD and PFD2 in Normal Mode.
3.
Press the red reversionary button on the left-side GMA 1347 to force the MFD into
reversionary mode.
4.
Select the GFC STATUS Configuration Page (GFC Page Group) on PFD1 using the
FMS knob (Figure 9-x). Observe the MFD and acknowledge any flashing CAS
messages.
5.
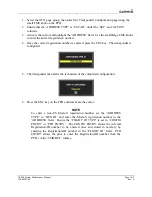
Select the desired servo on the GFC Status Page.
6.
Verify that the PFT status field on the GFC Status Page displays PASSED.
7.
Pin in place the aircraft control to be checked by following the OEM's instructions.
8.
Press the TEST SVO softkey.
9.
Highlight YES and press the ENT key. The test begins a 50 second data collection
period, where the servo is commanded to drive at ~2.5 rpm while the servo load cell
measures clutch torque. During the test, the MFD will display the CAS message
“CLUTCH [PIT/ROL/YAW] PROG” indicating the test for the stated axis is in progress.
10.
Monitor the CURRENT field and verify that the current displayed is greater than zero.
11.
After the data is collected and processed, the test displays the min and max torque
readings of the first direction on the PFD. The servo immediately reverses direction and
performs the test in the opposite direction.


