26
Setting LAN port
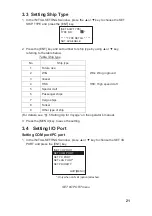
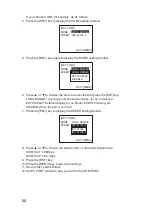
1. Press the [MENU] key, choose INITIAL SETTING, enter password, choose SET
I/O PORT and press the [ENT] key to show the SET I/O PORT sub menu.
2. Press
Ÿ
or
ź
to choose SET LAN PORT and press the [ENT] key.
[SET LAN PORT]
MODE :
STANDARD
IP ADDRESS
172. 031. 024. 001
SUB NET MASK
255. 255. 000. 000
PORT NO. : 10000
QUIT [MENU]
3. Press the [ENT] key to show the mode selecting window.
4. Press
Ÿ
or
ź
to choose suitable mode and press the [ENT] key.
STANDARD: When connecting a LAN device
MONITOR: When connecting a monitor
SERVICE: Data output for service man
DISABLE: No connection
5. Press the [ENT] key, enter IP address in the IP ADDRESS field and press the
[ENT] key. (Setting range: 000.000.000.000 to 255.255.255.255)
Choose digit with
Ż
or
Ź
; set value with
Ÿ
or
ź
.
6. Press the [ENT] key, enter sub net mask in the SUB NET MASK field and press
the [ENT] key. (Setting range: 000.000.000.000 to 255.255.255.255)
7. Press the [ENT] key, enter port number in the PORT NO. field and press the
[ENT] key. (Setting range: 0 to 65535)
8. Press the [MENU] key several times to save the settings and close the menu.
Содержание FA-150
Страница 2: ...This page left intentionally blank ...
Страница 4: ...This page left intentionally blank ...
Страница 5: ...Revision history manual Rev A B C Description Date dd mm yyyy Sign A A 06 05 2015 HAB ...
Страница 6: ...This page left intentionally blank ...
Страница 8: ...This page left intentionally blank ...
Страница 9: ...Index divider Section 1 N ...
Страница 10: ......
Страница 12: ...PRINTED IN JAPAN UAIS TRANSPONDER FA 150 ...
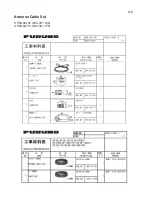
Страница 53: ...Antenna Cable Set CP20 02700 004 381 160 CP20 02710 004 381 170 A 8 ...
Страница 54: ...Antenna cable Set CP24 00300 000 041 938 CP24 00310 000 041 939 A 9 ...
Страница 55: ...Y Hatai D 1 ...
Страница 56: ...Y Hatai D 2 ...
Страница 57: ...Y Hatai D 3 ...
Страница 58: ...Y Hatai D 4 ...
Страница 59: ...Feb 19 03 D 5 ...
Страница 60: ...May 20 03 D 6 ...
Страница 61: ...Feb 22 05 D 7 ...
Страница 62: ...Jan 9 03 D 8 ...
Страница 63: ...Mar 11 04 H Hayashi D 9 ...
Страница 64: ...Feb 02 05 D 10 ...
Страница 65: ...Nov 28 03 D 11 ...
Страница 66: ...Oct 02 03 D 12 ...
Страница 67: ...H Hayashi Mar 10 05 D 13 ...
Страница 69: ...Index divider Section 2 N ...
Страница 70: ......
Страница 72: ...This page left intentionally blank ...
Страница 129: ...Index divider Section 3 N ...
Страница 130: ......
Страница 187: ...Index divider Section 4 N ...
Страница 188: ......
Страница 190: ...TECHNICAL MANUAL A100K11209 v 1 3 Sound Reception System VSS V2 Installation User Manual ...
Страница 204: ...15 VSS V2 Technical Manual A100K11209 v 1 3 4 7 Cable Connection Diagram ...
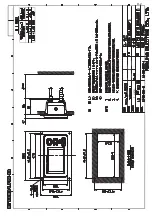
Страница 205: ...16 A100K11209 v 1 3 VSS V2 Technical Manual 5 Dimensions Mounting Details 5 1 VSS V2 Microphone Unit Dimensions in mm ...
Страница 206: ...17 VSS V2 Technical Manual A100K11209 v 1 3 5 2 VSS V2 Master Panel Dimensions in mm ...
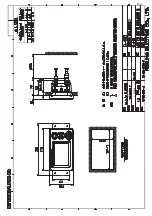
Страница 207: ...18 A100K11209 v 1 3 VSS V2 Technical Manual 5 3 VSS V2 Slave Panel Dimensions in mm ...
Страница 216: ...This page left intentionally blank ...

