ATTENTION
Confirm that the pick rollers are installed properly. Otherwise, paper jams or other feeding errors
may occur.
9
Close the ADF.
For details, refer to
How to Close the ADF (page 64)
CAUTION
Be careful not to get your fingers caught when closing the ADF.
10
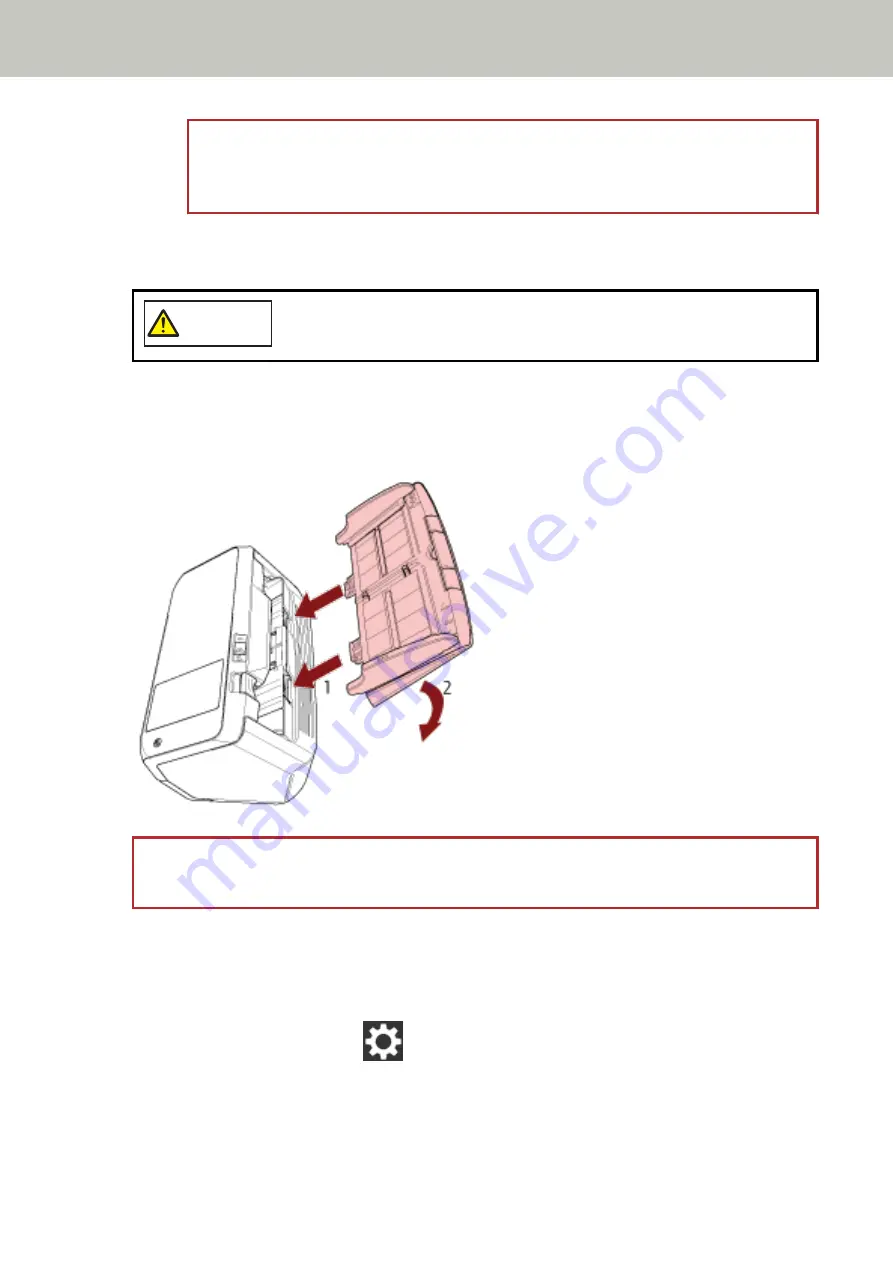
Attach the ADF paper chute (feeder).
Insert the tabs into the slots on the back of the scanner in the direction of arrow 1 and tilt the ADF paper
chute (feeder) downwards in the direction of arrow 2 until it locks in place.
Attach the ADF paper chute (feeder) with the side guides facing upwards.
ATTENTION
Do not leave any space between the ADF paper chute (feeder) and the scanner.
11
Plug in the power cable and turn on the scanner.
For details, refer to
How to Turn the Power ON (page 56)
.
12
Clear the pick roller counter.
a
On the touch screen, press
→ [Cleaning & Maintenance] → [Consumable counters].
b
On the [Consumable counters] screen, press the [Clear] button for [After Replacing the Pick
Roller].
Replacing the Consumables
140
Содержание fi-7300NX
Страница 1: ...P3PC 6192 05ENZ2 FUJITSU Image Scanner fi 7300NX Operator s Guide ...
Страница 44: ... Scanner Settings Network Scanner Setup 44 ...
Страница 117: ... Documents on which the toner is not sufficiently fused Daily Care 117 ...
Страница 257: ...The password is set Scanner Settings Software Operation Panel 257 ...
Страница 260: ...The password is set Scanner Settings Software Operation Panel 260 ...
Страница 283: ...HINT This setting is effective only for scanning images in black white Scanner Settings Software Operation Panel 283 ...
Страница 314: ...Outer Dimensions The outer dimensions are as follows Unit mm in Appendix 314 ...


