Printer Connection and Software Installation
55
21
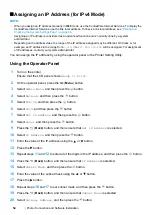
Enter the value of the gateway address using the or button.
22
Press the button.
23
Repeat steps
21
and
22
to set gateway address, and then press the
button.
24
Turn off and turn on the printer.
See also:
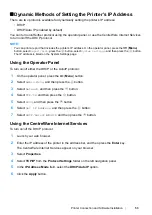
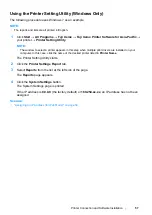
Using the Printer Setting Utility (Windows Only)
The following procedure uses Windows 7 as an example.
NOTE:
•
When you use IPv6 mode for network printing, you cannot use the Printer Setting Utility to assign an IP
address.
1
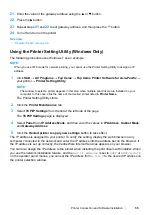
Click
Start
→
All Programs
→
Fuji Xerox
→
Fuji Xerox Printer Software for Asia-Pacific
→
your printer
→
Printer Setting Utility
.
NOTE:
•
The window to select a printer appears in this step when multiple print drivers are installed on your
computer. In this case, click the name of the desired printer listed in
Printer Name
.
The Printer Setting Utility starts.
2
Click the
Printer Maintenance
tab.
3
Select
TCP/IP Settings
from the list at the left side of the page.
The
TCP/IP Settings
page is displayed.
4
Select
Panel
from
IP Address Mode
, and then enter the values in
IP Address
,
Subnet Mask
,
and
Gateway Address
.
5
Click the
Restart printer to apply new settings
button to take effect.
The IP address is assigned to your printer. To verify the setting, display the web browser on any
computer connected to the network and enter the IP address into the address bar on the browser. If
the IP address is set up correctly, the CentreWare Internet Services appears on your browser.
You can also assign the IP address to the printer when installing the print drivers with installer. When
you use the network installation feature, and the
Get IP Address
is set to
DHCP
or
DHCP/AutoIP
on the operator panel menus, you can set the IP address from
0.0.0.0
to the desired IP address on
the printer selection window.
Содержание DocuPrint P255 dw
Страница 1: ...User Guide DocuPrint P255 d P255 dw ...
Страница 6: ...6 Contents ...
Страница 26: ...26 Product Features ...
Страница 38: ...38 Basic Operation ...
Страница 69: ...Printer Connection and Software Installation 69 5 Select Advanced ...
Страница 114: ...114 Printer Connection and Software Installation ...
Страница 195: ...Troubleshooting 195 7 Close the rear cover 8 Insert the paper tray into the printer and push until it clicks into place ...
Страница 197: ...Troubleshooting 197 4 Lower the levers to the original position 5 Close the rear cover ...
Страница 226: ...226 Troubleshooting ...
Страница 248: ...248 Contacting Fuji Xerox ...
Страница 252: ...252 Index X XML Paper Specification print driver 58 96 ...

