102
Printer Connection and Software Installation
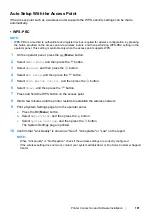
• WPS-PIN
NOTE:
•
WPS-PIN is a method to authenticate and register devices required for wireless configuration, by entering PIN
code to a printer and computer. This setting, performed through access point, is available only when the
access points of your wireless router supports WPS.
•
Before WPS-PIN starts, you will need to enter your PIN code at the web page of the wireless access point.
See the access point manual for the details.
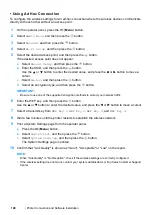
1
On the operator panel, press the
(
Menu
) button.
2
Select
Admin Menu
, and then press the
button.
3
Select
Network
, and then press the
button.
4
Select
WPS Setup
, and then press the
button.
5
Select
PIN Code
, and then press the
button.
6
Take a note of PIN code displayed on the operator panel.
7
Select
Start Configuration
, and then press the
button.
8
If SSID selection screen appears, select the SSID, and then press the
button.
9
Enter the PIN code of the printer at the web page of the wireless access point.
10
Wait a few minutes until the printer restarts to establish the wireless network.
11
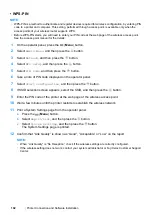
Print a System Settings page from the operator panel.
a
Press the
(
Menu
) button.
b
Select
Report/List
, and then press the
button.
c
Select
System Settings
, and then press the
button.
The System Settings page is printed.
12
Confirm that “Link Quality” is shown as “Good”, “Acceptable” or “Low” on the report.
NOTE:
•
When “Link Quality” is “No Reception”, check if the wireless settings are correctly configured.
•
If the wireless setting does not work, contact your system administrator or Fuji Xerox Customer Support
Center.
Содержание DocuPrint P255 dw
Страница 1: ...User Guide DocuPrint P255 d P255 dw ...
Страница 6: ...6 Contents ...
Страница 26: ...26 Product Features ...
Страница 38: ...38 Basic Operation ...
Страница 69: ...Printer Connection and Software Installation 69 5 Select Advanced ...
Страница 114: ...114 Printer Connection and Software Installation ...
Страница 195: ...Troubleshooting 195 7 Close the rear cover 8 Insert the paper tray into the printer and push until it clicks into place ...
Страница 197: ...Troubleshooting 197 4 Lower the levers to the original position 5 Close the rear cover ...
Страница 226: ...226 Troubleshooting ...
Страница 248: ...248 Contacting Fuji Xerox ...
Страница 252: ...252 Index X XML Paper Specification print driver 58 96 ...

