PMAC-Pack
Getting Started
29
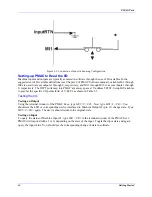
Setting Up the Servo Loop
WARNING
Make sure the motor is in open-loop mode before restoring the proportional gain.
Otherwise, it may lurch to an old commanded position.
The polarity test is enough to see that the motor is working. Make sure the motor can run free (preferably
no load attached at this point) and that you will be able to stop things quickly so that no damage is caused
if problems occur. Type
K<CR>
to disable the output(s), then preset the proportional gain by setting I130
(try 2000 initially for very fine resolution systems, 50,000 for very coarse systems, or somewhere in
between for medium resolution).
Closing the Loop
Now close the motor's servo loop by typing
J/<CR>
(the "jog-stop" command brings the motor into
zero-velocity position control). It should hold position at this point, resisting attempts to move it away, at
least gently. If it runs away, you have mismatched polarity; re-run the above polarity tests. If you lose
control or the motor starts behaving wildly, type
K<CR>
to disable the motor.
Weak Loop
If the motor does not resist being turned, or does so very weakly, try increasing proportional gain (I130).
Try doubling it until you get some reasonable stiffness, but do not try yet to get the maximum possible
stiffness. The tests described below will help you do that.
Oscillations
If the motor has a tendency to oscillate at low to moderate frequency, you probably have inadequate
derivative gain. Try doubling I131 and see if the oscillation goes away.
Buzzing
If the motor has a tendency to oscillate at high frequency (a "buzz"), you probably have too much
proportional gain, or maybe too much derivative gain. Try lowering I130 (or I131) until the "buzz"
disappears.
Servo Loop Tuning
The PMAC Executive Program has a large section devoted to assisting the user in optimizing the servo
loop parameters for a motor. It allows the user to perform step moves and profiled moves and have the
response plotted to the screen with key statistics calculated, so that the user may make easy choices about
changing gains. This process is documented in detail with examples in the manual for the PMAC
Executive Program. In addition, there is an
auto-tuning
feature that lets the Executive program make the
decisions about what the gains should be. The program excites the system, evaluates the response, and
calculates the gains necessary to achieve the desired response.
Remember that precise tuning cannot be done until the load has been connected to the motor. Our goal at
this point is simply to get the motor moving reasonably well without a load.
Содержание PMAC Pack
Страница 10: ...PMAC Pack Table of Contents vii ...
Страница 11: ......
Страница 16: ...PMAC Pack Overview 5 Figure 1 1 PMAC Pack Dimension ...
Страница 27: ...PMAC Pack 16 Overview ...
Страница 47: ...PMAC Pack 36 Getting Started ...
Страница 51: ...PMAC Pack 40 Complying with European Community EMC Requirements ...
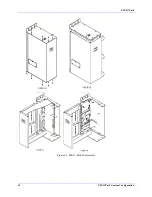
Страница 53: ...PMAC Pack 42 PMACPack Custom Configuration Figure 4 1 PMAC Pack Disassembly ...
Страница 70: ...PMAC Pack PMACPack Custom Configuration 59 Figure 4 4 PMAC Pack Assembly ...
Страница 91: ...PMAC Pack 80 Circuit Diagrams Figure 7 2 Basic PMAC Pack Wiring Diagram ...
Страница 92: ...PMAC Pack Circuit Diagrams Figure 7 3 PMAC Pack with Accessory 8D Option 2 Wiring Diagram ...
Страница 93: ...PMAC Pack 82 Circuit Diagrams Figure 7 4 PMAC Pack with Accessory 8D Option 4A Wiring Diagram ...
Страница 94: ...PMAC Pack Circuit Diagrams Figure 7 5 PMAC Pack with Option 9L Wiring Diagram ...
Страница 95: ...PMAC Pack 84 Circuit Diagrams Figure 7 6 PMAC Pack with Accessory 28A Wiring Diagram ...
Страница 96: ...PMAC Pack Circuit Diagrams Figure 7 7 PMAC Pack with Accessory 39 Wiring Diagram ...
Страница 97: ...PMAC Pack 86 Circuit Diagrams ...
Страница 98: ...PMAC Pack Circuit Diagrams 87 ...
Страница 99: ...PMAC Pack 88 Circuit Diagrams ...
Страница 100: ...PMAC Pack Circuit Diagrams 89 ...
Страница 101: ...PMAC Pack 90 Circuit Diagrams ...
Страница 103: ...92 Acc 24E Acc 24EXP Expansion XP Pack Figure 8 1 Expansion Pack Installation ...
Страница 106: ...PMAC Pack Acc 24E Acc 24EXP Expansion XP Pack 95 Figure 8 3 PMAC Pack Assembly ...
Страница 109: ...98 Acc 24E Acc 24EXP Expansion XP Pack ...
Страница 117: ...106 PMACPack Options and Accessories ...


