9-15
Cisco Wireless LAN Controller Configuration Guide
OL-9141-03
Chapter 9 Managing User Accounts
Choosing the Web Authentication Login Window
You can download a sample login page from Cisco WCS and use it as a starting point for your
customized login page. Refer to the “Downloading a Customized Web Auth Page” section in the Using
Templates chapter of the
Cisco Wireless Control System Configuration Guide, Release 4.0
for
instructions.
If you want to download a customized web authentication login window to the controller, follow the
instructions in the GUI or CLI procedure below.
Using the GUI to Download a Customized Web Authentication Login Window
Step 1
Make sure that you have a TFTP server available for the file download. See the guidelines for setting up
a TFTP server in
Step 8
of the
“Using the CLI to Choose the Default Web Authentication Login
Window” section on page 9-10
.
Step 2
Copy the .tar file containing your login page to the default directory on your TFTP server.
Step 3
Click
Commands
>
Download
File
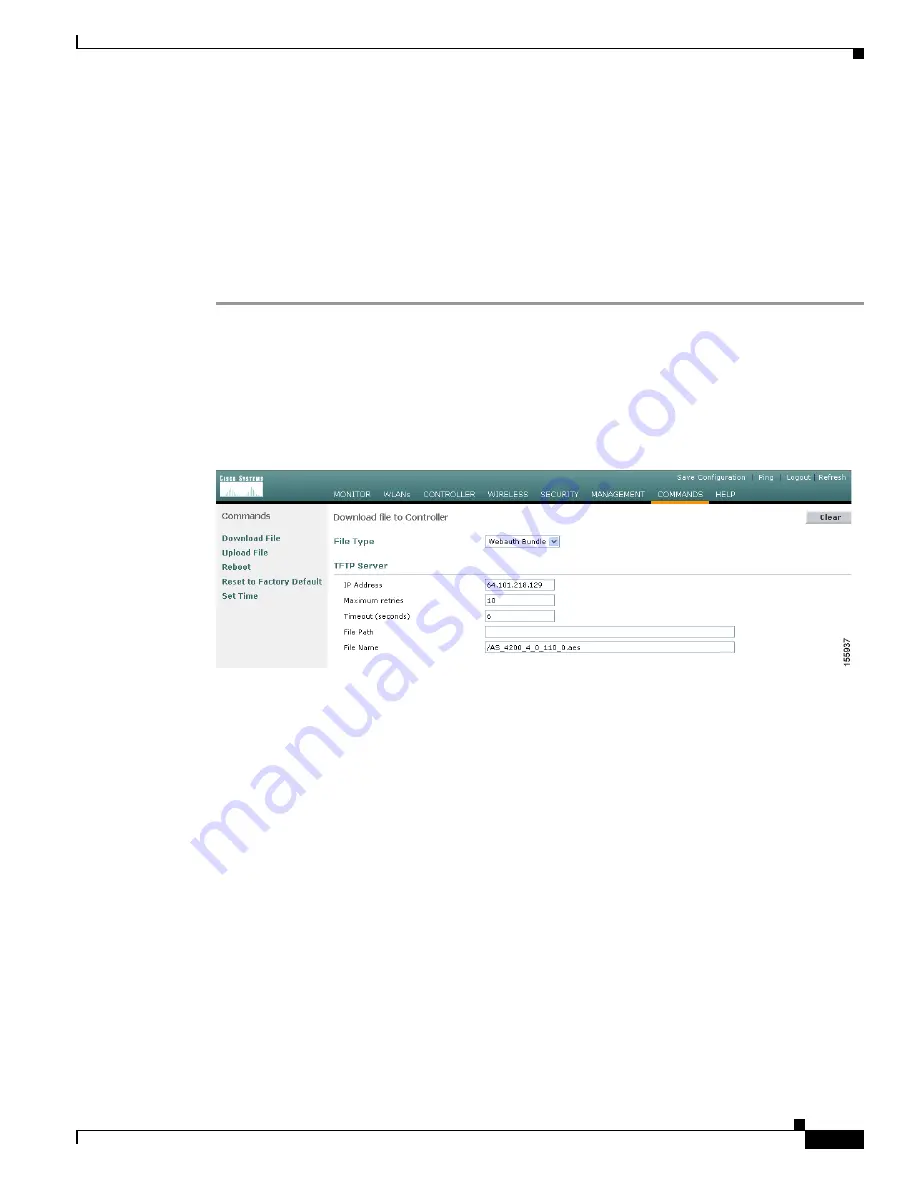
to access the Download File to Controller page (see
Figure 9-13
).
Figure 9-13 Download File to Controller Page
Step 4
From the File Type drop-down box, choose
Webauth
Bundle
.
Step 5
In the IP Address field, enter the IP address of the TFTP server.
Step 6
In the Maximum Retries field, enter the maximum number of times the controller should attempt to
download the .tar file.
Range:
1 to 254
Default:
10
Step 7
In the Timeout field, enter the amount of time in seconds before the controller times out while attempting
to download the *.tar file.
Range:
1 to 254 seconds
Default:
6 seconds
Step 8
In the File Path field, enter the path of the .tar file to be downloaded. The default value is “/.”
Step 9
In the File Name field, enter the name of the .tar file to be downloaded.
Step 10
Click
Download
to download the .tar file to the controller.
Step 11
Click
Security
>
Web
Login
Page
to access the Web Login page.
Step 12
From the Web Authentication Type drop-down box, choose
Customized (Downloaded)
.


