7-13
Cisco Wireless LAN Controller Configuration Guide
OL-9141-03
Chapter 7 Controlling Lightweight Access Points
Cisco Aironet 1510 Series Lightweight Outdoor Mesh Access Points
Step 2
Click
New
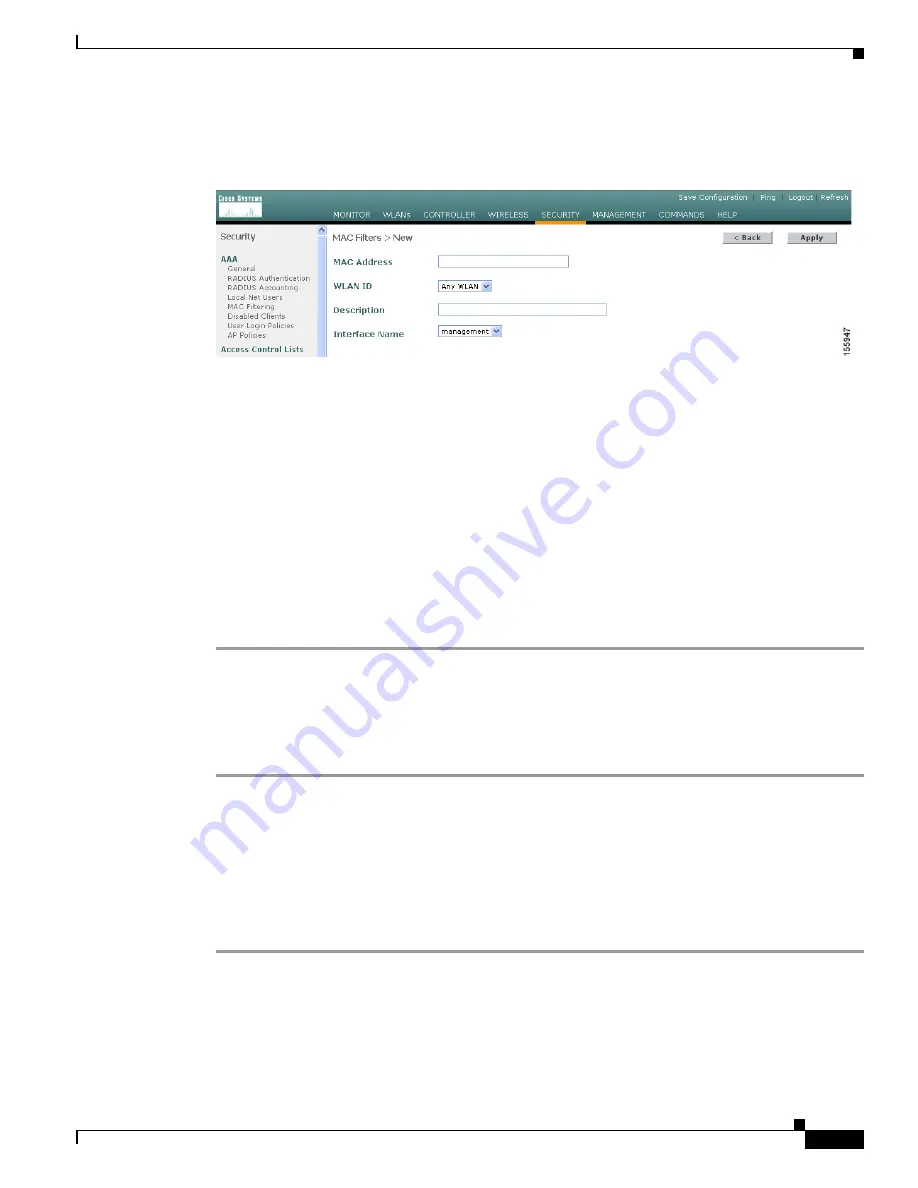
. The MAC Filters > New page appears (see
Figure 7-5
).
Figure 7-5
MAC Filters > New Page
Step 3
In the MAC Address field, enter the MAC address of the access point.
Step 4
From the WLAN ID drop-down box, choose “Any WLAN.”
Step 5
In the Description field, enter a description of the access point. The text that you enter identifies the
access point on the controller. You may want to include an abbreviated name and the last few digits of
the MAC address, such as ap1510:62:39:10.
Step 6
From the Interface Name drop-down box, choose the controller interface to which the access point is to
connect.
Step 7
Click
Apply
to commit your changes. The access point now appears in the list of MAC filters on the
MAC Filtering page.
Step 8
Click
Save
Configuration
to save your changes.
Step 9
Repeat this procedure to add the MAC addresses of additional access points to the list.
Using the CLI to Add the MAC Address of the Access Point to the Controller Filter List
Follow these steps to add a MAC filter entry for the access point on the controller using the controller
CLI.
Step 1
To add the MAC address of the access point to the controller filter list, enter this command:
config macfilter add
ap_mac wlan_id interface
[
description
]
A value of zero (0) for the
wlan_id
parameter specifies any WLAN, and a value of zero (0) for the
interface
parameter specifies none. You can enter up to 32 characters for the optional
description
parameter.
Step 2
To save your changes, enter this command:
save config


